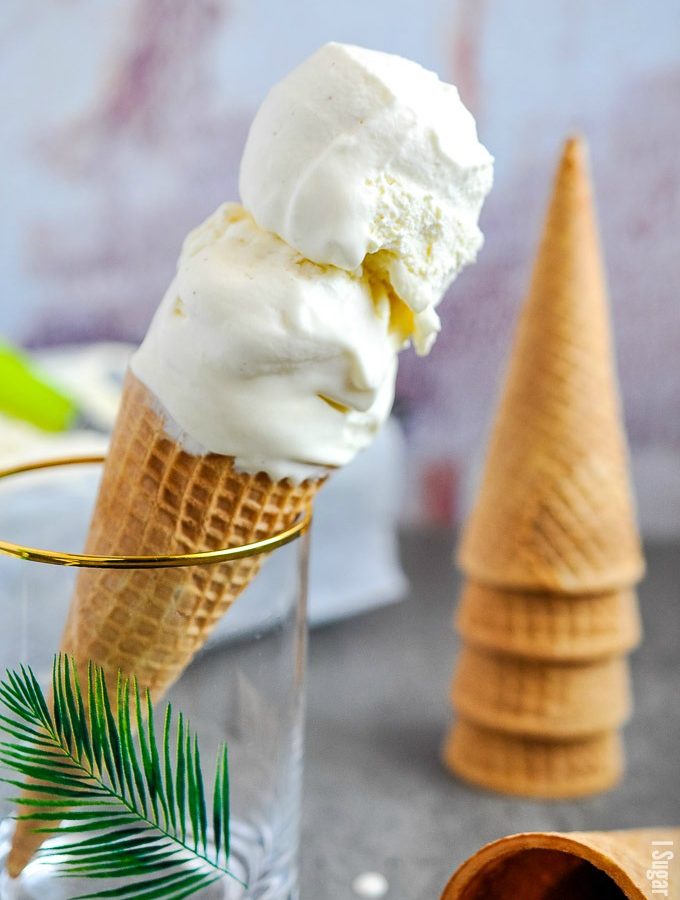
Hints of banana, pineapple and mild citrus, this Fresh Soursop Ice Cream is a childhood fave and an addictively refreshing summer treat.
 Hiya! After many weeks of procrastinating, I am feeling a little shaky typing this post. If you've stuck around, I've got a real treat for you - Fresh Soursop Ice Cream - a childhood fave!
I imagine a number of you will not have heard of soursop - I had a few messages on instagram when I shared one in my stories. There were a few who knew it by other names like guanabana, graviola and paw paw. It is native to the West Indies and other tropical areas.
CLICK HERE TO PIN THIS RECIPE FOR LATER!
 Sour What?
My grandparents had a tree when we were kids. It was located just off the side entrance of the property, not far from a massive breadfruit tree (yuck. yuk. YUCK!).
Every so often, we would walk out to find a couple overripe victims, whose custardy sweetness was just too heavy to bear, splattered on the ground. Those that were caught in time, made some memorable drinks and treats, sorbet and ice cream being my faves.
Unlike its smaller, sweeter counterpart, sugar/custard apple, soursop isn't the most appealing of names. However, it does not disappoint in the taste department and it's pretty bad-ass looking, IMO. We mostly enjoyed the fruit as-is, juices from the custard-like pulp dripping down our sun-kissed arms, leaving puddles for ants to later indulge.
 I was thinking the other day that it seemed odd I've waited this long to share recipes, like this, that were such a big part of my childhood. Like the accompanying memories, I hold these things sacred.
However, my otherwise healthy, vibrant, eighty-going-on- thirty grandmother has been dealing with some recent health challenges and my way of coping has been to make all the things from my childhood.
Granted, my cooking and baking skills don't hold a match to her's, but I sure am trying my damnedest! And having lots of fun to boot!
CLICK HERE TO PIN THIS RECIPE FOR LATER!
 Fresh Is Best!
So, this Fresh Soursop Ice Cream...
I used fresh in the name to stress the use of fresh fruit - there's just no comparison. Living in a culturally diverse city, it's becoming increasingly easy to find so-called exotic ingredients and produce. You'll likely have more luck at the West Indian and Asian markets, but some items have started appearing in the bigger chains.
Because they are imported, a lot of these tropical fruits are generally picked too early. Soursop can be on the sour side, when not fully developed and ripened. Choose fruits that give when lightly pressed with your fingers, or leave to ripen in a shaded area on your kitchen counter. The skin will start to darken from a bright to a dull green when ready.
CLICK HERE TO PIN THIS RECIPE FOR LATER!

Simply peel the skin off, or cut in half and remove the spine and seeds. Scoop out the flesh and experience it as-is and fall in love with its complex flavour profile - hints of pineapple, banana, citrus and sometimes papaya - and creamy texture.
If fresh soursop isn't available where you are, frozen puree works in a pinch, but the taste and texture are noticeably diminished. Someone mentioned there is a canned version, but I've never seen, nor tried it.
This version of Fresh Soursop Ice Cream is very close to my grandma's, with a few minor adjustments. I hope you get the opportunity to try a little taste from my childhood, it's so freaking awesome!! We also make an egg and dairy-free version and a sorbet, so refreshing.
What are some of your favourite childhood treats?
CLICK HERE TO PIN THIS RECIPE FOR LATER!
Fresh Soursop Ice Cream
Ingredients
Special Equipment:
- ice cream maker
For the ice cream:
- 1 medium/large fresh soursop
- 118 grams soursop juice or water
- 220 grams coconut milk
- 235 grams 35% whipping cream
- 2 egg yolks
- 72 grams granulated sugar
- 1 lime zest only
- 1 vanilla bean scraped
Instructions
- Prepare the soursop by cutting it, or breaking it open, in half, lengthwise. Remove and discard the spine. Scoop the flesh with seeds into a small saucepan with the juice or water and warm the flesh over medium heat to draw out the juices. Push the flesh mixture through a sieve to extract the liquids. Discard the seeds and remaining flesh. Set aside.
- Set up an ice water bath in a large bowl, or clean sink for later.
- In a medium heatproof bowl, whisk together the egg yolks and sugar until fully incorporated and pale. Set aside.
- In a medium saucepan, warm the milk, cream and vanilla bean and pod to a light boil. Remove from the heat and drizzle half into the egg mixture, while whisking. This tempers the egg/sugar mixture. Add to the remaining cream/milk mixture in the saucepan and return to a light boil, allowing it to thicken.
- Add the soursop to the egg/cream mixture and continually stir the mixture with a wooden spoon until it thickens and coats the back of the spoon. Run your finger along the back of the spoon and it should leave a clear line through the mixture on the spoon.
- Remove from the heat and quickly cool the mixture by placing the saucepan in the water bath, stirring the mixture to help the cooling process. Zest the lime into the mixture, cover and place in the refrigerator for 4 hours, or overnight for a more pronounced flavour.
- Once chilled, remove the vanilla pod. Freeze the mixture in an ice cream maker according to the manufacturer's instructions. I use the KA ice cream attachment, which took about 20 minutes. Transfer to a freezer-safe containe and allow to chill overnight.

 Don't you just love summer and all it's beautiful bounty? I especially love when the tropical fruits from my childhood start popping up in stores, other than my frequented Asian and West Indian markets.
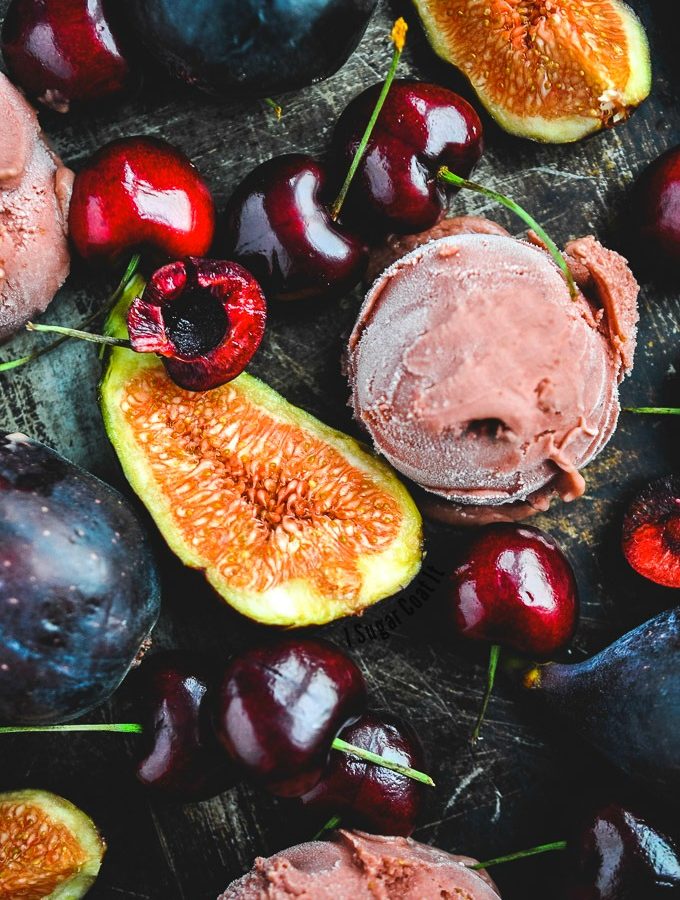
 Today, however, I want to tempt you with a scoop, or two, of my delightful Fresh Fig Cherry Goat Cheese Ice Cream.
 We make lots of ice cream year-round, but this was my first time using fid gas the star ingredient. I hadn't planned to, but I happened upon
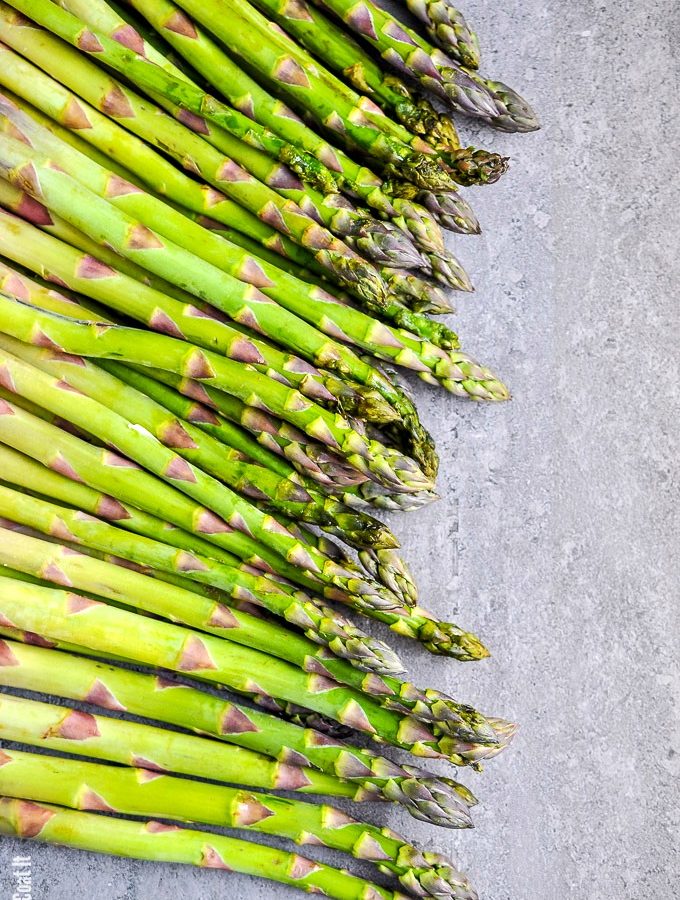
 We are knee-deep into summer and that means grilling ALL THE THINGS! I think my meat, poultry, fish/seafood consumption increases ten-fold at barbecues. But nothing quite beats perfectly charred, hot off the grill veggies along side your meat. AM I RIGHT?
 Colour Compromise
 Browned Butter Love

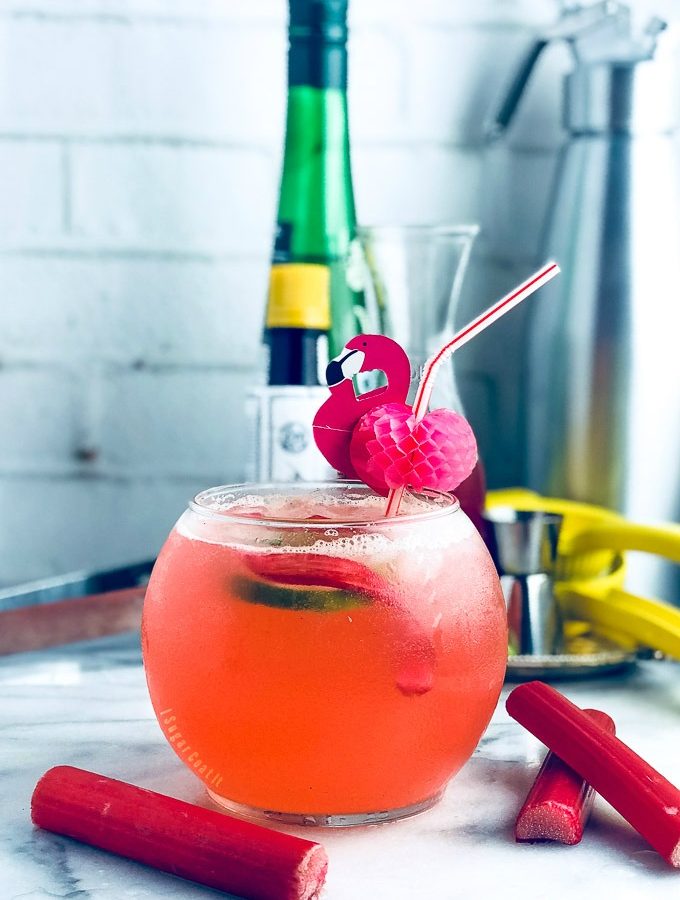
 The Farmers' Market near my office kicked off a couple weeks ago and my very first purchase was the rhubarb I used in my Vanilla Bean Rhubarb Elderflower Soda!
 Vanilla Bean Rhubarb Syrup
 Whip It Real Good... with A Whipping Siphon!
 My Vanilla Bean Rhubarb Elderflower Soda went over extremely well at a recent backyard hang. This is the non-alcoholic version, but feel free to booze it up to suit your entertaining needs. We had a couple other flavours on hand, which I'll share over the summer months.
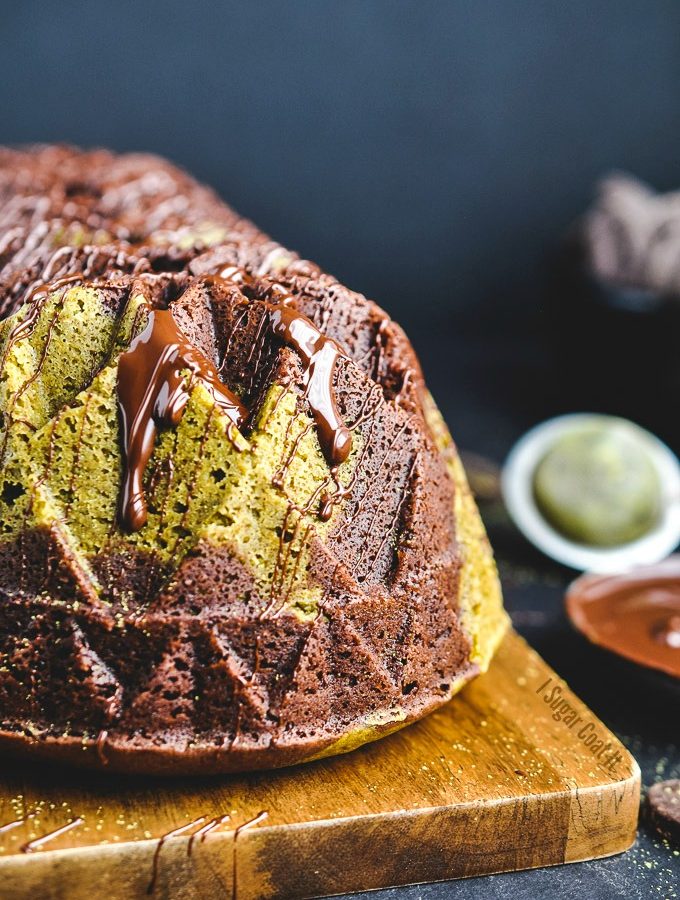
 This Matcha Chocolate Bundt Cake combines three of my fave things - chocolate, green tea and pretty Bundt pans! OK four... GREEN! The Dude calls it the combat fatigues cake. I call it simply delish!
 A few months back, I polled my
  Cooking grade matcha costs less and tends to impart an astringent, bitter aftertaste when taken as a plain drink. I use this grade for baking, as the other flavours and sweeteners in the recipe will mask those unpleasantness.

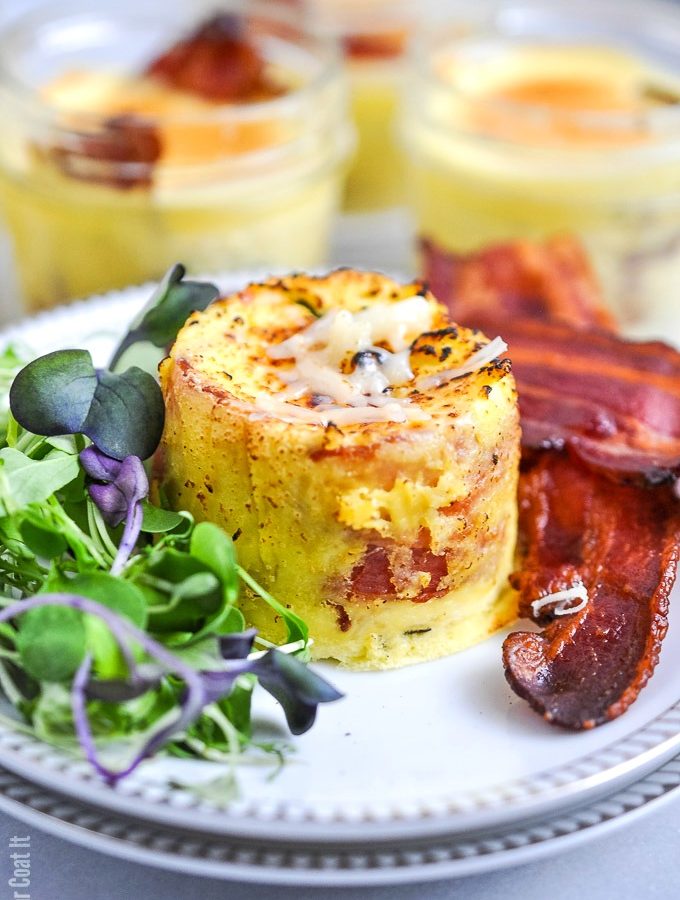
 It's a long weekend here, but if you are eager to start prepping your weekly meals, these Sous Vide Bacon Brie Egg Bites are just the place to begin.
 Sous Vide, Schmous Vide
 What are some of your favourite omelette flavour combinations? Tell me below and tag me
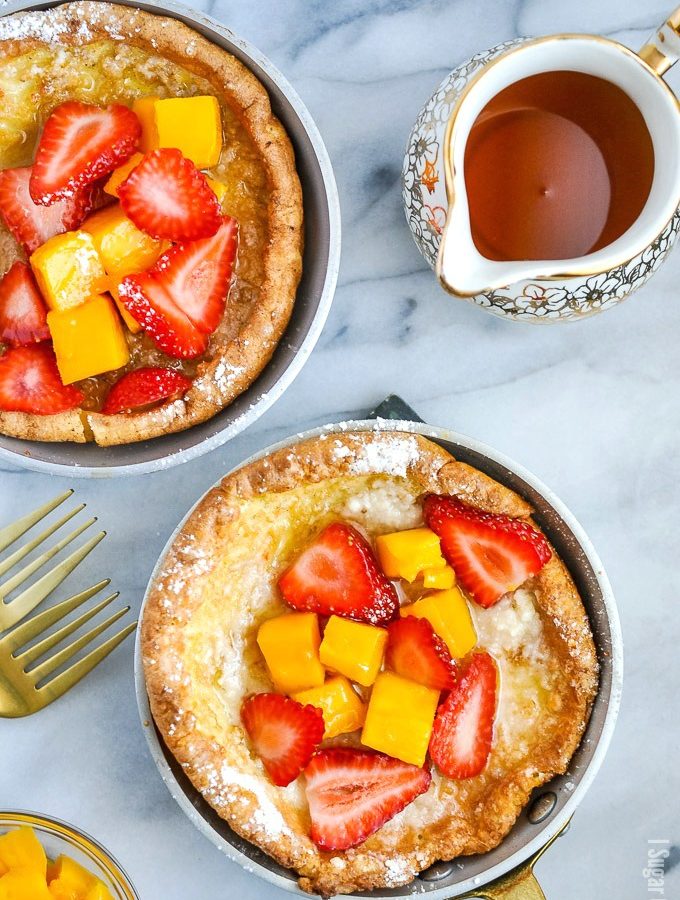
 Browned Butter Vanilla Dutch Baby Pancakes... because waffles are so last Wednesday! OK, I am always down for waffles; I actually prefer them to pancakes. Dutch Baby Pancakes are another story, however.
 Before ever tasting them, their name is what piqued my interest - Dutch Baby Pancakes. Oddly, there's nothing 'baby' about them and they are supposedly of German origin, not Dutch.
 My Browned Butter Vanilla Dutch Baby Pancakes are an adaptation of a basic recipe from Chef Villegas.


 So why do some people, including companies big and small, think this is the wild wild west?
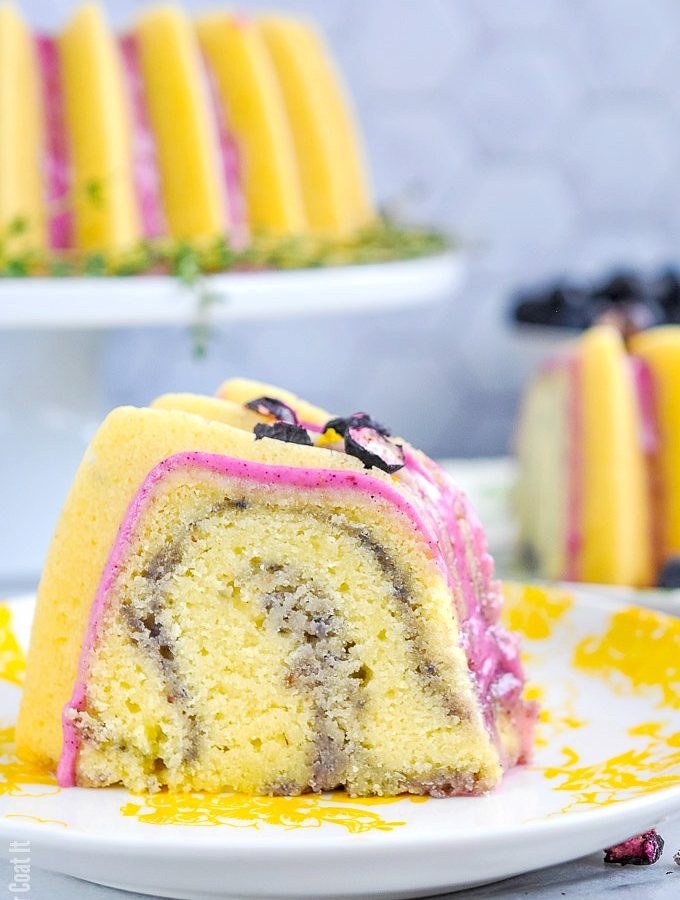
 So what if the first day of spring was frigid AF. Just knowing we have arrived, puts a spring in my step, as does the hit of citrus and berries in this Pomelo Blueberry Thyme Bundt Cake! It's basically the baked version of a cocktail we make around these parts, on occasion.
 Before I started baking and blogging, I developed an inexplicable addiction to bundt pans. Those around me know it and lovingly enable my addiction, which, over the years, has led to a collection of epic proportions. Hoarder comes to mind for those who don't appreciate the workmanship and sheer beauty of these pans. Me? I fancy myself a collector. Yup, let's go with that! 😉
 How I Prep My Bundt Pans For Easy Release
 What's a Pomelo?
