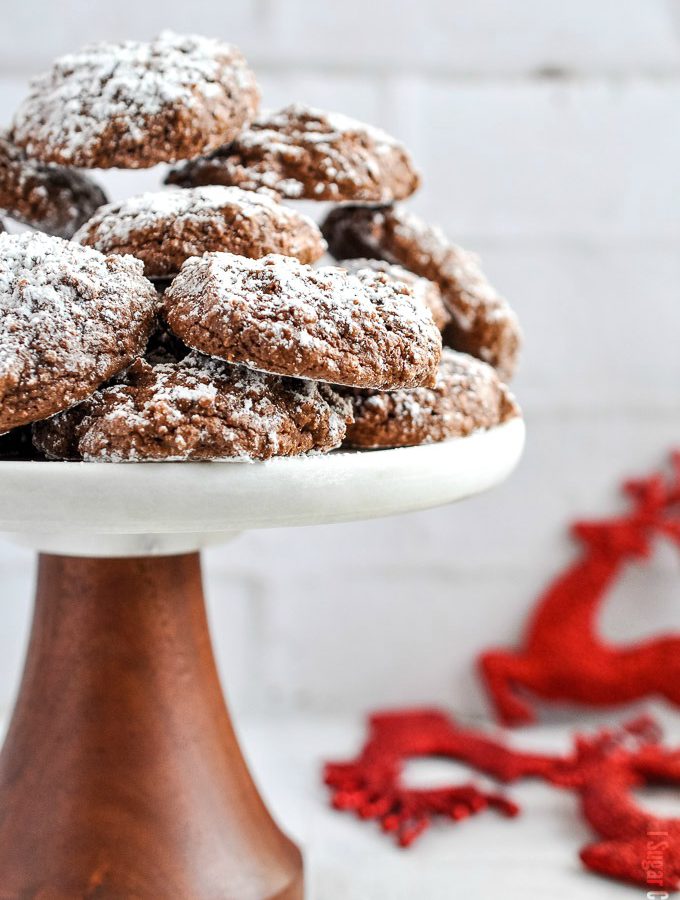
Intensely flavoured, chewy and deliciously simple Chocolate Hazelnut Amaretti Cookies, plus a giveaway for some of my favourite Rodelle ingredients!
 'Tis the season for giving, folks!! Today I give you snow-capped Chocolate Hazelnut Amaretti Cookies and a chance to win some of my favourite baking ingredients from Rodelle, as part of the 2017 Cookies with Rodelle Campaign!!

I should note that I have been a Rodelle Ambassador for about three years, but have used their vanilla beans and cocoa for much longer. So, when I was approached about the ambassador opportunity, it just seemed like a natural fit. They send me quality ingredients that I use in my baking and cooking that I, in turn, share with you all.
 I could not think of a better way to showcase Rodelle's gourmet baking cocoa, than these Chocolate Hazelnut Amaretti Cookies. Made with just a handful of ingredients, including nut meal instead of flour, the addition of cocoa makes for a deep chocolatey, chewy cookie experience.
Amaretti cookies are one of my faves around the holidays! For this batch, I subbed out half of the almond meal for hazelnut meal. Of course, you can stick with all almond meal, but the toasted hazelnuts really boosted the chocolatey (or for you fussy types cocoa-y) flavour.
 In a recipe with such a short list of ingredients, I like to use the best possible. In addition to the Rodelle cocoa and pure almond extract, I used Marcona almonds and Piedmont hazelnuts like I did here. I prefer to make my own flour/meal, as needed, but both are readily available for purchase.

I can sit here and write you another paragraph on how simply delish these Chocolate Hazelnut Amaretti Cookies are, but why, when you can easily whip up a batch of your own! And to help a little with your holiday baking needs, Rodelle has generously provided a few of my fave ingredients for one lucky I Sugar Coat It reader.
If you are aware of the price of vanilla these days, you will appreciate this little bakers' gift pack, which includes:
Organic Rodelle Gourmet Baking Cocoa|Organic Rodelle Almond Extract|Rodelle Vanilla Bean Paste|Rodelle Whole Vanilla Beans|Organic Rodelle Chocolate Extract

THIS GIVEAWAY IS NOW CLOSED.
Thank you all for entering and sharing your favourite cookies with me!
The winner is Valentina | The Baking Fairy, comment #6!!

Giveaway is open to Canadian (except Quebec) and the United States. Contest closes on December 11th, 2017 11:59PM and is open to residents of legal age in the province, state or territory in which they reside at the time. Winner must answer a skill-testing question. No purchase necessary. Prize pack will be shipped to the winner directly from the sponsor, Rodelle. Winner will be chosen by random using Random.org number generator. See Full Sweepstakes Rules.
Here's How To Enter:
A comment and tweet are required for entry. Leave a comment below telling me your favourite holiday cookie and tweet this giveaway using the click to tweet message below.
[Tweet "Up your holiday baking game with a Rodelle prize pack from @isugarcoatit! Enter for a chance to win!"]
For more Rodelle-filled cookie ideas from my fellow ambassadors, visit Cookies With Rodelle!
Chocolate Hazelnut Amaretti Cookies
Ingredients
- 25 grams unsweetened cocoa powder I used Rodelle
- 300 grams icing sugar
- 20 grams cornstarch
- 150 grams finely ground almonds
- 150 grams finely ground hazelnuts
- 3 grams salt
- 135 grams egg whites approximately 4 large eggs, or use liquid egg whites
- 5 grams amaretto or pure almond extract
- AN icing sugar for dusting
Instructions
- Preheat oven to 350ºF.
- Line two baking trays with silpat or parchment.
- Use a sieve to sift cocoa powder, icing sugar, and cornstarch together into a large bowl.
- Add the ground nuts and salt.
- Stir the amaretto or extract into the egg whites. Add most of the egg white mixture to the dry ingredients, until a thick, firm batter is formed. If the batter is too dry, continue to add the remaining egg whites.
- Dip a small ice cream scoop into the bowl of icing sugar reserved for decorating and then scoop the batter onto the lined baking sheets. This will cover the dough in the sugar to create that snow-capped finish to your cookies. It also helps prevent the batter from sticking to the ice cream scoop!
- Bake for 7-9 minutes.
- Remove and allow to cool completely.


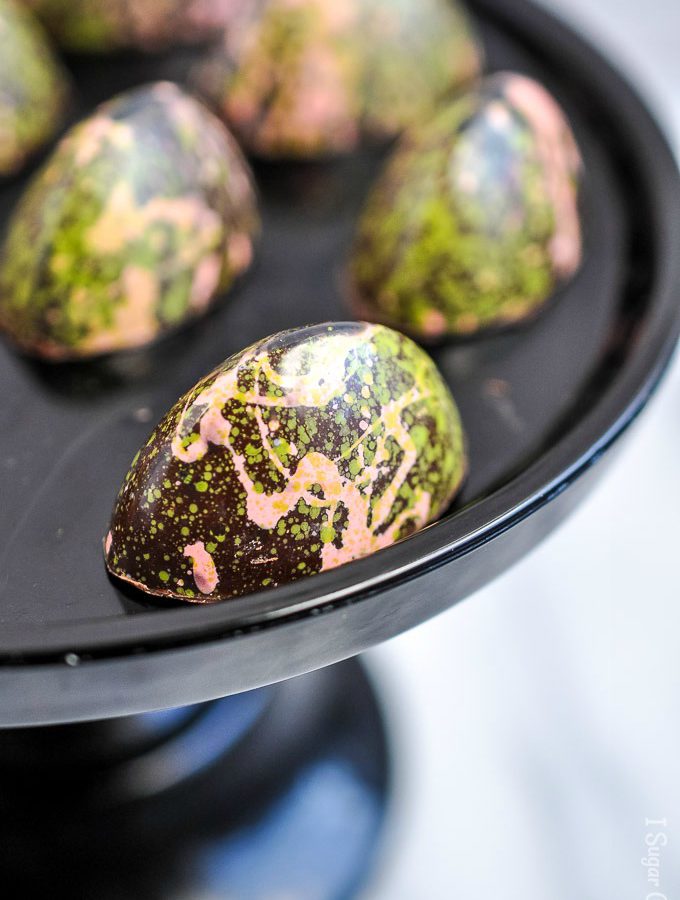
 I've got a delightful little treat for you today, Mission Fig Cheesecake Bonbon! Just like a cheesecake, wrapped in a thin, bite-sized chocolate shell and bursting with flavour.
 If you like figs, then you will most definitely like the layer of fig compote that oozes from the shell when cut, or bitten into. It read more like caramel on the palate, but without overpowering the other component - cheesecake ganache.
 Sweet Tips for Mission Fig Cheesecake Bonbon Success:


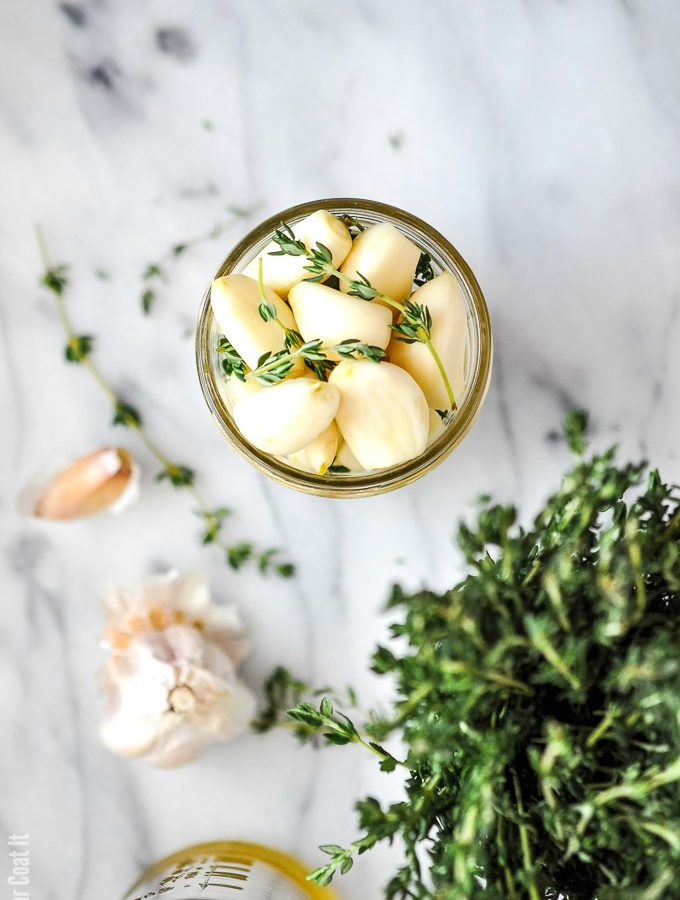
 My favourite pizza topping, next to ALL the cheese, is garlic confit. Today, I'm bringing it to you sous vide style, for my #sousvidesundayseries, with this Sous Vide Garlic Confit. It's one of those things that is ridiculously simple, but absolutely delicious and really doesn't require a recipe, per se.
 If you follow my insta-stories over on
  Sous Vide Garlic Confit requires only two ingredients - garlic (duh!) and fat - but you can also add fresh herbs and a pinch of salt, if you like. We normally use olive oil or avocado oil to make it, but this time we used duck fat. Mainly because we had some on hand from the batch we made around Thanksgiving, but also, it is super flavourful. We also added some fresh thyme.
 Sweet Tips for Sous Vide Garlic Confit Success:
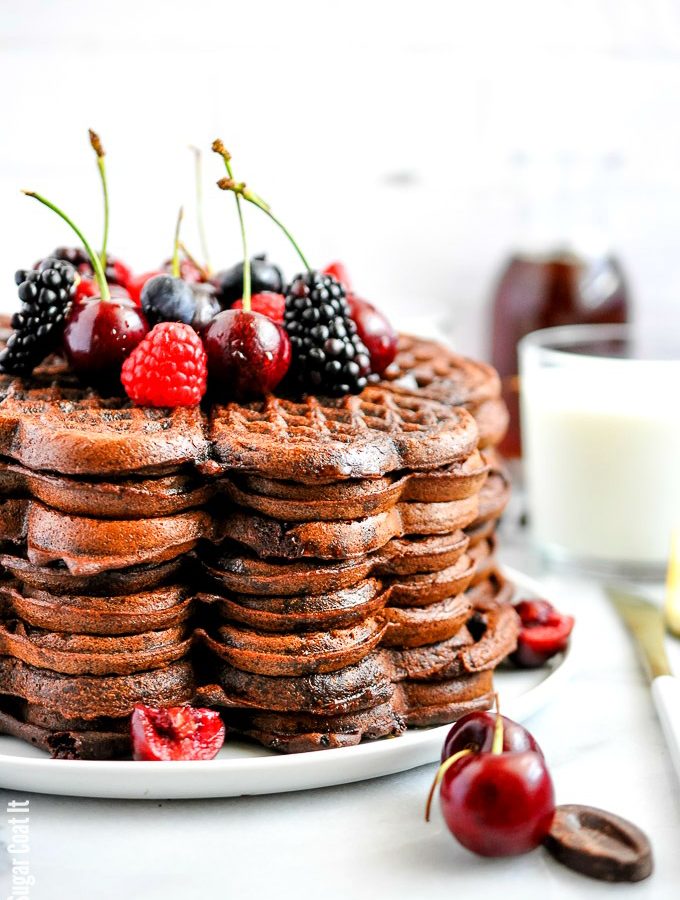
 These decadent Dark Chocolate Cherry Buckwheat Waffles, topped with juicy summer fruits, may seem a little odd for a post this late in October. I made them and shared a sneak peek on Instagram, back when cherry season was at its peak... and just like that, we're almost through October!!
 I like foods that blur the line between meals. These chocolate and cherry packed hearts certainly do that. They work well alongside a brunch spread, but could easily be enjoyed as dessert, when topped with ice cream, or whipped cream, or chocolate sauce, or all of the above.
 I've been a little smitten with
  The stars of these Dark Chocolate Cherry Buckwheat Waffles are the cocoa and chocolate. I built on this
  Sweet Tips For Making Dark Chocolate Cherry Buckwheat Waffles:

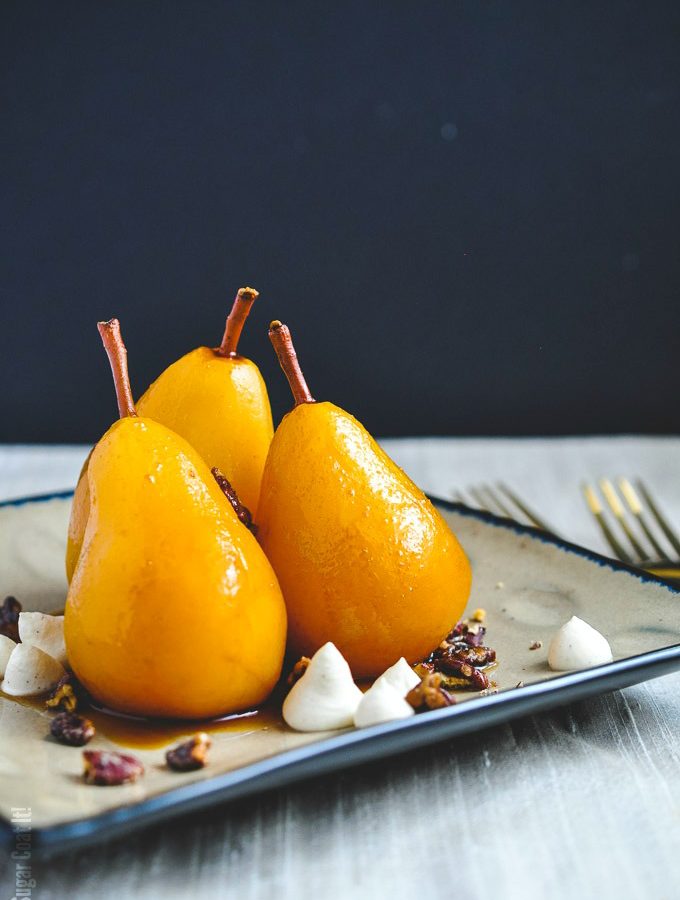
 I'm serving up a plate of sexy, sparkly, scrumptious Sous Vide Marsala Poached Pears for this instalment of
  OK, back to these Sous Vide Marsala Poached Pears. I've made David Lebovitz's
 Sweet Tips For Making Sous Vide Marsala Poached Pears:

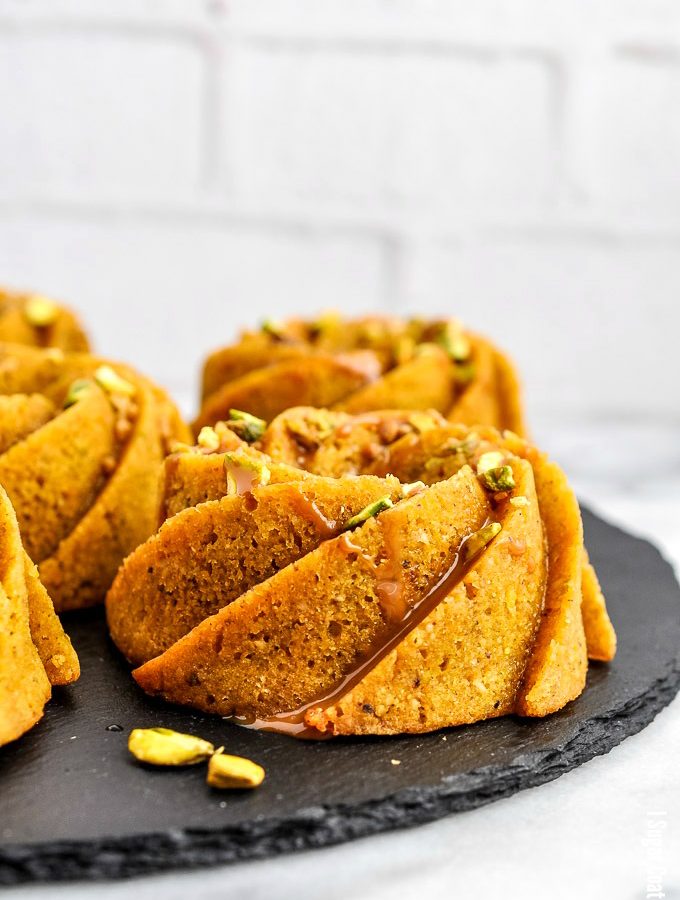
 I am in love with these Pistachio Orange Caramel Mini Bundt Cakes. Not only are they pretty in all their mini heritage bundtliness, but the flavour combo is hella fine!
 Pistachio is one of my absolute favourite nuts! Some might say it's the pink/red and green colour combo - see site branding :). Or, it may be that they share bloodlines with cashew, which is another fave. I think it's that drab, tough-to-crack shell that gives way to a colourful, rich, nutty jewel - you know, like an oyster and pearl - the old it's what's on the inside adage.
 I tend to incorporate
  I've been playing with


 Sous Vide Duck Fat Roasted Baby Potatoes
 Sous Vide Maple Orange Beets


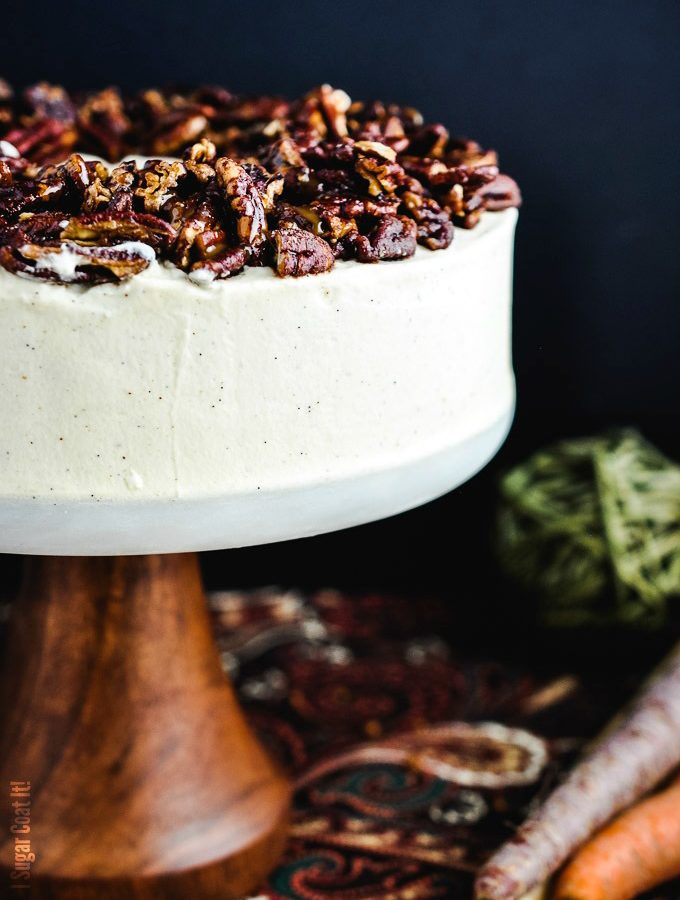
 After two weeks of heatwave weather, it finally feels like fall and I am embracing it with this Whipped Mascarpone Browned Butter Carrot Cake. Fresh carrots baked up with browned butter, buckwheat flour, demerara sugar, fall spices and finished with cinnamon vanilla bean whipped mascarpone topped with carrot caramel pecans!
 Had I kept this Whipped Mascarpone Browned Butter Carrot Cake in the house a second longer, it would have easily planted itself on my hips and thighs. For that reason, but not before sampling the goods, I quickly find homes away from mine for my baked goods. This generally includes neighbours, friends and colleagues. My family isn't that big on sweets. I know.... I often wonder if I was adopted. 🙂
 I have nothing against cream cheese frosting, except that I prefer mascarpone for it super creamy texture and mildly sour notes. Flavoured with a little cinnamon and lots of tiny vanilla bean specks, it's the perfect match for this carrot cake.
 I had no intention of adding drips to the cake, but the caramel could not be contained when drizzled onto the nuts atop the cake. Luckily, it was just on one side of the cake, so I was still able to keep the somewhat simple, no-fuss look I intended for this Whipped Mascarpone Browned Butter Carrot Cake.
 I really loved this cake! I think you will too and hope that you'll whip one up for Thanksgiving, or you know, just because. If you do, would you stick with mascarpone, or whip up your fave cream cheese frosting? I'd love to know!