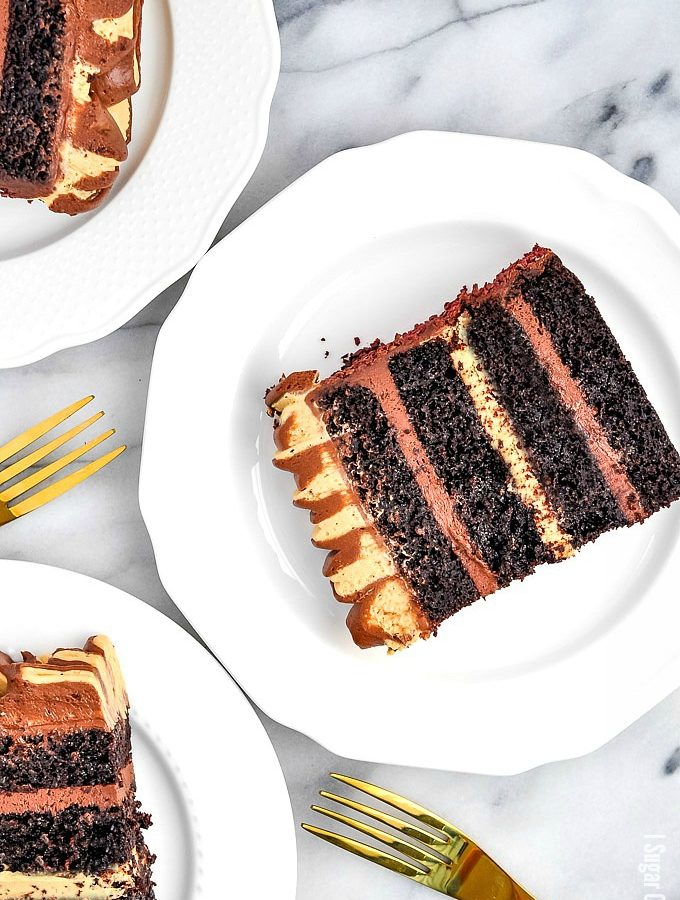
Peanut Butter Caramelized White Chocolate Stout Cake is devilishly delicious Guinness cake, filled with decadent layers of dark chocolate peanut butter cremeux and caramelized white chocolate mousse.
 Farewell Feb. Hello green brew, pastel eggs, chocolate bunnies and all things stout-laden - like this Peanut Butter Caramelized White Chocolate Stout Cake!
First of all, for those who were eagerly awaiting this post since my sneak peek on Instagram, I apologize for the delay. I have been having a slew of issues with my site on the backend, which I hope are now fully resolved. Now to regrow all the hair I pulled out over the last couple weeks. OK, so onto this cake...
I was both so very pleased and yet annoyed with this cake. I set out making this, with my other stout and peanut butter combo in mind. When I first paired the two back in 2013, I got a few weird looks that were quickly replaced with 'wows!' and 'alright then!'.
The combo just worked, so I repeated it with a little added heat.
 It's been on my redo list for quite some time, as I wanted a version without the fondant finishing. Although this Peanut Butter Caramelized White Chocolate Stout Cake came closer to what was floating around in my head, I had a few blunders with the finishing - mostly due to my clouded belief that I can effectively multitask.
The taste, however, is off the charts! Saying that is so out of character for me, as I like to leave the critiques and compliments to those with whom I sample my treats. One such compliment came from a colleague, and I quote... 'this is exactly what a cake should taste like!'...end of quote.
 I pretty much wanted to drop the proverbial mic, leave the office for the day and declare a national holiday. HAHAHAAAAA... imagine?! Seriously though, that may have been one the most flattering bit of feedback I've received to date (save for the Dude's and family).
It's four layers of pure decadence. There's the dark, rich, Guinness cake baked up perfectly flat and square in two 7-inch square by 3-inch tall pans. For perfectly flat-top cakes, I sometimes use the popular bake strips, but that's an extra step that I generally forget.
By just lowering the oven temperature and baking a few extra minutes, I get the same result, so that's the route I generally take - a little tip I learned from one of my first Wilton instructors, back when I took my very first decorating class. It works like a charm and doesn't cost a thing!
In both scenarios, there is no wasted cake.
 Now, I am not at all a fan of just stacking the cakes whole. I like an almost even cake to filling ratio, so I generally split my cakes before assembling the layers. The two cakes I baked up were each split in two, to create four layers. The thing is, I simply suck at splitting manually with a knife, so I have a little helper called Agbay. You can read more about it in my post here.
To fill the layers of my Peanut Butter Caramelized White Chocolate Stout Cake, I whipped up some caramelized white chocolate mousse and some dark chocolate peanut butter cremeux. OReffingGASMIC!! Two layers were filled with the cremeux, one with the mousse and I piped both on top.
 My first attempt at piping the top was a MAJOR FAIL - I shared the behind the scenes on my Instagram story. After testing further on a plate, I settled on the tip I thought would provide the result closest to what was in my mind. Although it isn't exactly how I envisioned it, I decided to stick with it, or I'd have to make new batches of both.
The sides of the cake were my biggest disappointment. I first went with a smooth ganache finish, so that nothing would compete with the top design. I should have kept it that way, but I thought it would look cool with a little texture, so I added chocolate flakes like I did for this cake and the top of this one.
 Thing is, I prepared two bowls of of chocolate flakes for this and another cake I was working on. One bowl of flakes was flavoured and coloured with freeze-dried raspberry powder, like I showed you here. The other, with gold flakes meant for this cake. Both cakes looked identical after the crumb-coat was applied. I think you see where this is going...
So yeah, I applied the wrong flakes to each of the cakes. DUH!! At the point I realized what I'd done, there was no going back, or I just wasn't interested. The raspberry flavoured flakes didn't work with the overall taste of the cake, so I scraped them away after the one photo above. But try to picture it with the gold, instead of red flakes and you'll see what I was going for.
The Dude and I each had a slice and I knew immediately that it had to leave the house, or I'd risk eating the whole thing. I sliced it up and took it to work, where it was quickly devoured.
The END! But before you go, here's a quick gif of how I piped the top.


Peanut Butter Caramelized White Chocolate Stout Cake
Ingredients
For the mousse:
- 300 grams caramelized white chocolate I used Valrhona Waina 35%
- 250 grams milk
- 300 grams 35% whipping cream
- 3 grams leaf gelatin
For the cremeux:
- 300 grams dark chocolate I used Valrhona Guanaja 70%
- 61.5 grams smooth peanut butter
- 129 grams egg yolks from 6-7 extra large eggs
- 85.5 grams sugar
- 243.5 grams milk
- 382.5 grams 35% whipping cream
- pinch of sea salt
For the cake:
- 250 grams stout I used Guinness
- 227 grams unsalted butter
- 78.5 grams unsweetened cocoa powder I used Rodelle organic baking cocoa
- 345 grams unbleached all-purpose flour
- 405 grams granulated sugar
- 8.5 grams baking soda
- 4.5 grams salt
- 2 large eggs
- 212 grams sour cream
Instructions
Make the mousse (one day before):
- Caramelize the white chocolate using your preferred method, or use a blond chocolate like Dulcey. See this post for sous vide method.
- When the chocolate is ready, warm the milk in a small saucepan over medium-low heat.
- While the milk is warming, soak the gelatin sheets for a few seconds in cold water. When the milk is ready, squeeze the water from the gelatin sheets and stir into the warm milk until dissolved.
- Slowly add the milk/gelatin mixture to the chocolate while stirring. Use an immersion blender to fully combined, then refrigerate for 20 minutes. Remove from the fridge after 20 minutes and blend again, then chill for an additional 20 minutes.
- Pour the cream into a chilled bowl and use a hand whisk to whip the cream to soft peaks. Once the chocolate mixture has chilled, remove from the fridge and combine fully with the whipped cream. Do not whisk to stiff peaks, mixture should still be pourable.
- Transfer to an airtight container and refrigerate to set for 24 hours.
Make the cremeux:
- Melt the chocolate over a double boiler and stir in the peanut butter, once melted. Set aside.
- In a separate bowl, whisk together the egg yolks and sugar. Set aside.
- Bring the milk, cream, and sea salt to a simmer in a saucepan. Remove from heat, and slowly pour a small amount of the hot mixture into the egg yolks, while whisking. Add the remaining milk mixture in a slow and steady stream while whisking. Once combined, pour the mixture back into the sauce pan and cook over medium-low heat while whisking continuously, until mixture reaches 82C and has thickened.
- Immediately strain the mixture into the melted chocolate. Whisk until combined, or use an immersion blender for best results. Cover the surface with plastic wrap and chill in the refrigerator until firm, 4 to 24 hours. Once set, remove from the refrigerator and whip the cremeux to a smooth, spreadable texture.
Bake the cake:
- Preheat oven to 325°F. Prepare two (2) 7” square pans using your preferred method. I used a pastry brush to apply homemade cake release.
- Cut butter into cubes. In a heavy large saucepan over medium heat, bring the Guinness and butter to a simmer .
- When butter is melted, whisk in the cocoa powder until mixture is smooth. Remove from heat and let cool slightly.
- Sift flour and baking soda into a large bowl, or onto a sheet of parchment paper. Add sugar and salt and whisk together.
- Using the paddle attachment of your electric mixer, beat eggs and sour cream until blended. Add the Guinness mixture to the egg mixture and beat briefly, just to combine. Add flour mixture and beat briefly on slow speed.
- Remove bowl from stand mixer. Using a silicone spatula, fold batter until completely combined. Divide batter equally among prepared pans. (I use a scale for accuracy)
- Bake cakes until tester inserted into center of cakes comes out clean - that was about 35 minutes in my oven. Baking time may vary depending on your oven.
- Transfer cakes to a cooling rack for 15 minutes. Turn cakes out onto rack and cool completely.
Pull it all together:
- Split the cakes in two to create four layers in total. Dab some cremeux on a square cake board or plate and secure the first layer of cake onto the board.
- Fill separate piping bags with some of the cremeux and mousse. Pipe the first cake layer with cremeux and place a cake layer on top. Pipe the second layer with mousse and place another later on top. Repeat with the cremeux and place the final layer on top. Ensure the layers are well aligned and use some of the cremeux to crumb-coat the cake before chilling for a few minutes.
- Remove cake from the refrigerator and apply a thin, smooth layer of cremeux on all sides of the cake. Apply the flakes to the sides of the cake by scooping up handfuls and pressing lightly onto the cake.
- Fill a double piping bag, or two piping bags, with the remaining mousse and cremeux. Attach a large piping tip to a large piping bag and insert the bags filled with the mousse and cremeux into the bag outfitted with the tip.
- Mark an X on the top of the cake to create four triangles. Pipe from the centre out to the edge of the cake while moving from one side of the triangle lines to the next.


 OK, so I'm just going to put this out there... you NEED to make this Luscious Yuzu White Chocolate Tart...STAT!
 I talked about yuzu
  My test batch was basically the same as
  It all came together gloriously - but one might say I am a little biased. You'll just have to give it a try! If you do, would love if you used #isugarcoatit on

 I whipped up this Mocha Latte Chocolate Chip Cake four years ago!! The flu knocked me flat on my back for the last week and a bit, so I had a few minutes to peruse my Instagram feed. I came across this
  Make a cold infusion
 If you have been around here a while, you know how much I enjoy
 If you still have one of those Italian cakes sitting around from the holidays, this Sous Vide Zabaglione Lemon Cream Cake Trifle is the perfect way to use it up. I could totally see you serving this up at Valentine's Day brunch!
 Upon closer inspection, I noticed the brightly coloured, tent-shaped box said Pandoro and not Panettone. With my Italian limited to 'ciao', 'mangia', 'gelato' and 'incontrami al ristorate', I assumed they were one in the same.
 Zabaglione also hails from Italy. With just egg yolks, sugar and fortified wine (like
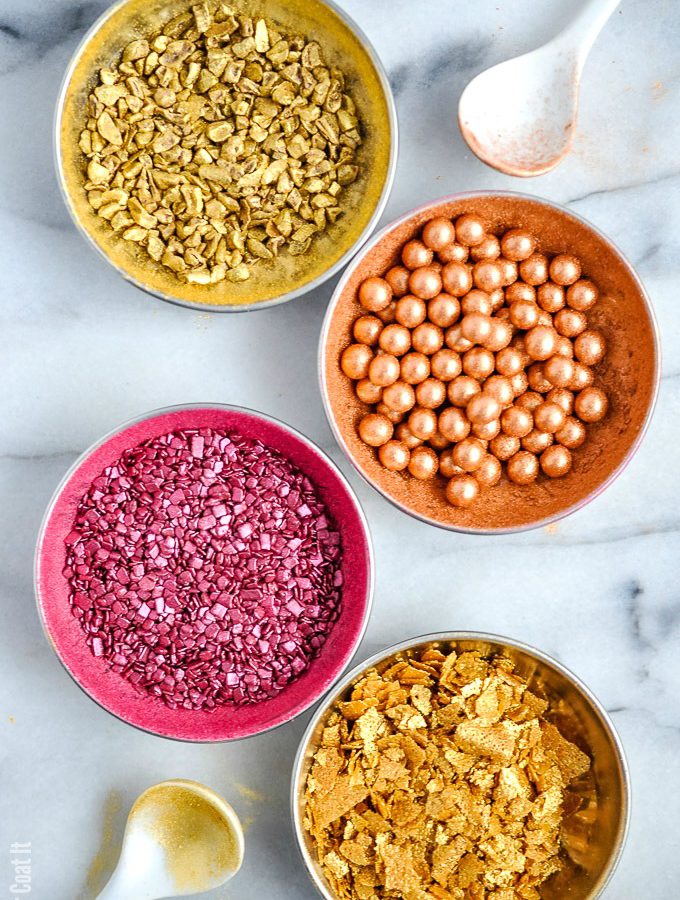


 These chocolate flakes are a wonderful addition to truffles and
  These Valrhona Dulcey crispy pearls are addictive on their own, or atop a

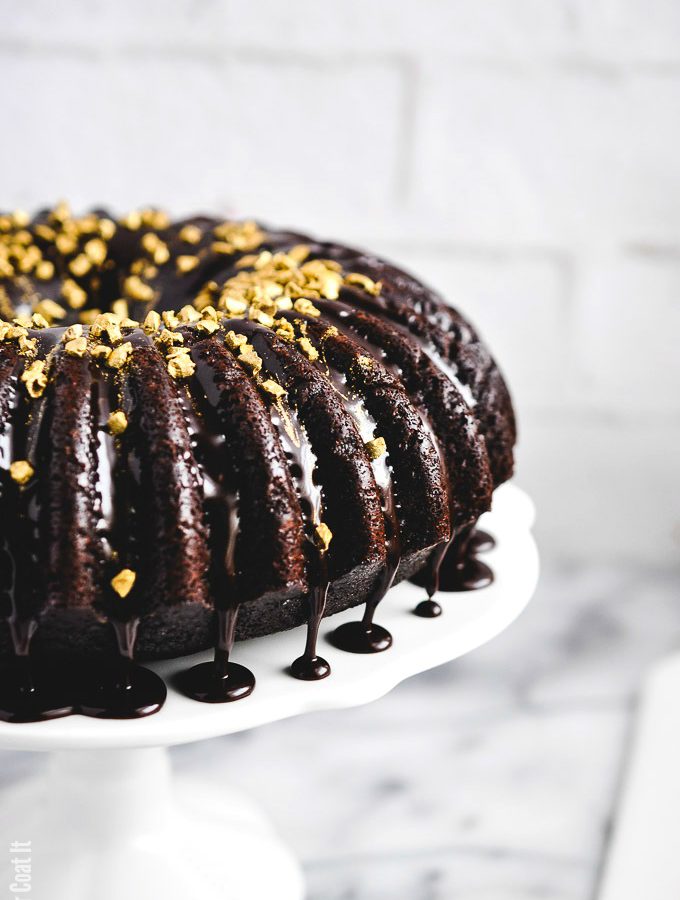
 Happy New Year!! I hope 2018 has been real good to you so far. If not, chocolate fixes everything and there's a generous helping in this Coffee Chocolate Truffle Bundt Cake.
 For me, the most difficult part about unplugging from the online world, is getting back into it. But here I am with a decadent chocolate cake in tow, so let's do this thing already!
 On it's own, the cake is pure melt-in-your mouth chocolate and coffee decadence, but I didn't stop there. The Dude's not huge on buttercream, but he is a coffee fiend, so I drenched the cake with some of the coffee ganache leftover from a batch of truffles I made earlier that day.
 To add a little crunch and bling to this Coffee Chocolate Truffle Bundt Cake, I tossed some cacao nibs in culinary gold dust and sprinkled on top. Not your conventional birthday cake, but add a candle or sparkler and voila!
 /div>
/div>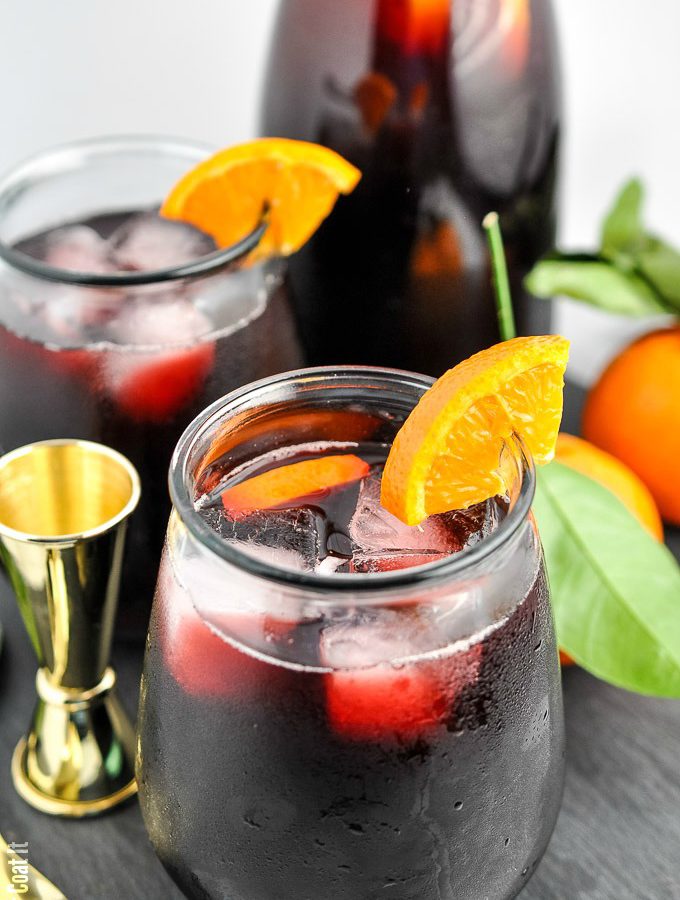
 Just a few days before Christmas and I am winding down and hydrating on copious amounts of Sorrel (Hibiscus) Caribbean Christmas Punch. It's a holiday staple from my childhood and the second time I am sharing it on my blog.
 There are so many foods and fruits that my grandparents grew and made, that I've come to appreciate with age. Aloe, for instance - my grandmother would chop a piece from the gigantic spiked-afro looking plant and lather us with it after too much sunning. She also used it on our hair, along with coconut oil.


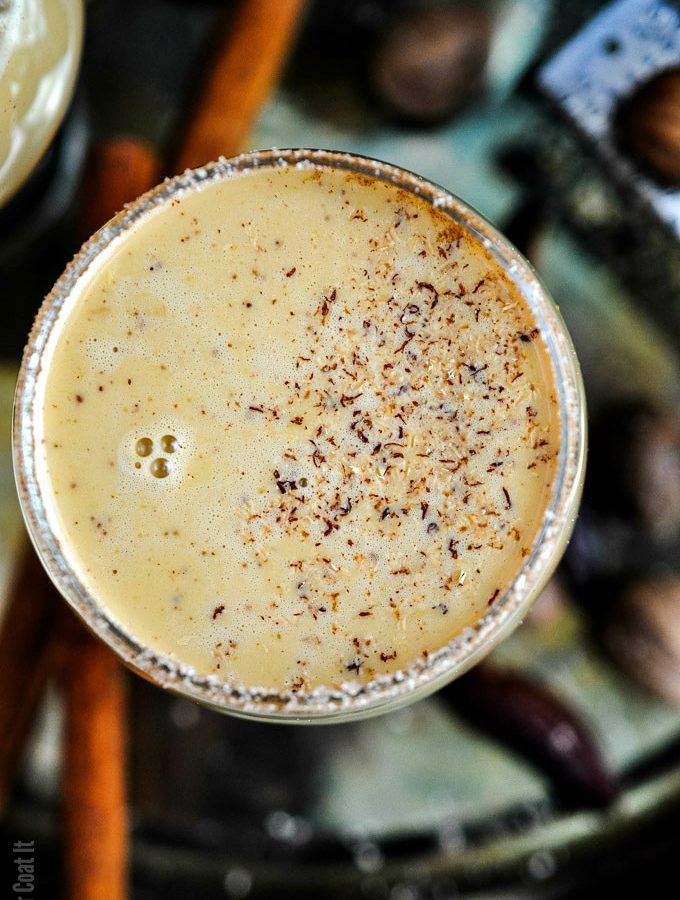
 Love it or hate it, eggnog is synonymous with the Christmas. My Silky Sous Vide Coconut Tonka Eggnog is sure to be loved by those who crave a little tropical flavour around the holidays. I know we certainly do!
 So What's This Tonka Bean?
 The wrinkled exterior, when shaved, gives way to an interior that resembles almond. Oddly, the same naturally occurring compound (
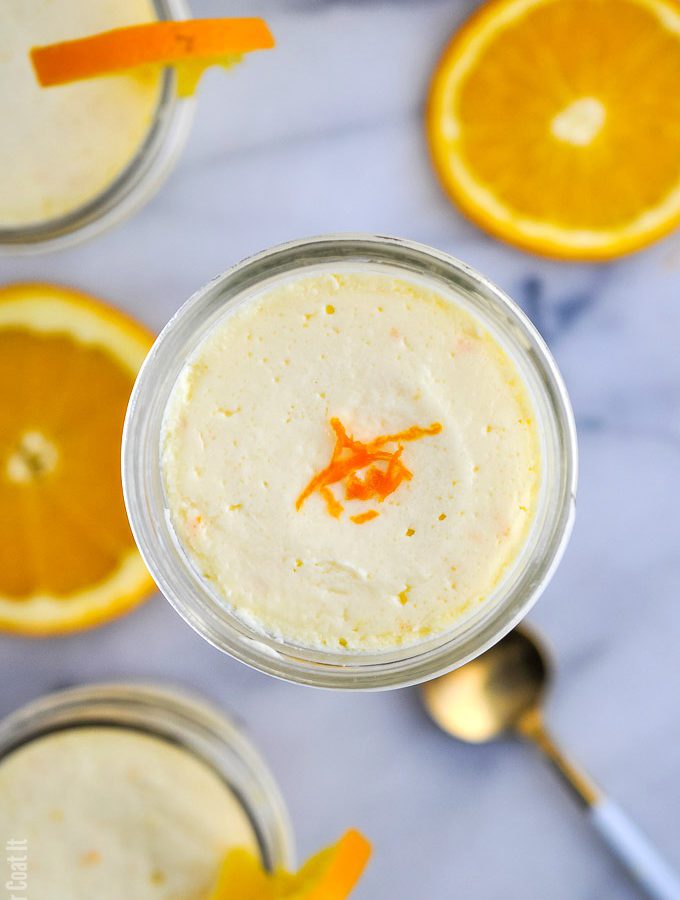
 Welcome to another #SousVideSundaySeries! I made these single-serve Sous Vide Orange Mascarpone Cheesecake as part of Tre Stelle's #RandomActsofCooking. An edible thank-you to my neighbour who brings in my trash and recycle bins and shovels my driveway when the Dude's away. You rock!
 I'll never tire of single-serve desserts in jars. These Sous Vide Orange Mascarpone Cheesecake are perfect for giving! Not only do they make a great addition to all the holiday entertaining, they make perfect take-home treats!
 Thanks to Tre Stelle for providing the wonderfully delicious Mascarpone used in this recipe. For every share using #RandomActsofCooking, Tre Stelle will donate $1.00 to a local FoodBank.