• Skip to primary navigation
  • Skip to main content
  • Skip to primary sidebar
  • Home
  • About
    • About I Sugar Coat It
    • Features & Press
    • Copyright
    • Disclosure
    • Privacy Policy
  • Recipes
  • How-To
  • Contact
  • sous vide sista

I Sugar Coat It

Home

All Posts

Refreshingly creamy, flavourful, Asian-inspired Sous Vide Mango Basil Ice Pops with strawberry drizzle to lick your summer into gear.

June 2019 By i sugar coat it! Leave a Comment

Sous Vide Mango Basil Ice Pops

Refreshingly creamy, flavourful, Asian-inspired Sous Vide Mango Basil Ice Pops with strawberry drizzle to lick your summer into gear.

Refreshingly creamy, flavourful, Asian-inspired Sous Vide Mango Basil Ice Pops with strawberry drizzle to lick your summer into gear.

It's beginning to feel a lot like summer and synonymous with the season, are frozen treats like these Sous Vide Mango Basil Ice Pops! They contain two of my fave things - mango and Asian flavours.

I am bringing you this recipe today as part of my weekly Instagram stories sousvide-along. Also, to introduce you to the fairly new Sous-Vide magazine by Cuisine Solutions, dedicated to the art of cooking sous vide, it delivers great articles to get you sous viding like a pro, with mouthwatering photos of restaurant-worthy recipes that can easily be created at home.

Refreshingly creamy, flavourful, Asian-inspired Sous Vide Mango Basil Ice Pops with strawberry drizzle to lick your summer into gear.

Issue 6 is all about cooking for the warmer months ahead, and what says summer better than a flavour-packed, frozen treat on a stick? Put a popsicle in my hand and I am immediately transported to my childhood.

A childhood filled with freshly picked mangoes would naturally translate to a life-long love obsession with the irresistible, sweet, juicy, orange-yellow fleshed fruit. Not surprisingly, I was immediately drawn to the mango pops featured in the magazine.

Refreshingly creamy, flavourful, Asian-inspired Sous Vide Mango Basil Ice Pops with strawberry drizzle to lick your summer into gear.

It spoke not only to my love of mangoes, but Asian flavours. The Dude and I love Asian cuisine, and having lived in SEA for a year, what seems like a lifetime ago, those ingredients are always on hand.

Thai Basil

I used Thai basil in place of regular sweet basil, added a little galangal, replaced the white sugar with panela, used fresh, instead of frozen mango and added a little lime zest to another batch.

Thai basil, also known as cinnamon basil, has longer, more pointed leaves, purple stems and pretty purple flowers. Its looks are complement by spicy, licorice/anise aroma and flavour - I love using it in fruit salads. I'd like to make another batch of these pops using Thai lemon basil or Holy Basil, if only to feed my curiosity.

Galangal

Galangal is a commonly used ingredient in SEA cooking, particularly Indonesian, Thai and Malaysian. Flavour-wise, it's a very different beast from ginger, so I am not suggesting it as a substitute per se. Using galangal, instead of the ginger called for in the magazine recipe, made a noticeable difference in the overall flavour profile. I love the fresh, cooling aroma galangal imparts to dishes and felt it would work well in these Sous Vide Mango Basil Pops.

If you prefer more spicy, pungent notes with your mango, then ginger is your gal. You know your palate better than anyone, so play around with what speaks to your senses. It's what I love most about cooking!

Refreshingly creamy, flavourful, Asian-inspired Sous Vide Mango Basil Ice Pops with strawberry drizzle to lick your summer into gear.

Panela

Panela is unrefined, raw cane sugar with flavourful, aromatic caramel and molasses undertones. It is common to Latin and Central America and some parts of the Caribbean. It can be used at a 1:1 ratio when replacing sugar in both sweet and savoury dishes. Apart from its wonderful flavour, I like how the colour seemed to have warmed that of the mango.

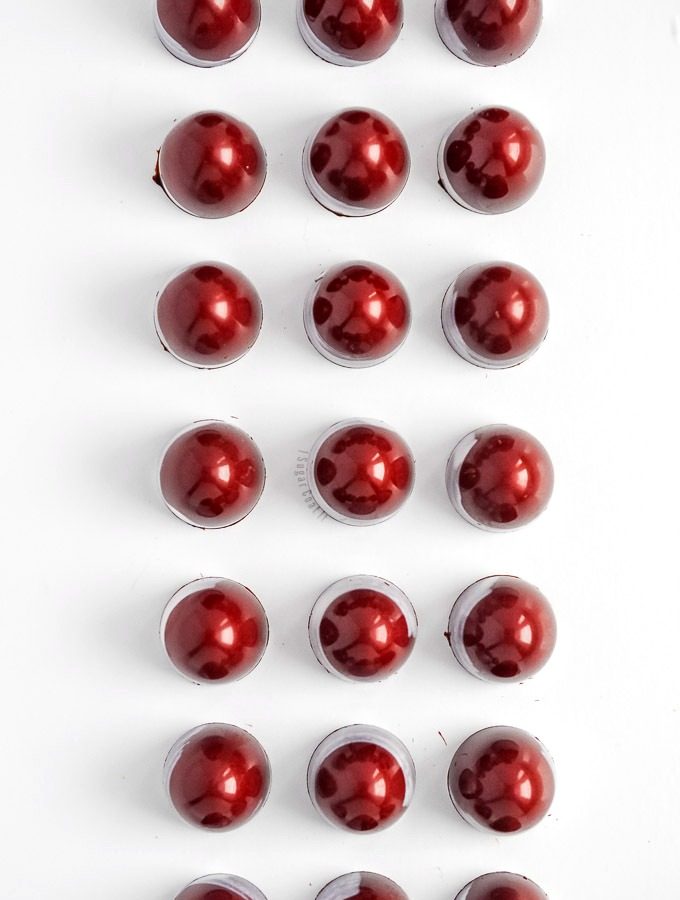
Switching up the ingredients made a noticeable difference in the overall flavour profile of the ice pops. I really like the mellow complexity of the ingredient blend I used (so much that I translated it into bonbons). Each ice pop version provided a slightly different experience, but were both refreshingly delish!

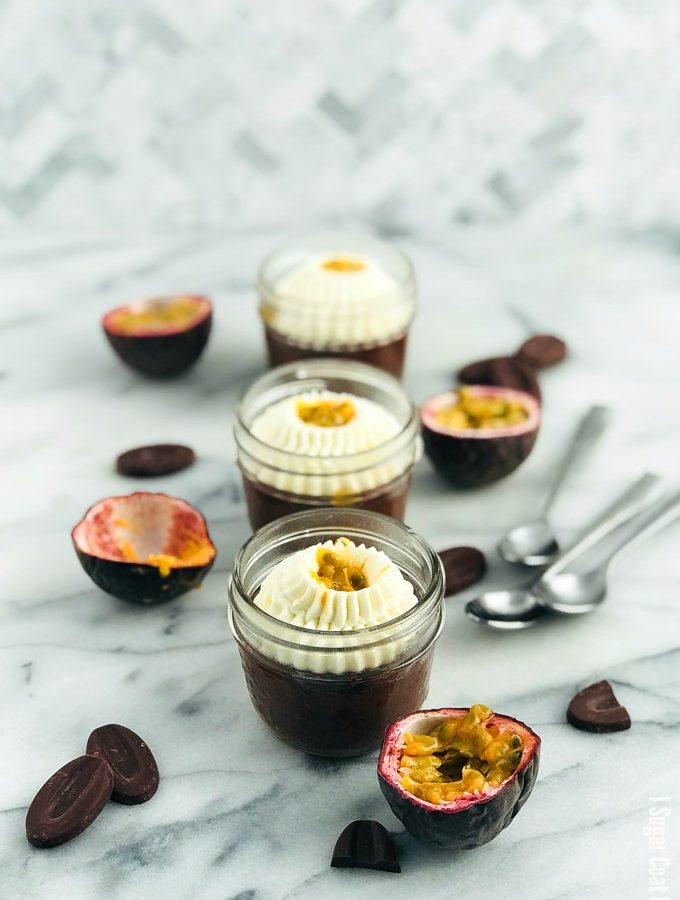
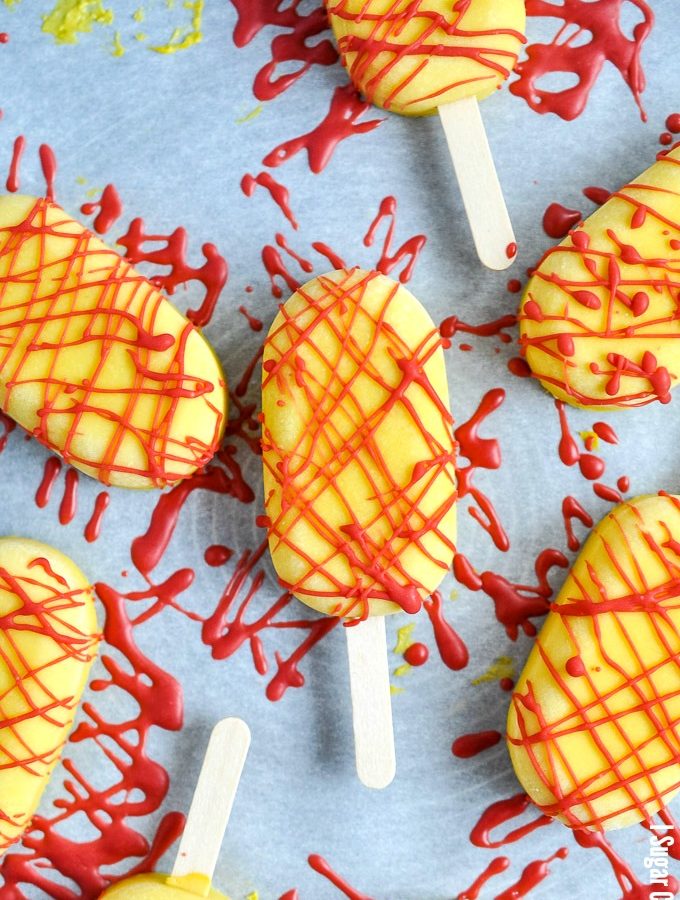
To finish them off with a little interest, I piped random line patterns using Strawberry and Passion Fruit Inspiration mixed with a neutral oil to create what is called a magic shell - a technique I've used on a few other pops and ice cream.

The flavours of the Valrhona fruit inspirations are quite intense, so I backed off the idea of dipping the pops for fear they would overpower the incredibly creamy flavour-packed pops. You can skip this, however, as the Sous Vide Mango Basil Ice Pops definitely held their own.

Refreshingly creamy, flavourful, Asian-inspired Sous Vide Mango Basil Ice Pops with strawberry drizzle to lick your summer into gear.

Sous Vide Ice Pops... Really?

Preparing fruits and vegetables sous vide, really intensifies and locks in the flavour and colour. Nutrient loss is also lessened, resulting in an overall win-win, if you ask me.

Although a number of you have reached out to say that I've inspired you to invest in a sous vide cooker, I realize that the majority of you likely don't. These flavourful Asian-inspired ice pops can just as easily be made in a blender, raw.

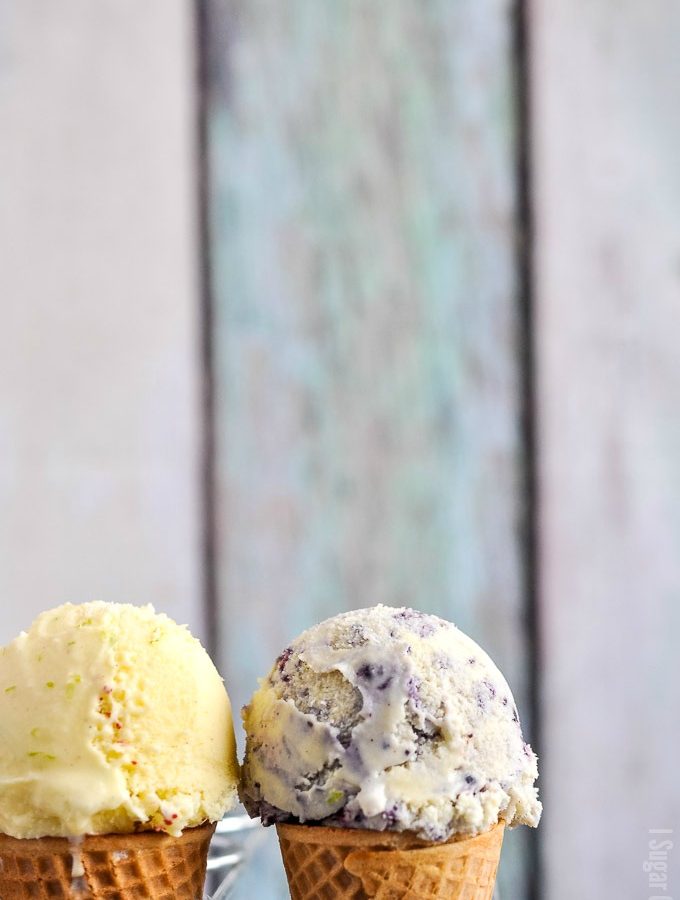
Either way, you just can't go wrong with mango! Check out my video below.

Refreshingly creamy, flavourful, Asian-inspired Sous Vide Mango Basil Ice Pops with strawberry drizzle to lick your summer into gear.
Print Recipe
5 from 1 vote

Sous Vide Mango Basil Ice Pops

Refreshingly creamy, flavourful, Asian-inspired Sous Vide Mango Basil Ice Pops with strawberry drizzle to lick your summer into gear.
Prep Time10 minutes mins
Cook Time1 hour hr 10 minutes mins
Freeze Time10 hours hrs
Course: Dessert
Cuisine: Asian
Keyword: frozen dessert, mango, popsicle, sous vide
Servings: 12
Author: i sugar coat it!
Cost: $15.00

Equipment

  • Sous Vide Immersion Cooker
  • Silicone Ice Cream/Popsicle Mold
  • Popsicle Sticks
  • Blender

Ingredients

For the ice pops:

  • 220 grams coconut milk or cream or dairy milk
  • 48 grams panela or other sweetener of your choice
  • 454 grams ripe mango chunks fresh or frozen
  • 4 large fresh Thai basil leaves or regular sweet basil
  • 5 grams galangal (Ka), freshly minced or freshly minced ginger

For the magic shell (optional):

  • 100 grams Strawberry Inspiration for dipping or drizzling
  • 20 grams grape seed oil or other neutral oil

Instructions

Prepare the water bath:

  • Place warm water in a heavy-duty pot, or heatproof container. Attach the immersion circulator and heat water to 83ºC/181.4F.

Make the pops:

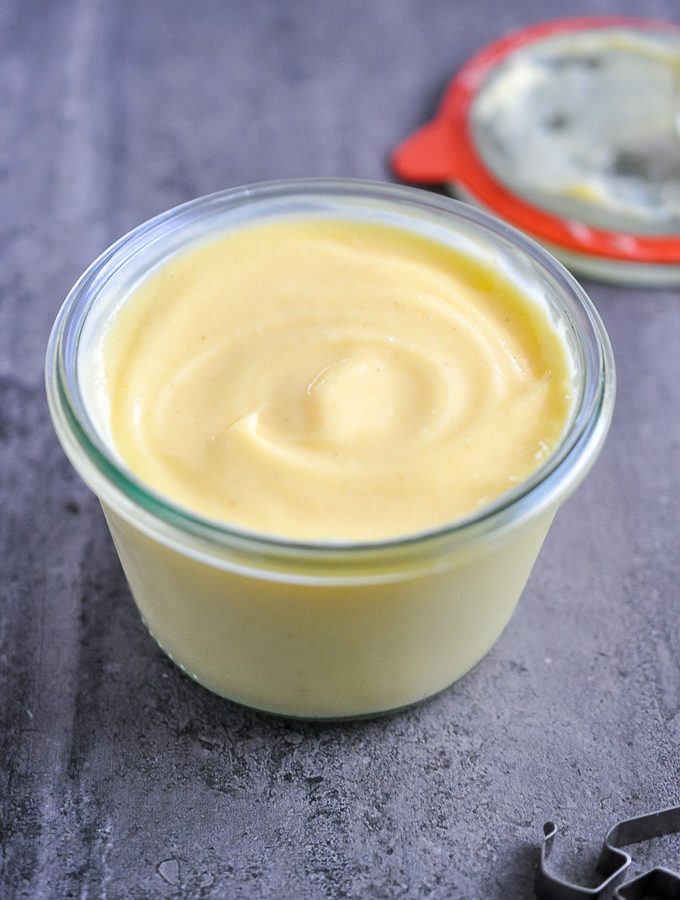
  • Add the sugar and coconut milk to a small saucepan and heat to a light boil, while whisking. When the sugar is all melted, remove from heat, cool at room temperature for a few minutes, then chill in the refrigerator.
  • Mince the ginger over the mango chunks, then add to a resealable sous vide bag, along with the basil and coconut milk. Seal partially, removing as much air as possible (you can do this by passing the bag along the edge of your counter or table). Add to the heated water bath, removing any excess air from the bag using the displacement method. Seal and cook for 1 hour.
  • A few minutes before the cook ends, prepare a stainless steel bowl with cold water and ice. Remove the bag from the water bath, when ready, and place in the ice bath to chill. Open the bag, discard the basil leaves and transfer the contents to a mixer, or a tall container and blend with an immersion blender until smooth.
  • Pour into molds and freeze for at least 8 hours, or overnight for best results.

Make the magic shell:

  • Unmold the pops, place on a parchment-lined baking tray and return to the freezer.
  • Melt the strawberry and passion fruit inspiration along with the oil in separate bowls over simmering water, stirring until smooth. Remove from heat and cool to 37ºC before drizzling or dipping. Enjoy!
Sweet, sticky, buttery, fluffy and intensely nutty Black Walnuts Cinnamon Rolls baked into perfectly crunchy, lightly spiced swirls!

May 2019 By i sugar coat it! Leave a Comment

Black Walnuts Cinnamon Rolls

Sweet, sticky, buttery, fluffy and intensely nutty Black Walnuts Cinnamon Rolls baked into perfectly crunchy, lightly spiced swirls!

Sweet, sticky, buttery, fluffy and intensely nutty Black Walnuts Cinnamon Rolls baked into perfectly crunchy, lightly spiced swirls!

Plain or Frosted

I recently polled my Instagram peeps to learn whether they felt frosting on cinnamon rolls was essential or MEH. Sixty-five percent felt it was essential. I clearly feel otherwise, as you can tell from these Black Walnuts Cinnamon Rolls, sans frosting. They were the perfect balance of flavour and crunch, just how I like to roll.

I like a touch of frosting on my buns... urm, rolls from time to time, but I am with the MEH-sayers on this one. If the rolls are made exactly to my liking - a light crisp exterior that gives way to a sticky, pillowy, not-too-sweet interior - then frosting need not apply!

Ankarsrum Assistent Mixer

Ankarsrum Assistent Original

I rarely ever enter giveaways, much less win anything. So imagine my utter surprise when I learned I won this beauty of a beast in a recent Russell Hendrix giveaway - the Ankarsrum Assistent Original. It is so beautifully designed and engineered, with a plethora of attachments from mill to blender.

The very first thing I made were scones, followed by this batch of Black Walnuts Cinnamon Rolls. I am completely mesmerized by the tandem workings of the roller and scraper. Yup, I'm easily entertained. 🙂

I was in a bit of a baking slump, but seeing this beauty on my counter has awaken my desire.

Sweet, sticky, buttery, fluffy and intensely nutty Black Walnuts Cinnamon Rolls baked into perfectly crunchy, lightly spiced swirls!

Black Walnuts

You can use regular walnuts, but black walnuts impart a rich nutty, earthy flavour to recipes, both sweet and savoury. Plus they are packed with protein - more per ounce than any other tree nut, I am told. They are very low in saturated fat and boast an impressive list of health benefits.

I love adding them to recipes, but mostly enjoy them by the handful as a snack, or atop yogurt and hot cereal. They also work well with chocolate.

Sweet, sticky, buttery, fluffy and intensely nutty Black Walnuts Cinnamon Rolls baked into perfectly crunchy, lightly spiced swirls!

Fresh Yeast

I first baked with fresh yeast in a baking and pastry intro course at a local culinary school back in 2012. Although I find the smell off-putting, I really enjoy the flavour and texture it imparts to baked goods.

Fresh yeast has a short shelf life (approx. 3 weeks), so it is less commonly stocked in regular grocery stores. I recently found a bakery outlet/supplier that carries the butter-sized blocks. Prior to that, I would hit up a couple bakeries and convince them to sell me a piece.

Sweet, sticky, buttery, fluffy and intensely nutty Black Walnuts Cinnamon Rolls baked into perfectly crunchy, lightly spiced swirls!

If you have never used fresh yeast and would like to, here are some pros and cons to keep in mind:

  • easily dissolves into liquids and disperses efficiently throughout the dough
  • contains about 6 billion active yeast cells per gram of compressed yeast; highly perishable - must be refrigerated and used within 2-3 weeks
  • provides the highest moisture content of any baker's yeast
  • will activate and die if left at room temperature for too long without feeding

Should a recipe call for fresh yeast and you are not able to find it, follow these simple substitutions that I also shared back in this 2012 post:

  • Active dry yeast is 2x stronger than fresh yeast, so use half as much as what the recipe calls for of the fresh yeast.
  • Instant yeast is 3x stronger than fresh yeast, so use one third as much as what the recipe calls for of the fresh yeast.
Sweet, sticky, buttery, fluffy and intensely nutty Black Walnuts Cinnamon Rolls baked into perfectly crunchy, lightly spiced swirls!

The mixer came with a recipe booklet that includes a recipe for cinnamon rolls, which was my starting point for these Black Walnuts Cinnamon Rolls.

I know most people probably pack the rolls closely in a dish for that pull-apart end result, but I prefer to bake them apart - on a tray or in a muffin tin. That way I achieve that beautiful colour and crispness on all sides.

How about you? How do you like your cinnamon rolls?

Here is a little video I made so that you can see the mixer in action - I am in love!

Sweet, sticky, buttery, fluffy and intensely nutty Black Walnuts Cinnamon Rolls baked into perfectly crunchy, lightly spiced swirls!
Print Recipe
4 from 1 vote

Black Walnuts Cinnamon Rolls

Sweet, sticky, buttery, fluffy and intensely nutty Black Walnuts Cinnamon Rolls baked into perfectly crunchy, lightly spiced swirls!
Prep Time25 minutes mins
Cook Time8 minutes mins
Proofing Time50 minutes mins
Total Time1 hour hr 23 minutes mins
Course: Dessert
Cuisine: Danish
Keyword: black walnuts, cinnamon roll
Servings: 12
Author: i sugar coat it!

Equipment

  • Stand Mixer
  • Rolling Pin

Ingredients

For the dough:

  • 50 grams butter unsalted
  • 305 grams milk
  • 25 grams fresh yeast
  • 48 grams granulated sugar
  • 488 grams whole wheat flour
  • 0.6 grams salt a pinch

For the filling:

  • 50 grams butter softened
  • 7 grams cinnamon ground
  • 36 grams raw sugar or unpacked brown sugar
  • 40 grams black walnuts coarsely chopped

For brushing:

  • 1 egg light whisked
  • pearl sugar optional

Instructions

Make the dough:

  • In a small saucepan, melt the butter, then add the milk and warm to 37ºC/98ºF.
  • Pour a little of the warmed milk/butter mixture over the yeast and use a silicone spatula to stir to dissolve the yeast. Add the remaining warm milk/butter mixture, sugar, flour and salt.
  • Turn the mixer on medium speed and work the dough until it pulls away from the sides completely. Cover and allow to rise for at least 30 minutes.
  • Lightly flour a clean work surface. Split the dough in half and use a rolling pin to roll each into a thin rectangular sheet.

Fill and roll the dough:

  • Whisk the cinnamon and sugar until combined, in a small bowl, or shake in a jar.
  • Spread the softened butter liberally over the surface of the rolled out dough. Sprinkle with the cinnamon sugar mixture and top with nuts. I did half with nuts and the other half without.
  • Roll the filled dough lengthwise and cut into equal pieces. Place the rolls on a parchment covered baking sheet, or in lightly greased muffin tins.
  • Cover with a clean towel and allow to rise for at least 20 minutes.

Bake the rolls:

  • While the rolls proof, heat the oven to 250ºC/475ºF.
  • After 20 minutes, remove the towel and use a clean pastry brush to lightly coat the rolls with the whisked egg.
  • Top with a little pearl sugar, if you like.
  • Place the tray with the rolls on the middle rack of the heated oven and bake for about 8 minutes, until golden brown.
  • Remove from the oven, place on a cooling rack, cover with a towel and allow to cool. You may choose to top with a cream cheese frosting, but we prefer them plain.
Sweet, sticky, buttery, fluffy and intensely nutty Black Walnuts Cinnamon Rolls baked into perfectly crunchy, lightly spiced swirls!
Add this beefy, juicy, melt-in-your-mouth, flavourful Sous Vide Flank Steak Tacos with all the fixings to your next taco any day.

May 2019 By i sugar coat it! 4 Comments

Sous Vide Flank Steak Tacos

Add this beefy, juicy, melt-in-your-mouth, flavourful Sous Vide Flank Steak Tacos with all the fixings to your next taco any day.

Add this beefy, juicy, melt-in-your-mouth, flavourful Sous Vide Flank Steak Tacos with all the fixings to your next taco any day.

So, did I accomplish my goal? Did this shot of my Sous Vide Flank Steak Tacos make you drool just a touch? I hope so!

No food photo tricks here (I never do). It's one hundred percent real deal, edge-to-edge pink plumpness. Eating and enjoying the food we prepare is first on our priority list; photographing and blogging are secondary.

Add this beefy, juicy, melt-in-your-mouth, flavourful Sous Vide Flank Steak Tacos with all the fixings to your next taco any day.

The Real Deal

So you will not find engine oil posing as maple syrup, shoe polish painted burgers, liquid soap foam topped beer or mashed potatoes moonlighting as ice cream. WTF? And what a complete waste of food. I could not believe it when a friend sent me a link to tricks used to make food look, urm... delicious. I get that some foods won't hold up to a professional photo shoot, but the list of tricks were simply deceptive and downright disgusting.

This luscious looking piece of flank steak was smothered with an olive, balsamic vinegar, smoked paprika mustard and garlic paste marinade and sprinkled with salt and pepper to taste. Or you can skip the marinade and just salt and pepper it before cooking it sous vide.

It may not look whatever your idea of 'perfect' might be, but is is all real and simply delish!

Add this beefy, juicy, melt-in-your-mouth, flavourful Sous Vide Flank Steak Tacos with all the fixings to your next taco any day.

Time & Temperature

Flank steak is a relatively cheaper cut of meat. It is a lean, tough cut that's a great candidate for cooking sous vide. My preference for cooking this cut sous vide is 56ºC/133ºF for 2-3 hours or up to 24 hours. Here are a few other options we have tried and enjoyed:

  • Medium rare - 54.4ºC/130ºF to 57.2ºC/135ºF for 2-3 hours
  • Medium - 57.7ºC/136ºF to 62.7ºC/145ºF for 1-2 hours

Note that cooking meat sous vide 54.4ºC/130ºF or below for an extended period can be harmful, so if you choose the lower end of the temperature scale, 2 hours is probably best. Also important, is checking the internal temperature of your meat to ensure doneness and safety.

If you have tried other time and temperature combinations, I would love to hear about them.

Add this beefy, juicy, melt-in-your-mouth, flavourful Sous Vide Flank Steak Tacos with all the fixings to your next taco any day.

Taco ANYDAY!

The steak, once cooked, can be used in a number of ways. We like it alongside eggs for brunch, but enjoy it most wrapped in soft tortilla shells. Did someone say TACO THURSDAY? I am down for TACO ANYDAY, but that does not roll off the tongue as deliciously.

Our Sous Vide Flank Steak Tacos we packed with avocado, tomato, pepper and corn, wrapped in homemade masa harina tortilla shells. But not just any corn, we're talking sous vide street corn and it was OH MY LAAAWD AMAZING!

Add this beefy, juicy, melt-in-your-mouth, flavourful Sous Vide Flank Steak Tacos with all the fixings to your next taco any day.
Print Recipe
5 from 1 vote

Sous Vide Flank Steak Tacos

Add this beefy, juicy, melt-in-your-mouth, flavourful Sous Vide Flank Steak Tacos with all the fixings to your next taco any day.

Prep Time25 minutes mins
Cook Time2 hours hrs
Course: Main
Cuisine: Mexican, Sous Vide
Keyword: flank steak, savoury, sous vide, tacos
Servings: 6
Author: i sugar coat it!

Ingredients

For the steak:

  • 885 grams flank steak
  • 3 tablespoons olive oil
  • ⅓ cup balsamic vinegar or dry wine
  • 2-3 tablespoons smoked paprika mustard
  • 2-3 cloves garlic grated or pressed
  • salt and pepper to taste

For the tacos:

  • thinly sliced sous vide flank steak from above
  • 6-8 corn tortillas homemade or store-bought
  • tomato
  • chili pepper
  • street corn niblets
  • cilantro
  • lime
  • leftover street corn dressing

Instructions

Cook the steak:

  • Add warm water to a heavy-duty pot or heat-safe container, attach your immersion cooker heat water to 56C/133F. Cover to contain heat and prevent evaporation.
  • Clean and pat the meat dry. Add all the ingredients, except the sat and pepper, to a small bowl and whisk until well combined. Brush marinade onto both sides of the steak and sprinkle with salt and pepper. Add to a resealable sous vide bag along with remaining marinade. Pass the filled bag along the edge of a counter to remove excess air, or use the displacement method. Add the sealed bag to the heated water and cook for 2 hours.
  • Remove from the bag when cooked. Place on a cooling rack to allow the juice to drip off and pat (not rub) lightly with a paper towel. To finish the steak, heat a skillet or grill until smoking. Sear steak for about a minute, flipping every 10-15 seconds. Or, if you own a Searzall torch, that will do the trick! Cut into thin slices.

Make the tacos:

  • Build your tacos with all the fixings listed here, or any of your preference. Enjoy!
Add this beefy, juicy, melt-in-your-mouth, flavourful Sous Vide Flank Steak Tacos with all the fixings to your next taco any day.
Berry Carambola Cheesecake Bonbons are an exquisite blend of silky cheesecake ganache, topped with sweet tangy carambola (starfruit) jam.

May 2019 By i sugar coat it! 11 Comments

Berry Carambola Cheesecake Bonbons

Berry Carambola Cheesecake Bonbons are an exquisite blend of silky cheesecake ganache, topped with sweet tangy carambola (starfruit) jam.

Berry Carambola Cheesecake Bonbons are an exquisite blend of silky cheesecake ganache, topped with sweet tangy carambola (starfruit) jam.

HELLO, HELLO! I'm still here and finally getting around to sharing these red pops of yummy Berry Carambola Cheesecake Bonbons.

I first shared these on my Instagram feed back in March and had lots of requests to share on the blog. Sorry it has taken me so long - I just could not find the time to edit the damn photos and video!

Well, I finally have and I've included how I close my bonbons - another popular request from my die-hard followers. YIPPIE-KI-YAY! If you aren't interested in my banter, skip down to the video - I'll only judge you a little.

Berry Carambola Cheesecake Bonbons are an exquisite blend of silky cheesecake ganache, topped with sweet tangy carambola (starfruit) jam.

Go Light On the Colour

Whether you apply your colour manually or mechanically, know that less is more. I sampled some bonbons recently and the coloured cocoa butter was laid on so thick, it ruined the overall eating experience for me.

I have found this especially with darker colours like blue and black and with white. If you want a more opaque finish, try mixing your cocoa butter with dark, milk or white chocolate, instead of laying on the coloured cocoa batter.

If you are just starting to make chocolate, more importantly, selling your goods, go light on the colour. Not only will your chocolates have a better mouthfeel for those eating them, but you can save some money in your production. Cocoa butter ain't cheap, after all.

Berry Carambola Cheesecake Bonbons are an exquisite blend of silky cheesecake ganache, topped with sweet tangy carambola (starfruit) jam.

Paint or Airbrush?

It all depends on the look you want to achieve, or how lazy/tired you happen to feel that day. Sometimes a splash of colour against a naked chocolate backdrop is all the effort I want to give, but can be just as impactful. Multiple splashes and you are on your way to becoming the next Jackson Pollock!

I'll admit, however, that I love using my airbrush to add colour - quick, even coverage in less time. Multiple colour changes, noisy compressor and the clean-up, not so much.

It's really up to you! But like I said above, don't lay it on too thick.

Berry Carambola Cheesecake Bonbons are an exquisite blend of silky cheesecake ganache, topped with sweet tangy carambola (starfruit) jam.

It's What's On The Inside

Say cheese! Yes, that is what's inside, and jam - so breakfast. These bonbons were my first foray into cheese ganache and they are still one of my faves.

The cheesecake ganache in these Berry Carambola Cheesecake Bonbons is almost identical to this one, with fromage blanc in place of mascarpone. This is where you'll likely ask, what's fromage blanc?

Fromage Blanc, also known as Maquee or White Cheese, is a fresh cheese in which fermentation has been halted. It's soft and decadently creamy and can be enjoyed as you would cheese or yogurt.

If you follow my IG stories, you may remember me sharing a fresh tub, straight from Montreal, a little while back. It can be a little tricky to find, but a few good substitutes include Mascarpone (this yields a richer ganache), Greek Yogurt, Quark, a mix of Sour Cream and Ricotta, or even Queso Fresco.

When our VP of Research resigned her post, she gifted me a bag of her homemade goodies, which included a jar of Strawberry Carambola (a.k.a Starfruit) jam. I'm normally not a jam person, but starfruit is another fave from my childhood, so we cleaned the jar out pretty fast. I thought it would work well in a bonbon, so I made a batch of my own.

Berry Carambola Cheesecake Bonbons are an exquisite blend of silky cheesecake ganache, topped with sweet tangy carambola (starfruit) jam.

Lace Bottoms

Now, you can slap on some plain chocolate feet to seal in all that delish in your bonbons, but I like to dress my feet up from time to time. This time called for white lace... risqué! Perfect for a departing colleague, whose sense of fashion is almost on par with her smarts. The other tray went to a friend, who returned from visiting his parents in Montreal, with the fromage blanc used in this recipe, in tow.

OK, enough talk...here's a video of me making my Berry Carambola Cheesecake Bonbons.

Berry Carambola Cheesecake Bonbons are an exquisite blend of silky cheesecake ganache, topped with sweet tangy carambola (starfruit) jam.
Print Recipe

Berry Carambola Cheesecake Bonbons

Berry Carambola Cheesecake Bonbons are an exquisite blend of silky cheesecake ganache, topped with sweet tangy carambola starfruit jam.
Prep Time59 minutes mins
Cook Time12 minutes mins
Total Time1 hour hr 11 minutes mins
Course: Dessert
Cuisine: Chocolate
Keyword: bonbons, chocolate, ganache
Servings: 42 bonbons
Author: i sugar coat it!

Ingredients

For the shells:

  • 150 grams dark chocolate tempered
  • an needed coloured cocoa butter I used white with a brush and red garnet with an airbrush

For the jam:

For the ganache:

  • 210 grams white chocolate 35% I used Valrhona Ivoire
  • 15 grams invert sugar
  • 25 grams glucose
  • 75 grams cream cheese softened
  • 75 grams fromage blanc
  • 1 vanilla bean scraped
  • pinch salt

Instructions

Prepare molds:

  • Clean and buff molds. See instructions here.
  • Decorate your molds in a design and colours of your preference. I applied a layer of white with a foam brush, then used the airbrush to add thin layer of red.

Make the ganache:

  • Melt the chocolate over a double boiler, or bowl set over a pot with a little bit of simmering water, then set aside.
  • Scale the invert sugar and glucose directly into a small, heavy bottom saucepan. Add the cheese, vanilla beans and salt in a small bowl and combine using a wooden spoon. Add to the saucepan with the sugars, combine and heat just to soften. Remove from heat.
  • While stirring the cheese mixture, add the chocolate and mix to combine. Or use an immersion blender to emulsify the ganache until smooth and fully incorporated. Allow to cool.

Fill and seal:

  • Transfer the jam and ganache to separate piping bags, snip a small opening off the tips of each. Pipe a dollop of the jam into the shells and top with a layer of ganache. Allow to set, then seal the bonbons with a thin layer of chocolate. See the video above to see how to close with a transfer sheet. Pop the sealed bonbons, still in the mold, into the refrigerator for a few minutes before unmolding.
Berry Carambola Cheesecake Bonbons are an exquisite blend of silky cheesecake ganache, topped with sweet tangy carambola (starfruit) jam.
homemade burger topped with bacon, tomato and microgreens | i sugar coat it

May 2019 By i sugar coat it! Leave a Comment

Sous Vide Bacon Cheese Burger

Kick off grilling season with thick, juicy, flavourful cooked to perfection Sous Vide Bacon Cheese Burger with all the fixings.

Kick off grilling season with thick, juicy, flavourful cooked to perfection Sous Vide Bacon Cheese Burger with all the fixings.

This Sous Vide Bacon Cheese Burger is so in your face, you may find yourself leaning in to lick the screen. My back is turned...just do it! OK, now that you've gotten that out of the way, let's work on making that virtual experience a juicy reality.

I am both fascinated and fearful of fire, so I generally leave the major grilling to the Dude. We have an outdoor grill that connects to the gas line of our home and the few times that I've been tasked with firing it up, involved me holding my breath and uttering prayers to not blow up our home. Cold sweats included.

Kick off grilling season with thick, juicy, flavourful cooked to perfection Sous Vide Bacon Cheese Burger with all the fixings.

Sous Vide Burgers... Really Tho?

Well, if you tend to overcook burgers, like I used to... then yes! If an appliance doesn't beep to remind me that it's doing doing its thing, I'm likely to have moved on to the next thing and forget. Which translates into countless burnt meals. I wish I were kidding...

I love cooking sous vide for many reasons, but especially for comfort that comes from not overcooking food. There is also the consistently great results one gets from meat to mixology.

I'm not going to lie... protein cooked sous vide can look downright gross out of the bag and that's where we play with fire.

Kick off grilling season with thick, juicy, flavourful cooked to perfection Sous Vide Bacon Cheese Burger with all the fixings.

Grill, Sear or Torch?

As fearful as I am of fire, it makes me feel like a total bad-ass. Once the grill is lit and my house blowing up fears are temporarily put to rest, I feel right at home flipping and mopping that meat. Throw some bacon on the grill while you're at it, it's in the post title, after all!

In the summer months, finishing sous vide meat on the grill is definitely our preference - especially when feeding a crowd. When it's just the two of us and below zero out, I stick to searing or torching - usually the latter using my Searzall torch.

These Sous Vide Bacon Cheese Burgers took on some much needed colour with high heat applied for less than a minute per side.

Kick off grilling season with thick, juicy, flavourful cooked to perfection Sous Vide Bacon Cheese Burger with all the fixings.

Serve With A Side...

Fries are nice (and can also be made sous vide), but the hot summer months beg for a bowl of fresh, crisp vegetables. And if you are lucky enough to have a green thumb in your household (that would be the Dude), home-grown veggies are even better. This one is packed with kale, golden and red beets, carrots and tomatoes.

Now all that is missing is the weather one would normally associate with outdoor grilling. Any time now, spring... any time. Check out the video below.

Kick off grilling season with thick, juicy, flavourful cooked to perfection Sous Vide Bacon Cheese Burger with all the fixings.
Print Recipe

Sous Vide Bacon Cheese Burger

Kick off grilling season with thick, juicy, flavourful cooked to perfection Sous Vide Bacon Cheese Burger with all the fixings.
Prep Time20 minutes mins
Cook Time30 minutes mins
Total Time45 minutes mins
Course: Main
Cuisine: American, Sous Vide
Keyword: burger, savoury, sous vide
Servings: 4
Author: i sugar coat it!

Ingredients

  • 500 grams ground beef
  • half red onion finely diced
  • 1 egg
  • 1 teaspoon mustard I love using Dijon
  • Worcestershire sauce a couple dashes to taste
  • handful bread crumbs optional
  • fresh thyme
  • salt and freshly ground pepper to taste

Instructions

  • Add water to a tall pot or heat-safe container, attach your immersion cooker heat water to 56C/133F. Cover to speed up heating.
  • Place the meat, onions and breadcrumbs (if using) in a large stainless steel bowl. Whisk the egg, mustard and Worcestershire sauce in a measuring cup and add to the bowl with the meat and onions. Combine well. 
  • Separate the mixture into 200-gram pieces and shape into balls with your hands, then flatten with your palms or the bottom of a cup/glass. If you have a burger mold, even better.
  • Place the formed burgers in a resealable bag, single layer and top each side with a sprig of fresh thyme. When the water reaches temperature, add the bag of burgers to the heated water bath using the displacement method.
  • Cook for 30 to 60 minutes, remove from bath, salt and pepper, then sear, grill or torch for less than 60 seconds per side. Top with your favourite toppings and enjoy!
Kick off grilling season with thick, juicy, flavourful cooked to perfection Sous Vide Bacon Cheese Burger with all the fixings.
Decadent, 3-ingredient, single serve Sous Vide Flourless Chocolate Cake made with passion fruit infused dark chocolate topped with whipped coconut cream.

April 2019 By i sugar coat it! Leave a Comment

Sous Vide Flourless Chocolate Cake

Decadent, 3-ingredient, single serve Sous Vide Flourless Chocolate Cake made with passion fruit infused dark chocolate topped with whipped coconut cream.

Decadent, 3-ingredient, single serve Sous Vide Flourless Chocolate Cake made with passion fruit infused dark chocolate topped with whipped coconut cream.

This weekend's sousvidesista (my alter ego) sous vide-along instalment delivered a chocolatey dose of decadence in mini jars of Sous Vide Flourless Chocolate Cake!

Three ingredients - dark chocolate, eggs and butter. Simple, but huge on taste, with passion fruit infused dark chocolate as the main ingredient topped with vanilla bean speckled, whipped coconut cream.

Decadent, 3-ingredient, single serve Sous Vide Flourless Chocolate Cake made with passion fruit infused dark chocolate topped with whipped coconut cream.

Flourless Cake

OK, I say cake, but it's more like a fudgy brownie, but with a hint of passion fruit, thanks to the Itakuja dark chocolate. I initially planned to make a sous vide version of this flourless cake we made back in school, but it requires a little more perfecting.

Instead, I thought I would keep it stupid simple with this recipe I long ago adapted from Anova and made a number of times in a number of ways - milk chocolate, flavoured chocolate, milk and dark chocolate, vanilla bean, cinnamon, fruit, alcohol. It can easily be scaled up, which is what I do when looking for something simple to feed a crowd.

Decadent, 3-ingredient, single serve Sous Vide Flourless Chocolate Cake made with passion fruit infused dark chocolate topped with whipped coconut cream.

Sous Vide Setup

Before the more economical, convenient immersion cookers came on the market, we had a bulky beast that we hardly ever used. Although it was a nicely contained unit, it did not allow for the preparation of large cuts of meat, and we make a lot of large cuts.

Then in 2013, the Anova precision cooker launched and we snatched it up STAT. We had lots of concerns about cooking with plastic, so we limited our preparations to mason jar friendly recipes. Once we felt comfortable with the then current research around plastics, we went all in.

So much so, that we now own three precision cookers, Anova and Joule, for those times we want to cook a number of things at different temperatures all at once - think entertaining a crowd.

For small items, we attach the cookers to cast iron pots, a stainless steel stock pot for extra tall jars, or polycarbonate container for large cuts of meat and batch cooking.

Decadent, 3-ingredient, single serve Sous Vide Flourless Chocolate Cake made with passion fruit infused dark chocolate topped with whipped coconut cream.

Cooking In Jars

I love cooking in jars, especially when guests take them home and we don't have to worry about doing dishes. They are quite affordable, when purchased in bulk and don't add to the waste problem.

But they are glass and are susceptible to chips, cracks and breaks. To lessen instances of such mishaps, here are a few tricks:

Decadent, 3-ingredient, single serve Sous Vide Flourless Chocolate Cake made with passion fruit infused dark chocolate topped with whipped coconut cream.
  • avoid thermal shock, by keeping the glass at a similar temperature as the water bath. I talked about placing them on the lid of the sous vide bath as the water heats and soaking them in a bowl of warm water in this post.
  • another option is to add them to the water bath as it is heating, so that the jars heat along (as seen in the video below).
  • another common cause of cracks and breaks, is overly tightened caps. This causes pressure to build in the glass, when submerged, and with no available means of escape, one is created. This happened to me a couple times when I was starting out and my heart broke when I stepped in the kitchen and saw the contents floating around in the water bath. So tighten the caps only finger-tip tight to allow air to escape, but no water in.
Decadent, 3-ingredient, single serve Sous Vide Flourless Chocolate Cake made with passion fruit infused dark chocolate topped with whipped coconut cream.

Flawless Flavour

I think most people think white chocolate when they ponder passion fruit pairings and that works great - see here. But it also works amazingly with milk chocolate and, in this case dark chocolate.

I first experienced Itakuja 55% from Valrhona a couple years ago, when I attended a workshop led by one of their chefs, Sarah Tibbets. It's a single-origin, dark chocolate, double fermented with passion fruit. Naturally, I immediately fell in love.

With eggs and butter as the only other ingredients in this brownie-adjacent cake, the chocolate flavour is perfectly pronounced. Topped with whipped coconut and fresh passion fruit, it becomes a tropical hallelujah moment, or two.

I used the Sultan piping tip to pipe the whipped coconut onto the cakes, like I did with these. I love the cool design and the vessel it provides for adding fillings down the center of the topping.

Also works well with a dollop of ice cream, especially while the cake is still warm and fresh berries or compote of your liking. I also love it on its own, still warm form the bath. YUMMMMM!

Decadent, 3-ingredient, single serve Sous Vide Flourless Chocolate Cake made with passion fruit infused dark chocolate topped with whipped coconut cream.

I am still working on producing a less dense texture cake that could hold its own beside an oven-baked cake. You'll be the first to know when I do...

Print Recipe

Sous Vide Flourless Chocolate Cake

Decadent, 3-ingredient, single serve Sous Vide Flourless Chocolate Cake made with passion fruit infused dark chocolate topped with whipped coconut cream.
Prep Time25 minutes mins
Cook Time1 hour hr
Total Time1 hour hr 10 minutes mins
Course: Dessert
Cuisine: Sous Vide
Keyword: cake, chocolate, sous vide
Servings: 3
Author: i sugar coat it!

Ingredients

For the cake:

  • 29 grams butter
  • 116 grams chocolate I used Valrhona Itakuja 55%
  • 2 large eggs
  • pinch sea salt optional

For the topping:

  • 1 can coconut cream or milk
  • as needed super fine sugar or maple syrup
  • vanilla bean paste

For the garnish:

  • fresh passion fruit pulp or fresh berries of your choosing

Instructions

Make the cake:

  • Prepare a heavy duty pot with warm water. Attach the sous vide immersion cooker and set to 77ºC/170ºF. With caps on, add the empty canning jars to the water - this will warm the jars up and prevent breakage while cooking. Cover the pot with plastic wrap and allow to heat.
  • While the water heats, whisk the eggs in a medium bowl until light frothy, using a hand whisk or hand blender. Set aside.
  • Place the butter and chocolate in a small, heavy-duty saucepan and melt over low heat, stirring to combine well. If you are worried about scorching the chocolate, melt over a double boiler (a bowl over a pot of simmering water), or melt directly in the sous vide bath at 46ºC/115ºF.
  • Slowly drizzle the heated chocolate mixture into the eggs while whisking, until well combined. Carefully remove the jars from the water bath, place on a towel and pat dry. Remove the caps, lightly brush with butter or non-stick spray and evenly distribute the cake batter among the jars. Do not fill to top.
  • Attach caps to jars, finger-tips tight to avoid trapped air form cracking the jars while cooking. Submerge the jars in the heated water and cook for an hour. Carefully remove from water when time is up and place on a towel to cool. I like to remove the lids while they cool, to avoid condensation

Whip up the topping:

  • Chill the coconut milk overnight. This will allow the milk solids and liquids to separate. DO NOT shake the can when you remove it from the fridge. Flip the can over and open. Drain off the liquids and scoop the solids only into a well-chilled bowl. I chill my whisk attachment, as well.
  • Whip on high until soft peaks form. Add the sugar, vanilla bean paste and whip until full, fluffy, firm peaks form. Cover and keep chilled until ready to use.

Garnish and serve:

  • Top each cake with a dollop or two of whipped coconut cream and drizzle with fresh passion fruit pulp. Or you may substitute fresh berries or berry compote. Enjoy!
Simple, 3-ingredient, decadent, single serve Sous Vide Flourless Chocolate Cake made with passion fruit infused dark chocolate.
Simply blend, bag, bath and chill for foolproof, silky, creamy, flavourful Sous Vide Yuzu Lemon Curd to satisfy all your citrus cravings.

April 2019 By i sugar coat it! Leave a Comment

Sous Vide Yuzu Lemon Curd

Simply blend, bag, bath and chill for foolproof, silky, creamy, flavourful Sous Vide Yuzu Lemon Curd to satisfy all your citrus cravings.

Simply blend, bag, bath and chill for foolproof, silky, creamy, flavourful Sous Vide Yuzu Lemon Curd to satisfy all your citrus cravings.

Perhaps you're reading Sous Vide Yuzu Lemon Curd and asking yourself -"what's wrong with good old stove-top curd?" Not a damn thing, if you love standing and stirring a pot that may yield a curdled, clumped mess the second your attention wanders!

Making curds sous vide, whether in a jar or bag, is foolproof and yields silky, smooth flavour-packed results every time, using your favourite curd recipe.

Simply blend, bag, bath and chill for foolproof, silky, creamy, flavourful Sous Vide Yuzu Lemon Curd to satisfy all your citrus cravings.

Bags or Jars

This recipe can be cooked in a bag or jars. Bags are easy and convenient and I really appreciate them in instances where the cooked item needs to be immediately added to an ice bath after cooking. To minimize waste, I use reusable sous vide safe bags for non-meat items.

I also enjoy cooking in jars, where appropriate. If I am completely honest, it is my preference, especially for recipes that require liquids. More importantly, they help me do my small part for the environment by minimizing waste.

The biggest risk to cooking in glass is breakage - from thermal shock and pressure buildup. To prevent thermal shock, avoid immediate temperature change. I ensure my jars and lids are warm before introducing them to the water bath and cooled before introducing to cold conditions.

To avoid cracks and breakage during cooking, screw the caps on only fingertip tight (a trick picked up from Chef Steps). This allows the air that builds up in submerged jars to escape while cooking, without letting water in.

Simply blend, bag, bath and chill for foolproof, silky, creamy, flavourful Sous Vide Yuzu Lemon Curd to satisfy all your citrus cravings.

Zest: Stay or Strain

It's a matter of taste. The batch in the photo above contains the zest, while the batch below was strained of the zest. If you are using the curd in an application where the added texture may distract from the overall experience, then strain. Try to find and use untreated and organic citrus whenever using the zest.

In the batch below, I experimented with adding more butter than one would normally add to a curd and man was it amazing! It resembled a spread with a consistency similar to ganache or silky peanut butter. Perfect for sandwiching between cookies, including macarons.

Simply blend, bag, bath and chill for foolproof, silky, creamy, flavourful Sous Vide Yuzu Lemon Curd to satisfy all your citrus cravings.

How To Enjoy Your Curd

Yes, straight from the jar is a definite option! But if that falls outside your realm of what is civilized, then this selection of tarts, cakes, ice cream, ice pops and toppings may tickle your fancy.

Sweet Tip

If you have bubbles on the surface of the curd when transferred to the jar, after blending or before chilling, simply wave a lit torch across the surface of the curd and ZAP, bubbles no more! You'll see it in action in the video below.

Here's a quick video that was part of my #sousvidesista series on Instagram this past weekend. I use a bag for this batch. When using jars, I simply distribute the blended ingredients evenly among jars and cook for an hour.

Print Recipe

Sous Vide Yuzu Lemon Curd

Simply blend, bag, bath and chill for foolproof, silky, creamy, flavourful Sous Vide Yuzu Lemon Curd to satisfy all your citrus cravings.
Prep Time10 minutes mins
Cook Time45 minutes mins
Total Time55 minutes mins
Servings: 1 cups
Author: i sugar coat it!

Ingredients

  • 128 grams granulated sugar
  • 79 grams lemon and yuzu juce or all lemon juice, if yuzu not available
  • 57 grams unsalted butter
  • 54 grams egg yolks from 3 large eggs
  • 9 grams corn starch
  • 0.6 grams sea salt
  • 6 grams lemon zest from about 2 large lemons

Instructions

Prepare the water bath:

  • Fill a heavy-duty pot or heat-proof container with warm tap water. Attach the immersion cooker and set the temperature to 73.9ºC/165ºF. Cover to speed up heating.

Make the curd:

  • Combine all the ingredients, except the zest, using a hand whisk, immersion blender or blender. Pour the mixture into a sous vide safe bag or jars, add the zest and seal partially and add the bag to the heated water bath using the displacement method. If using jars, screw the cap on finger-tip tight, or attach cap and clips. Cook for 45 minutes, up to 1 hour.
    OR 
    Simply add all the ingredients, including zest, to a sous vide safe bag, seal and cook, as above. You will need to agitate the bag a couple times throughout the cook and blend post cook, in this scenario.
  • Prepare an ice bath close to the end of the cook. Once cooked, remove the curd from the water bath and shake the contents. If you prefer a smoother texture, strain off the zest. Place the cooked curd in the prepared ice bath to cool down for about 20 minutes. Transfer to an airtight container and refrigerate for at least 6 hours. Best when consumed within 2 weeks.
Simply blend, bag, bath and chill for foolproof, silky, creamy, flavourful Sous Vide Yuzu Lemon Curd to satisfy all your citrus cravings.
24-Hour Sous Vide Beef Brisket or how to turn a tough cut meat into a smoky, tender, mouthwatering masterpiece just in time for grilling season!

March 2019 By i sugar coat it! Leave a Comment

24-Hour Sous Vide Beef Brisket

24-Hour Sous Vide Beef Brisket or how to turn a tough cut meat into a smoky, tender, mouthwatering masterpiece just in time for grilling season!

24-Hour Sous Vide Beef Brisket or how to turn a tough cut meat into a smoky, tender, mouthwatering masterpiece just in time for grilling season!

We cooked up a generous cut of Sous Vide Beef Brisket for this week's instalment of #sousvidesista on Instagram. The footage was from back in the winter, but with the weather warming up, I'd say it's perfect timing!

Grab a nice chunk of brisket, mix up a homemade rub, grind some peppercorn and LET'S GET READY TO SOUS VIDE!

24-Hour Sous Vide Beef Brisket or how to turn a tough cut meat into a smoky, tender, mouthwatering masterpiece just in time for grilling season!

What's A Brisket?

Beef brisket is a tough cut from the breast section, making it a perfect candidate for a low, slow cook, sous vide style. How long and what temperature are a matter of taste and texture. It's usually boneless and sold in one of two cuts:

  • Point, which is fattier, more flavourful and the cheaper of the two cuts; and
  • Flat, the leaner and more expensive cut.

We've only been able to find the point a couple times, so we generally buy the flat and choose one that is accompanied by a generous bit of fat, throughout and on top. The leaner the cut, the drier the end result, so grab a fatty piece for a more succulent brisket.

24-Hour Sous Vide Beef Brisket or how to turn a tough cut meat into a smoky, tender, mouthwatering masterpiece just in time for grilling season!

Smoking... Pre or Post Cook

Cooking is a matter of personal preference and taste and those can change with mood, season, direction of the wind...

My preference is a smoked brisket, but I've also enjoyed it sans smoking. Back when we made this Sous Vide Beef Brisket, it was too cold and snowy to fire up the outdoor grill/smoker, so we pulled out our trusty Smoking Gun to add a little smoky flavour. No thick, black bark, like that produced with traditional smoking, but it is so handy and a breeze to use!

To contain the smoke to the kitchen, we turn the stove exhaust fan on high and work directly under, or close by. We place the item to be smoked in a sealable bag or plastic-wrapped bowl, leaving a small opening for the smoker nozzle. Then we let it rip for 5 minutes, in this case, then wrap it tightly and allow it to infuse for about 30 minutes.

We have cooked our fair share of meat, poultry and fish and we continue to play with pre and post smoking. My preference is to smoke before cooking, meat in particular - fruits and veggies, I prefer to smoke post-cook, while still hot in the sous vide bag. And if you don't have a smoker, or don't want your house wafting with mesquite, hickory, applewood or some other delicious aroma, there is always liquid smoke.

24-Hour Sous Vide Beef Brisket or how to turn a tough cut meat into a smoky, tender, mouthwatering masterpiece just in time for grilling season!

Temperature and Timing

We have cooked brisket for 12, 24 and 36 hours at various temperatures, depending on our mood and use - tender, fall-apart, meaty, sliceable, succulent.

The second photo from the top may look on the dry side, but it wasn't. Although it wasn't as juicy as the one below, it was meaty, firm and steak-like in texture. We cooked that one at 57.2ºC/135ºF for 36 hours.

We enjoyed it with a green salad and homemade fries, cooked sous vide BTW. Yes, some of the best fries EVAH - a fluffy, melty interior wrapped in a crisp shell. But I digress a little...

The brisket below was also cooked sous vide and that is a crappy photo from a couple years ago. It was one of my favourite - flavourful, succulent, tender amazingness. This one we cooked at 68.3ºC/155ºF for 24 hours. You can also take it to 36 hours without ruining the end result.

We paired this one with polenta, greens and used the bag juices to create a gravy that was the perfect topping for a deliciously, comforting meal. You'll catch a glimpse of that dish in the video below.

24-Hour Sous Vide Beef Brisket or how to turn a tough cut meat into a smoky, tender, mouthwatering masterpiece just in time for grilling season!

So, have you started cooking sous vide? I am pleased to report that I have converted a total of twenty+ friends, colleagues and subscribers/followers. There may be more...if you are one, let a sista know! 😉

Print Recipe

24-Hour Sous Vide Beef Brisket

24-Hour Sous Vide Beef Brisket or how to turn a tough cut meat into a smoky, tender, mouthwatering masterpiece just in time for grilling season!
Prep Time45 minutes mins
Cook Time1 day d
Smoking30 minutes mins
Total Time1 day d 45 minutes mins
Course: Main
Cuisine: Sous Vide
Keyword: brisket, sous vide
Servings: 10
Author: i sugar coat it!

Ingredients

For the rub:

  • 2 teaspoons garlic powder
  • 2 teaspoons onion powder
  • 1 tablespoons mustard powder
  • 2 tablespoons smoked paprika
  • 2 tablespoons chipotle
  • 2 tablespoons each black and pink peppercorn freshly ground
  • 2-3 teaspoons coarse sea salt or to your taste

For the meat:

  • 2.4 kilos brisket point or flat
  • 1-2 tablespoons Worcestershire sauce
  • fresh thyme to taste
  • smoking chips if using a smoker
  • 1 tablespoon liquid smoke optional, if not using a smoker

Instructions

Make the rub:

  • Whisk all the ingredients together in a bowl or shake in a lidded jar. 

Season the meat:

  • Wash the meat and pat dry with clean paper towels. Drizzle on the Worcestershire sauce and massage into the meat on all sides, then apply the dry rub liberally and massage into the meat.
    OR
    Heat a skillet with a little oil and pre-sear the brisket on all sides for about 2-3 minutes. Remove from the heat and season, as above.

Smoke the meat (optional):

  • Place the seasoned meat in a stainless steel bowl or ziplock bag. Cover the bowl with plastic wrap, or close the bag - in either case leave an opening big enough to accommodate the smoker nozzle. Insert the nozzle, add some wood chips to the smoker (I like hickory or mesquite for this application) and light the smoker. Infuse for about 5 minutes, remove nozzle and cover/close and allow to infuse for about 30 minutes.
    OR
    Or skip this step and add a few dashes of liquid smoke to the meat after bagging (below).

Heat the water bath:

  • While the meat is infusing, fill a heavy-duty pot or heat-proof container with warm tap water. Attach the immersion cooker and set the temperature accordingly:
    68.3ºC/155ºF for 24 hours
    57.2ºC/135ºF for 36 hours
    Cover the container with plastic wrap or foil to help speed up the heating.

Cook the meat:

  • If already in a ziplock bag, add to the heated water and remove the air using the water displacement method. I suggest you double up this type of bag if doing the longer cook.
    If the meat is in a bowl, add to a vacuum bag and seal with a vacuum sealer along with the thyme.
    Submerge in the heated water, cover to retain heat an water level and cook per above times.

Finish:

  • Place a cooling rack over a rimmed pan. Remove the cooked meat from the water (be sure to check the internal temperature for doneness). Remove from the bag and place on the rack to drip dry, or you can place on a paper towel-lined plate. Reserve the bag juices for sauce, gravy or stock.
  • Heat the grill or skillet over high heat and sear for 1-2 minutes on each side, or use a torch. Slice to your preferred thickness and serve.
Sous Vide Beef Brisket or how to turn a tough cut meat into a smoky, tender, mouthwatering masterpiece just in time for grilling season!
Creamy, decadent, fuss-free and foolproof Sous Vide Sweet Corn Gelato made two ways to satisfy your sweet or savory tooth!

March 2019 By i sugar coat it! Leave a Comment

Sous Vide Sweet Corn Gelato

Creamy, decadent, fuss-free and foolproof Sous Vide Sweet Corn Gelato made two ways to satisfy your sweet or savory tooth!

Creamy, decadent, fuss-free and foolproof Sous Vide Sweet Corn Gelato made two ways to satisfy your sweet or savory tooth!

Last weekend I shared the making of this Sous Vide Sweet Corn Gelato on my instastories. I realize it's a bit early - the best local corn isn't available until late summer - but, anything to help shake off the winter blues.

I made the initial batch back in 2017, and yes, you guessed it... yada-yada-yada 2019. The long gap is sometimes due to lack of time, forgetfulness, but mostly multiple remakes to try to bring you the best versions of what I/we make. Plus, I needed to make a bunch of variations and ensure quality control, cause that's just how we do! 😉

Creamy, decadent, fuss-free and foolproof Sous Vide Sweet Corn Gelato made two ways to satisfy your sweet or savory tooth!

Cob or Canned?

You will notice the first batch was made back in September of 2017, when local corn was in abundance and bursting with flavour. You can find corn on the cob in stores pretty much year-round here, but using freshly picked, in-season, locally grown corn is such a treat.

I would not recommend using canned corn as a first choice, however - they are usually packed in a salt water solution. Although, I guess if you are in a pinch, you could rinse them... Frozen corn might work, as well, but I have not tried it, so can't confidently speak to it.

Let's just agree fresh, sweet corn is best! Even better if you can get it at a pick-your-own farm near you. Corn is at its optimal flavour and texture the day it is picked. The longer it sits around, the naturally occurring sugars turn to starch, which negatively impacts the flavour and texture.

Creamy, decadent, fuss-free and foolproof Sous Vide Sweet Corn Gelato made two ways to satisfy your sweet or savory tooth!

Plain or Paired?

The choice is yours! The sweet corn flavour really takes centre stage when made solo - scoops of creamy, fresh, not too sweet, soft yellow delight. The Dude really loves the sweet corn solo. I like variety, I get bored otherwise, so I tried a number of combos - some great, others require a little more finessing.

So, I made a large batch and separated it out to create:

  • Sweet Corn - with a touch of vanilla. For a more pronounced corn flavour, I blended the corn/milk/cream/sugar/salt mixture after simmering, then strained it before adding the yolks. A favourite for all who tried.
  • Sweet Corn and Lime - the lime zest adds a refreshing touch, but I like to add the lime zest after churning, so it doesn't clump. If you can get your hands on kaffir lime or yuzu you will be pleasantly pleased with the end result. The lime, salt and corn reminded me of Mexican street corn, so I tried...
  • Mexican Street Corn - shown in one of the photos, but still a work in progress that I hope to share with you soon.
  • I love corn salads with dark berries, especially blackberries. I did not have any on hand, so I used wild blueberries and added a little lime zest.
  • Also played around with cream cheese, fromage blanc, mascarpone and creme fraiche.
Creamy, decadent, fuss-free and foolproof Sous Vide Sweet Corn Gelato made two ways to satisfy your sweet or savory tooth!

Fool-Proof Ice Cream Base

Sous Vide is great for a number of savoury applications, but it is my go-to for making creme anglaise based desserts and dishes. My eggs never overcook or curdle, yielding the most silky, decadent results that may not always be the case when done stove-top.

The ability to walk away and not stand eagle-eyed and stirring, and not have your precious custard clump up is a dream. I am not saying stovetop sucks, I have had may success preparing ice cream bases stovetop. With sous vide, I am not as stressed.

Also, the flavours and aromas of your ingredients aren't going up in steam, but are trapped in the bag where the fats cling to them and keep them deliciously safe and snuggled.

Creamy, decadent, fuss-free and foolproof Sous Vide Sweet Corn Gelato made two ways to satisfy your sweet or savory tooth!

Tips For Sous Vide Gelato Success

  • Start with fresh ingredients - there aren't a lot of ingredients in this recipe, so the quality, or lack thereof, will tell the final taste.
  • Use sous vide safe bags - I talked a bit about it here.
  • Combine the ingredients before bagging for best results - whisk by hand or in a blender just until combined. I have found whisking by hand produces far less foam than blending. In either case, however, spoon off the foam. It's a real pain in the ass trying to do the water displacement with a bag filled with foam.
  • To agitate or not - when I add the ingredients in the bag without whisking or blending, I agitate the bag a couple times throughout the cook. I have found there is no real need to do so if the mixture is whisked or blended prior. Adds to the whole set it and forget it approach that I like about sous vide.
  • Ice, ice, baby - be sure to prepare a water bath close to the end of the cook, and immediately submerge the custard and leave to cool completely.

I hope you will give this Sous Vide Sweet Corn Gelato a try when the weather warms up and sweet local corn is plentiful. Tag me on Instagram @sousvidesista or @isugarcoatit.

Print Recipe

Sous Vide Sweet Corn Gelato

Creamy, decadent, fuss-free and foolproof Sous Vide Sweet Corn Gelato made two ways to satisfy your sweet or savory tooth!
Prep Time20 minutes mins
Cook Time30 minutes mins
Freeze Time1 day d
Total Time50 minutes mins
Course: Frozen Dessert
Cuisine: Ice Cream
Keyword: gelato, sous vide
Servings: 10
Author: i sugar coat it!

Ingredients

  • 242 grams 35% whipping cream
  • 733 grams whole milk
  • 232 grams granulated sugar
  • 2.5 grams sea salt
  • 5 corn on the cob
  • 5 egg yolks
  • 51 grams creme fraiche
  • 1 vanilla bean optional
  • 1 lime zest, regular, kaffir, yuzu optional
  • berries of your choosing optional

Instructions

  • Set up your water bath and heat to 82.2ºC/180ºF. Cover the the container to help speed up heating and retain the heat.
  • Shuck, wash and remove the corn kernels. Place in a medium saucepan along with the cream, milk, sugar and salt. Bring to a simmer. Allow to cool and infuse. For a more pronounced corn flavour, combine the heated mixture in a blender, then strain. Or the strain the liquids into a blender or bowl. Save the kernels for another dish!
  • With your warm liquids in a blender or bowl, add the egg yolks and vanilla (if using), and blend to combine. Spoon off the foam.
  • Pour into a bag suitable for sous vide and use the displacement method to remove as much air as possible, while submerging in the heated water. Cover and cook for 30 minutes.
  • Close to the end of the cook, prepare an ice bath (cold water and ice). When the custard is ready, remove it from the water bath and immediately place it in the ice bath. Allow to cool completely.
  • Once cooled, whisk in the creme fraiche and place in the refrigerator for a couple hours to chill, then churn it according to your ice cream maker manufacturer's instructions. Fold in your fruits and zest.
  • Transfer to a freezer-safe, airtight container and freeze overnight for best results. Enjoy!
Creamy, decadent, fuss-free and foolproof Sous Vide Sweet Corn Gelato made two ways to satisfy your sweet or savory tooth!
  • « Go to Previous Page
  • Page 1
  • Page 2
  • Page 3
  • Page 4
  • Page 5
  • Page 6
  • Interim pages omitted …
  • Page 51
  • Go to Next Page »

Primary Sidebar

Never Miss A Happy Ending...

Previous Sweetness...

Search

Filter by Category

Filter by Date

SWEETEN YOUR INBOX!

All Content Including Images Copyright Jacqueline | I Sugar Coat It© 2026