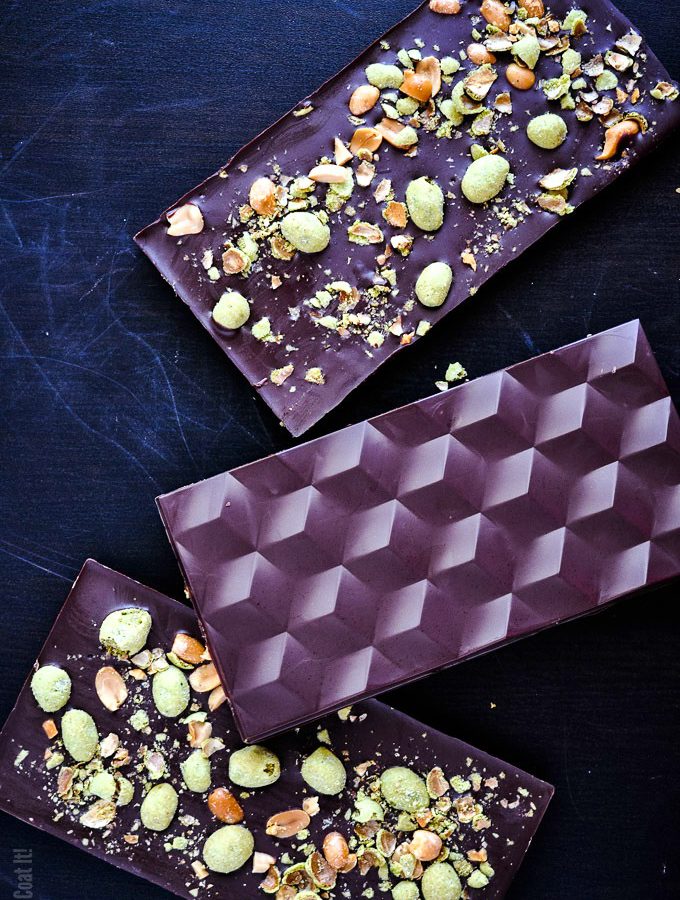
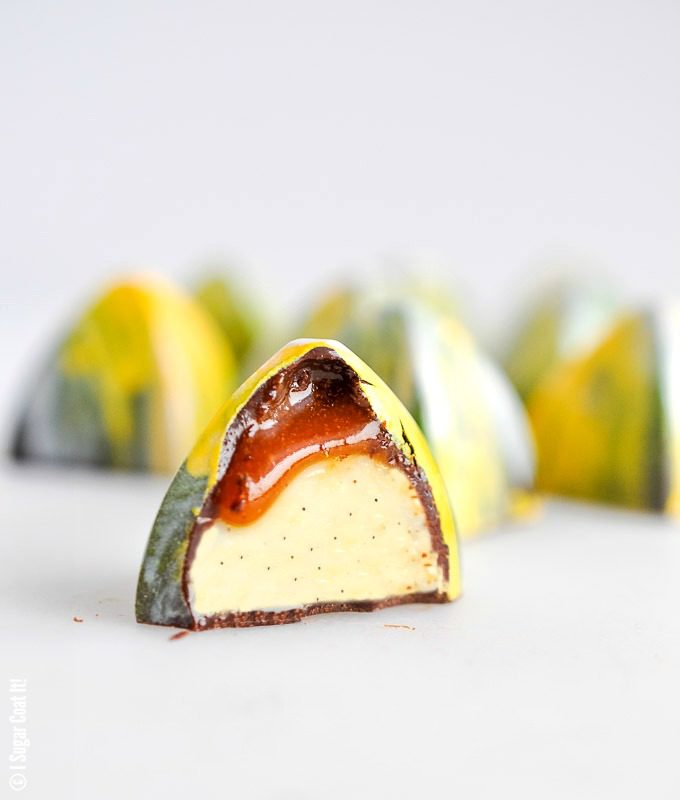
Wasabi Peanut Chocolate Bar is dark chocolate, paired with wasabi covered peanuts for a treat to satisfy both your sweet and spicy tooth.
 Happy first day of fall, friends! Except for a wet, dreary Saturday this past weekend, the weather here has been fantastic! Summer turned up the heat for her farewell and it looks like she plans to ride it out to the weekend. But, enough weather talk. Let’s talk chocolate - as in these Wasabi Peanut Chocolate Bars!
Those who know me well are fully aware of my addiction to wasabi covered peanuts. Given my aversion to spicy food, one would think that I wouldn’t get anywhere near wasabi, much less enjoy it. But such is the confusingly double life of a gemini.

A few years back when I was in school, I learned that the prettily piped green stuff that was served alongside my sushi-to-go lunch wasn't authentic wasabi. WHAAAA! Instead, it's horseradish mixed with Chinese mustard and green food colouring. But, not having had the real deal I went along with the impostor, half enjoying, half despising it.
I had my first taste of the real deal a couple years later, when a friend gifted me some premium semi-aquatic wasabi straight from his homeland. I get good tingles just thinking back to my first whiff and taste - earthy, deep, rich with that distinctive heat. It was a real experience!
 I was a poor student at the time, so once that supply ran out, it was back to the best impostor crap I could afford.
One such impostor came in the form of 'wasabi-flavoured' peanuts - the inspiration for this Wasabi Peanut Chocolate Bar. I still semi-secretly enjoy the store-bought ones, but have never been completely comfortable with the ingredient list.
So with a little basic panning skills under my belt and a batch of grossly over-priced freeze-dried wasabi, I set out to create my own wasabi peanut snacks. It took me a few expletive-filled, muscle-burning attempts, but I did it!!!
What's your favourite snack that you would like to see paired with chocolate?

Wasabi Peanut Chocolate Bar
Ingredients
- 300 grams dark chocolate
- 50 grams wasabi peanuts
Instructions
- Pre-crystallize (temper) the chocolate according to the instructions provided with your chocolate of choice.
- If using a mold, prepare the mold by buffing with cotton or cheesecloth and warm the mold.
- Pour the chocolate into the mold and tap a few times to release any air bubbles. Scrape off excess chocolate.
- Crush some wasabi-covered peanuts and sprinkle over the bars. Allow to set at room temperature for a few minutes, then pop them in the fridge for about 10 minutes. (setting time is dependent on the temperature in your home)
- Remove from fridge and let stand a couple minutes at room temperature. Invert the mold and lightly tap on the counter to release the bars.
- If you are not using molds, line a sheet pan with parchment paper and pour the precrystallized chocolate onto the parchment and use an angled spatula to spread an even layer, or tap the pan on the counter to level the chocolate out.
- Sprinkle with topping and you can leave to set, then break into pieces, or allow to set partially and use a pastry cutter in a shape of your preference to cut the bark. Allow to set completely, then remove the shaped pieces.
- Store in an airtight container at room temperature.


 What do I love about Sunday, you ask? (OK, even if you didn't...) Sleeping in and brunch! One involves an extra large, plush, snuggly elephant (and the Dude). The other, eggs. Enter these single serve Garden Fresh Bacon Cheddar Frittata.
 We picked the last of our garden haul this weekend and it bothers me that we won't be able to do so again for quite some time. 😢 I think the squirrel thieves I've spied snacking from time to time, share in my disappointment.
 These single serve Garden Fresh Bacon Cheddar Frittata are packed with organic eggs, juicy tomatoes, caramelized onions, three types of mushrooms, peppers, asparagus, jalapeno, fresh bacon, cheddar, thyme and lots of love. We made them on the grill in the most adorable mini cast iron skillets.

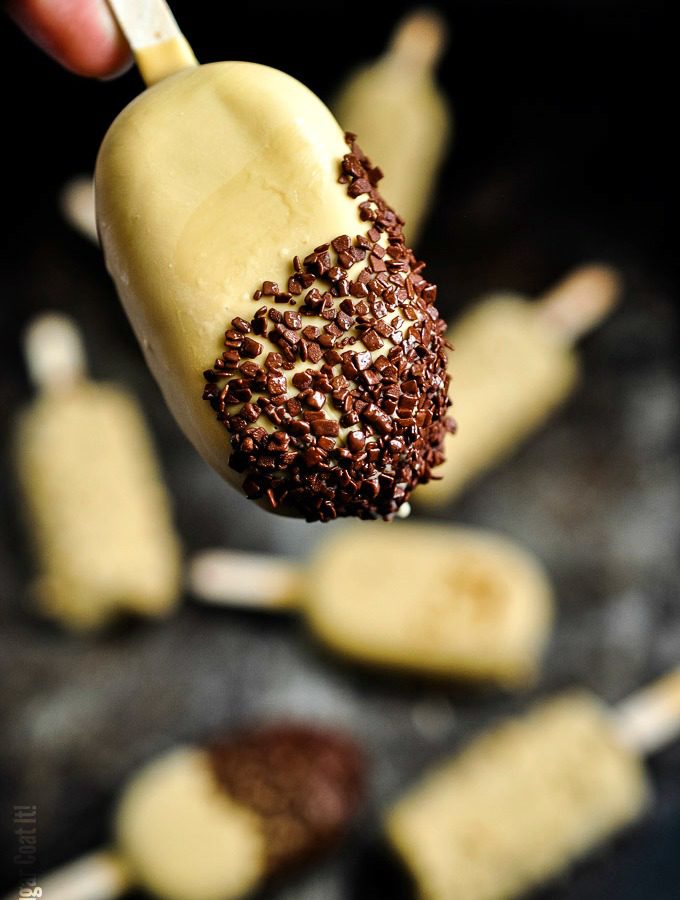
 I realize your mind has likely already turned to matters of fall, but we still have a few days of summer left. SOOO... I'm sharing what will likely be my last popsicle recipe for the season. Hazelnut Milk Triple Chocolate Popsicles!
 These were so GOOD! Why, you ask? Well, let's start with a generous addition of
  It won't be long before the lawn is covered with jewel-toned leaves and cool, crisp air replaces the humidity and heat. I'll be ready with my boots and sweaters, but for now, let's soak up all that summer has left to offer and enjoy a few Hazelnut Milk Triple Chocolate Popsicles!


 It's BACK TO SCHOOL already!! With all the anxiety associated with this annual event, I thought these Back To School Strawberry Chocolate Crayons might help to calm a few nerves. A good berry chocolate combo tends to do the trick for me.
 I also remember my first set of crayons. That bright yellow and green box filled with what this budding sweet-tooth took to be edible, only to be met with grave culinary disappointment. Followed by hours of adding colours to every surface I shouldn't.
 Alright, let's wipe that freakish glimpse into my childhood from your memory with these Back To School Strawberry Chocolate Crayons.

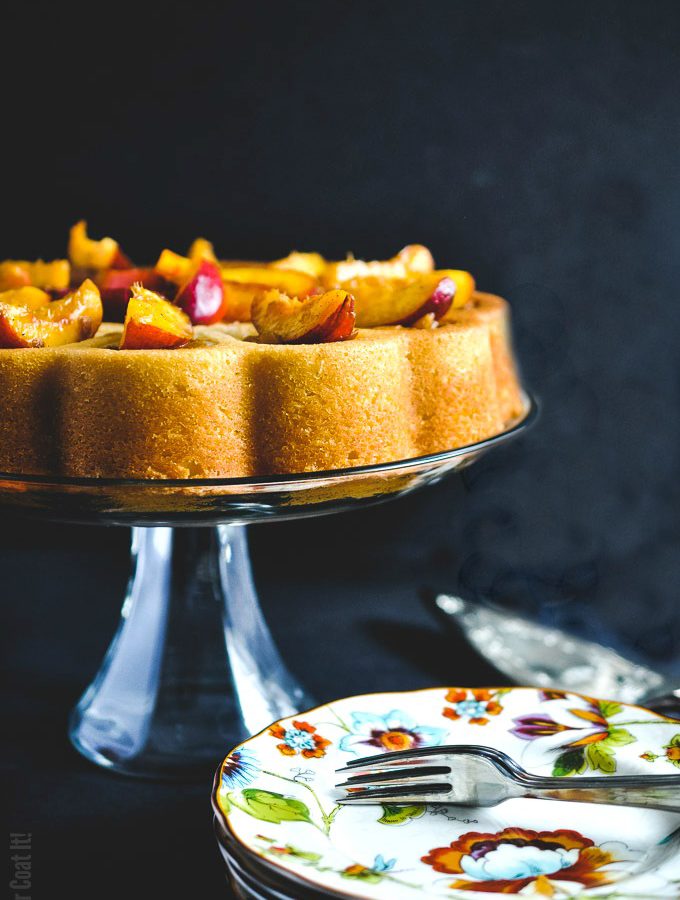
 This Grilled Bourbon Peach Browned Butter Cake is a sure sign summer is leaving the building. I should be angry, but... STONE FRUIT, YO!!!
 The fuzz freaks me out - even after it becomes less noticeable when washed - so I sometimes remove the skin. A real pain, but a small one, compared to my many other OCD tendencies and hangups.
 Did you know that in addition to yellow and white peaches, there are also doughnut peaches (or Saturn peaches that are slightly sweeter and don less fuzz). SHUT THE FRONT DOOR!! Or that some peaches are freestone (flesh separates easily from the stone) and others, clingstone (no explanation needed...)?
 I used both peaches and nectarines for this Grilled Bourbon Peach Browned Butter Cake. I grilled the fruits first, which made skinning a breeze, then I cooked them briefly in little brown sugar and spices before letting them soak overnight in their juices, spiked with a touch of bourbon.
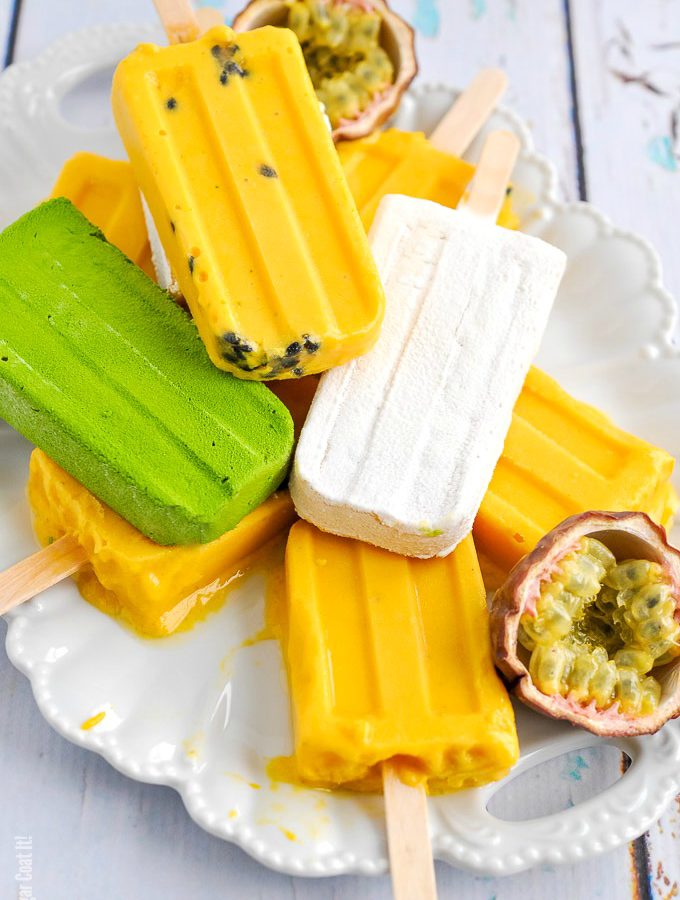
 There is just no letting go of summer with one of these Mango Passion Fruit Popsicles in each hand! Speaking of summer... were you as consumed by the Olympics as I? I was glued to the gymnastics and track events, in particular.
 Ummm - back to these Mango Passion Fruit Popsicles.


 OK, did I miss something? The Canadian National Exhibition (CNE), or the Ex, to which it is more commonly referred opens this week. That is basically the beginning of the end - the unofficial end to summer that is. Queue the ugly cry...
 You may remember a few posts back I shared with you that I was a bona-fide Chocolatier! I get a little chuckle saying that. 🙂 The certificate is tucked away on a book shelf and I still have a full-time career that I am not yet ready to walk away from. The Dude, however, thinks I should 'start building a sweet empire'. He clearly believes in me more that I do. Story of my life.
 In the meantime, let's dissect these little gems. Ignore the purple ones for now, I'll share in a future post. This post is all about the goat - goat's milk and cheese, that is. I seem to have a thing with
  These photos are from an earlier batch when I was playing around with a few techniques for layering colour. These are a combination of finger painting and airbrushing. I was not completely satisfied with the look, however.


 I may not have the skills of that New York bartender who took a job in Jamaica and fell in love, but I can still wow my friends with a few cocktails. No fancy bottle-slinging needed for these Molecular Mojito Spheres, just a few standard bar ingredients and your grade nine chemistry kit.
 The kit comes complete with Sodium Alginate, Calcium Lactate, Soy Lecithin, a slotted spoon, two pipettes, one small spheres silicone mold and three recipes to get you started. The first two items aren't typically found in the everyday kitchen, but can easily be bought. So this is certainly not out of reach for anyone interested in giving these a try. They are quite easy to make and such fun at a party!

