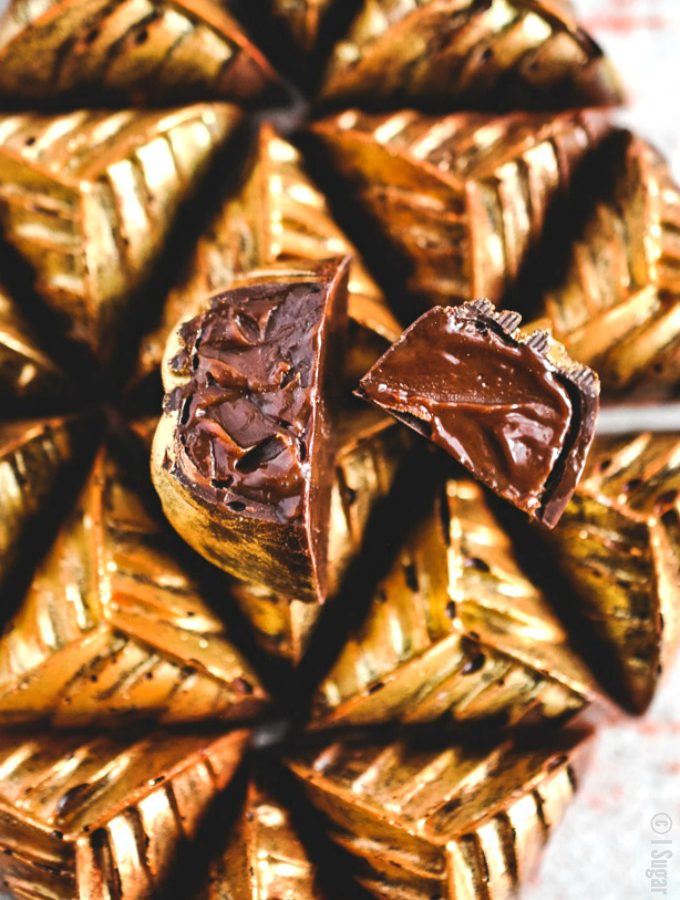
Salted Caramel Ganache Dark Chocolate. Bittersweet couverture molded and filled with a decadent salted caramel ganache.
 Today I bring you Salted Caramel Ganache Dark Chocolate bonbons!
I enjoy life most when it takes me to places I had not dreamed, or intended, only to learn it was exactly where I needed to be. Like a wrong turn on a road trip that leads to the juiciest, most perfectly grilled burger. Or missing a train and meeting the ONE on the next. So it has been, with blogging.
I started this blog a few years ago as a creative outlet, a place to document my adventures and mishaps in what was unfamiliar territory at the time, my kitchen. Views, shares, impressions, ads, clicks and SEO had not yet found their way onto the menu. Ahhh, the good old days! The more time I spent in the kitchen, the more my appetite grew for learning. Two years into blogging and the girl who avoided kitchens found herself enrolled in culinary school. HUH!?!
 Unlike those whose love of food and its preparation started them blogging, it was blogging that sparked my passion for the culinary arts. I was already a pro at enjoying great food, but the real pleasure now comes from creating, preparing and watching what I make being enjoyed by friends and family. It's oddly intoxicating!
Sew Pretty, my very first blog, which was open to only family and friends, focused on my fashion and interior designs and book club - a few of my other passions. After taking a series of Wilton cake decorating courses at a local craft store on a whim, I Sugar Coat It was born and filled with decorated cakes, sugar flowers and decorated cookies. Smoothies, savouries, frozen fun and pastries were all thrown into the mix, over time. Now, here we are - chocolate, my first and ever-lasting love.
[Tweet "When chocolate and salted caramel mate: Salted Caramel Ganache Dark Chocolate"]
There have been times throughout my blogging years when I've reached the point of shutting it all down - last week, for instance. Blogging is a great deal of work and I do it all on my own, in addition to a full-time career. I enjoy it! It is beyond frustrating, however, to have someone just grab your work, remove your watermarks and pose it as their own. Even worse, when fellow bloggers you admire don't credit less popular bloggers. I could go on and on about the dark, ugly side of blogging, but that's a whole other post.
To keep going, I remind myself of the wonderful folks I've befriended through blogging, the opportunities I've had to work with some great brands, the creative freedom it provides, the exciting paths down which it has led me and the unknown adventures that await.
 Now, back to these little Salted Caramel Ganache Dark Chocolate gems. Salted Caramel can most certainly hold its own, but when paired with dark (or milk) chocolate as a ganache, it's catapulted to superstar status. Don't take my word for it, whip up a batch and find out!
Check out my Confections page for more chocoliciousness!


Salted Caramel Ganache Dark Chocolate
Ingredients
- 40 grams water
- 10 grams glucose
- 50 grams sugar
- 137.5 grams cream 35%
- 250 grams dark chocolate like Valrhona Caraibe
- fleur de sel
Instructions
- To a deep pot, add the water, glucose, sugar and cook until caramelized. Remove from heat.
- Warm the cream in a separate pot. Remove from heat and gradually add to the caramelized sugar.
- Stir in salt to taste.
- Place chocolate in a medium bowl. I used discs, but If you buy in blocks, chop finely to allow for faster melting.
- Pour the salted caramel over the dark chocolate and use a hand whisk to stir until combined and smooth.
- Allow to cool at room temperature.
- Once cooled, pipe into prepared molded chocolate, allow to set and then cap. Check out my Dulcey Bonbons post to learn how.
This post contains affiliate links. Each purchase you make using these links may result in a small commission for my blog, without additional cost to you. Thank you for your support in making I Sugar Coat It a little sweeter!

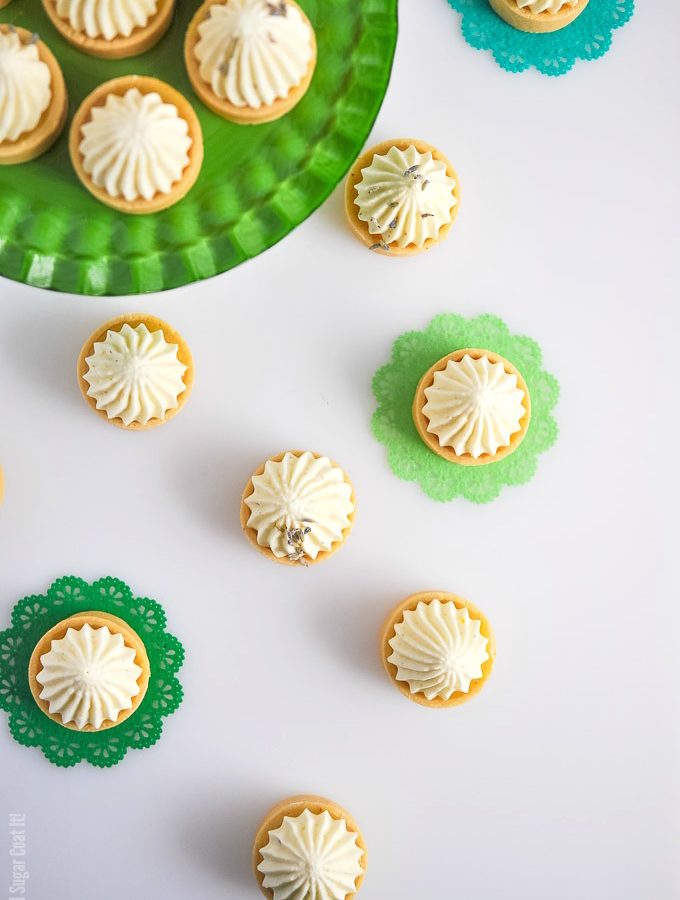
 These little sweet pastry cups of sunshine are simply mouthwatering! If you don't make these Lemon Lavender Coconut Mousse Mini Tarts at least once, we can no longer be friends. Seriously, I am fickle like that and apparently the world's biggest procrastinator.

 The lemon-lavender curd was most certainly the star in these Lemon Lavender Coconut Mousse Mini Tarts. I made the lavender-lemon sugar a couple days before, by simply blitzing some sugar, lemon zest and culinary lavender buds in the food processor - one teaspoon lavender to one cup sugar is a good ratio for me. I could have gone the route of a meringue topping, but if you look through my blog you'll discover my love of flavouring whipped cream. It's just so quick and easy! The lemon curd coconut mousse brought serious star-power as well, without competing with the filling. It took a mini intervention to stop me from devouring it by the spoonful straight from the bowl. Paired with a little raspberry coulis and my attempt at plating, these went over splendidly with our guests.


 Can you believe that Mother's Day is just over a week a way? I swear 2016, like its predecessor, seems to be kicking my ass and leaving me in the dust asking where the time has gone. While I ponder that...
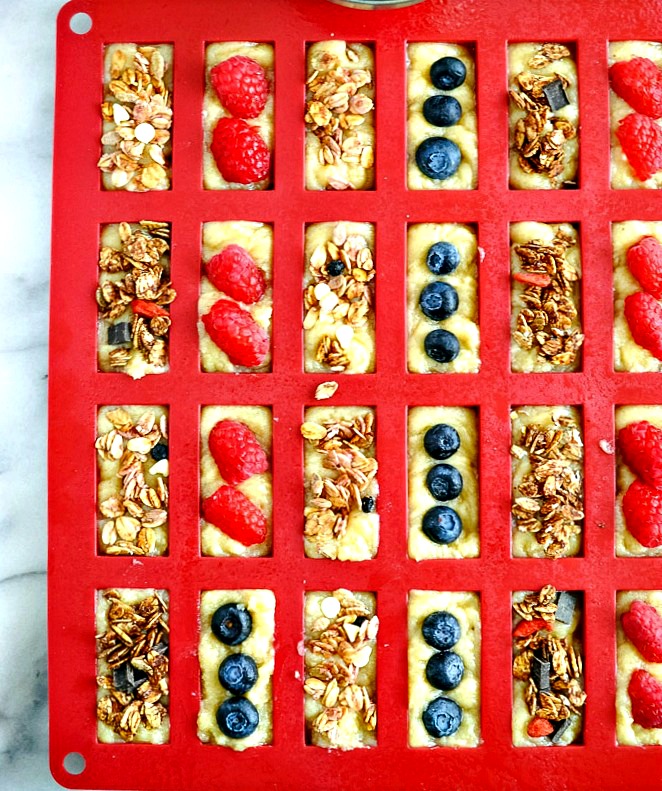
 If you have never had, or heard of financiers, they are small French cakes that have a perfectly buttery crisp exterior that gives way to a light, moist interior. They are generally made with almond flour, but get their distinct flavour from the beurre noisette, or simply, browned butter. I love browned butter and use it in
  These mini bars are typically made in rectangle molds to resemble gold bars (or ingots), said to be developed by a pastry chef with a shop in the French financial district in the nineteenth century. They were to be a quick, on-the-go, cutlery-free and mess-free treat for the busy financiers (bankers, traders etc.) in the area. Brilliant, right! I love a food with a good back story.
 Patty Pinner's book, Sweet Mornings - 125 Sweet and Savoury Breakfast and Brunch Recipes, offers a plethora of delicious and comforting dishes page after page. In addition to the recipes, Pinner offers a list of essential ingredients and indispensable kitchen tools at the onset and snippets of the people and stories behind each recipe.
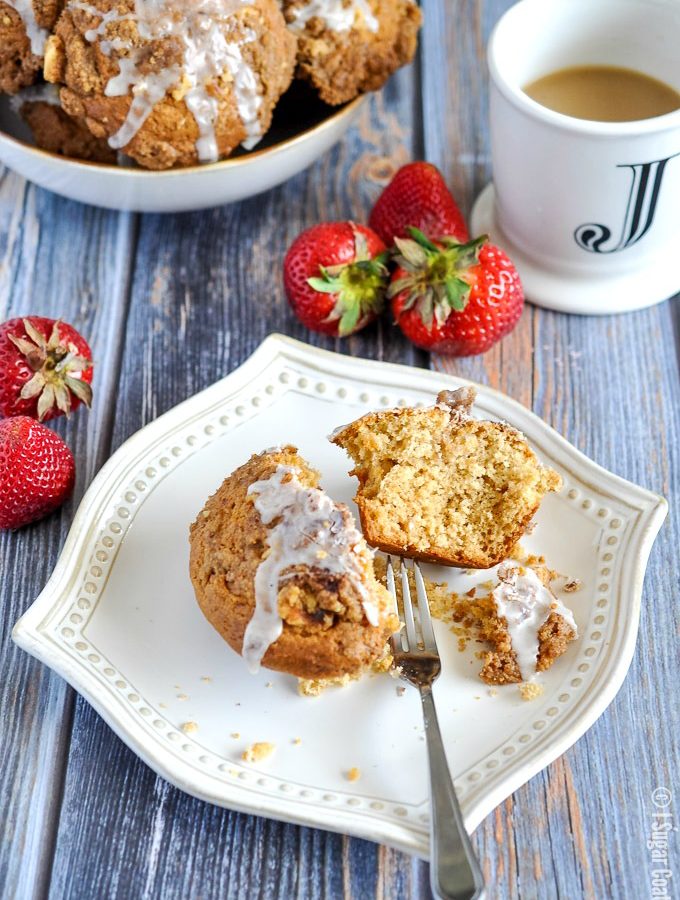
 There are enough recipes packed into this book for a year's worth of weekend brunches. I was immediately drawn to the muffins on the cover when I received my copy of the book from the folks at
  My baking preference is from scratch, so I was pleased to see that most of the recipes in the book were from scratch. Although a photo did not accompany every recipe, there were enough well-photographed, full-page images to hold my interest. I would have loved to have seen more images in place of the non-scratch recipes. I usually scale my ingredients and appreciate when books provide metric measures as well.
 The folks at Agate Publishing will provide one winner with a copy of Patty Pinner's book, Sweet Mornings - 125 Sweet and Savoury Breakfast and Brunch Recipes.

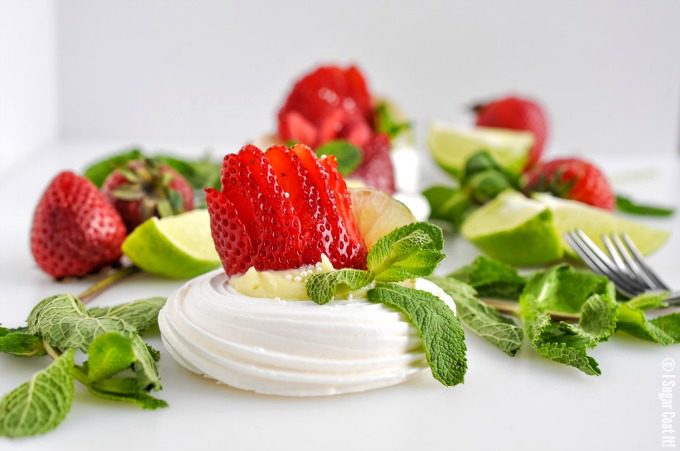
 We are finally expecting spring-like weather! YAAAYY! With the warmer weather ahead, my mind has turned to easy, colourful desserts for outdoor entertaining, like these Key Lime Meringue Nests. Think... Mother's Day brunch!
 After a couple drinks and a whole lot of sobbing and cussing, I took a look at the box of meringues sitting on the counter between us and rolled my eyes. I looked back at my friend and asked if she had planned to use them for shots, at which she laughed/cried/laughed...
 My preference is for a meringue with a crisp outer shell that gives way to a marshmallow-y interior - these
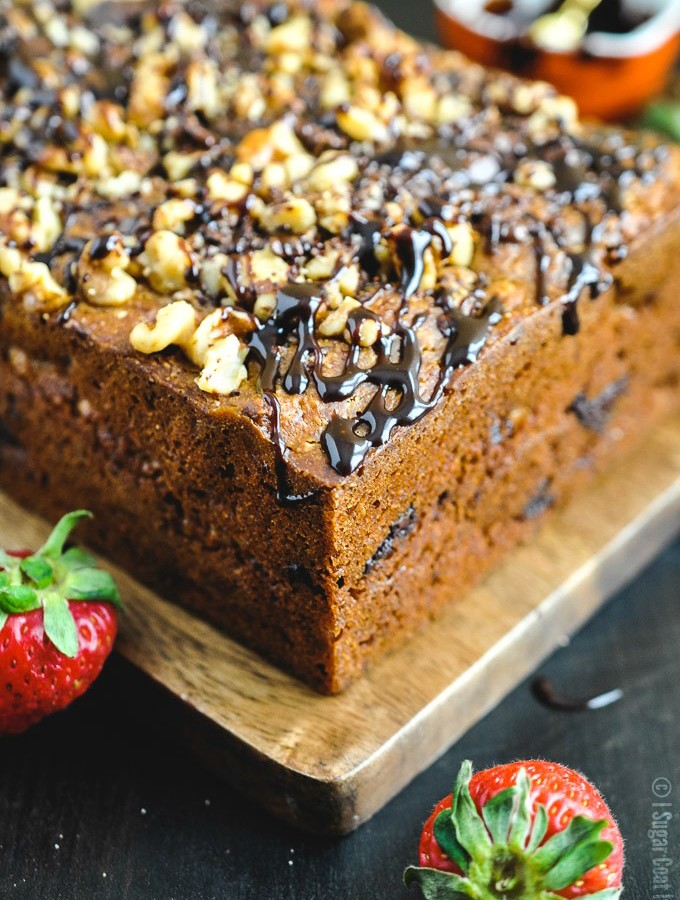
 We polished off this Walnut Chocolate Chunk Caramelized Banana Bread over a week ago, but I am salivating as I write this post. I know, I know... it's banana bread. It's been done a million times. You'll never see me make claims of anything being 'the best', but I gotta say this is pretty damn amazing.
 My grandmother would sometimes pick the bananas while they were still green and cook them as a side dish. My undeveloped palate just could not deal. She would boil them with a little salt and they would make their grey, slimy way onto our plates alongside more desirable items. Me, being the uber-stubborn child I was, would eat around them, to my grandmother's disdain. She and I had many a stand-offs when it came to food. Now that I know a little about
  So yeah... I LOVE bananas and banana bread! I make it quite often, but have only shared
  How about
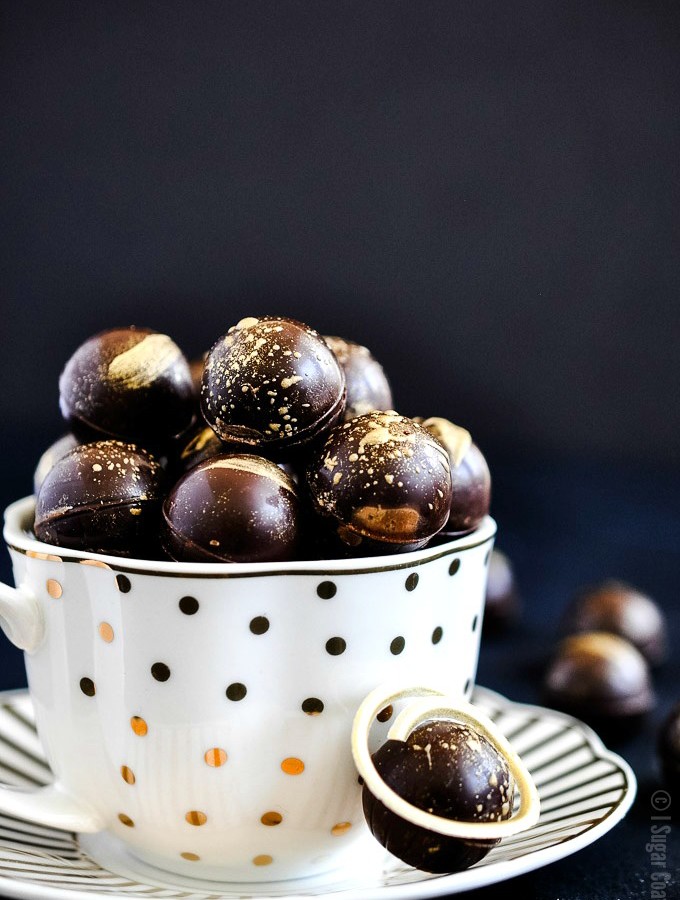
 I've been keeping a dark, little secret, ya'll. But before I spill my beans... OMGEEE!! Did you know that Baileys is available in Salted Caramel? I wasted no time grabbing a bottle (or two) when I saw them at the LCBO. I think it worked splendidly in these Baileys Salted Caramel Dark Chocolate Truffles!
 OK, I think I am ready to spill the beans. Hold on to your chef's hat my friends, I'm officially a bonafide Chocolatier!! Well, a trained Chocolatier that is - I'll be sticking with my full-time career for a while longer. I've dropped a few hints about my training in past chocolate-related posts, but I could not bring myself to tell you what I was up to. Then I became ill and had to take an extended break and wasn't sure when, or if, I would be picking it up again. The thing is, laying in bed gets old pretty fast, so instead of a year break, I was back at it in half the time.
 I'll tell you more about the experience and share some creations and techniques with you in future posts, including my chocolate show-piece from my final. Till then, I'm pretty sure I hear these Baileys Salted Dark Chocolate Truffles whispering your name...


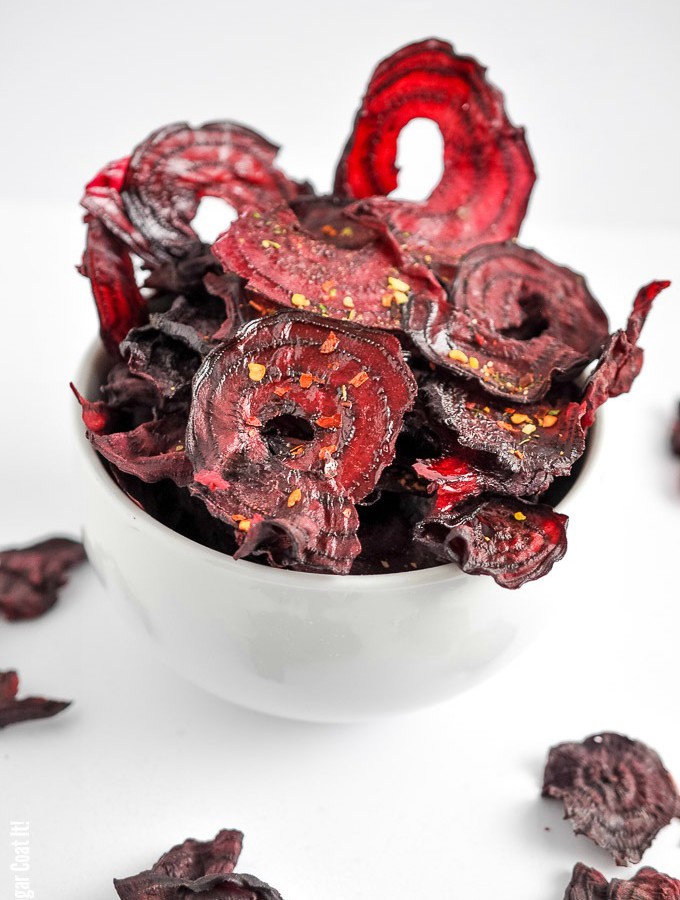

 Instead of using a knife to slice the the beets, I ran them through my spiralizer, which produced paper-thin beet ribbons. So pretty, but so very messy. On the bright side, this meant shorter drying time. When I sliced them, they would take ten to twelve hours to produce crispy chips. This spiralized method had me snacking within six to eight hours.
 This time around, I decided to go the raw route - or what I refer to as the lazy route. I skipped the blanching, plunging in cold water, draining, patting with paper towels, seasoning and dehydrating and just washed, peeled, sliced, seasoned, dehydrated and snacked and snacked and snacked!

 Question. If you were chocolate, which would you be - dark, milk, white, or a mashup of two or more? I know, and have known since the beginning of time, that I am fully committed to the dark camp. I'll admit to occasional, brief dalliances with milk and white, but most often in the company and with the approval of dark. Yes, we're open like that. 😉
 Speaking of delicious, dark things...
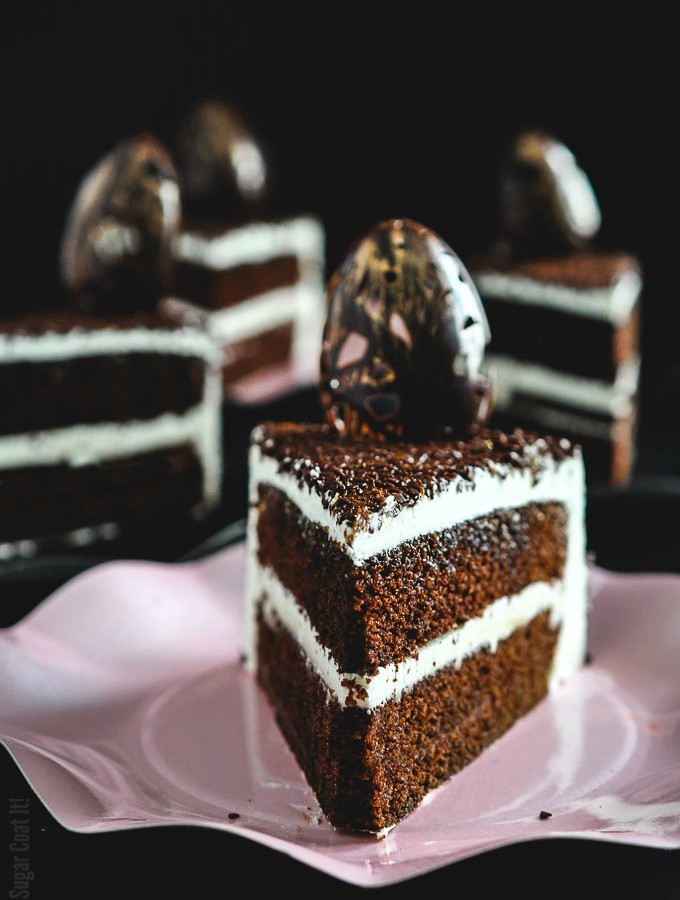
 It had been a while since I made mud cake (see


