• Skip to primary navigation
  • Skip to main content
  • Skip to primary sidebar
  • Home
  • About
    • About I Sugar Coat It
    • Features & Press
    • Copyright
    • Disclosure
    • Privacy Policy
  • Recipes
  • How-To
  • Contact
  • sous vide sista

I Sugar Coat It

Home

All Posts

Pink and Green Chevron Chocolate Cake for First Year Blogiversary

August 2012 By i sugar coat it! 91 Comments

J's Favourite Things & Giveaway Part 2 {CLOSED}

This sweepstake is now CLOSED. Thanks to all who entered. Winners are listed below...
I Sugar Coat It Favourite Things Giveaway

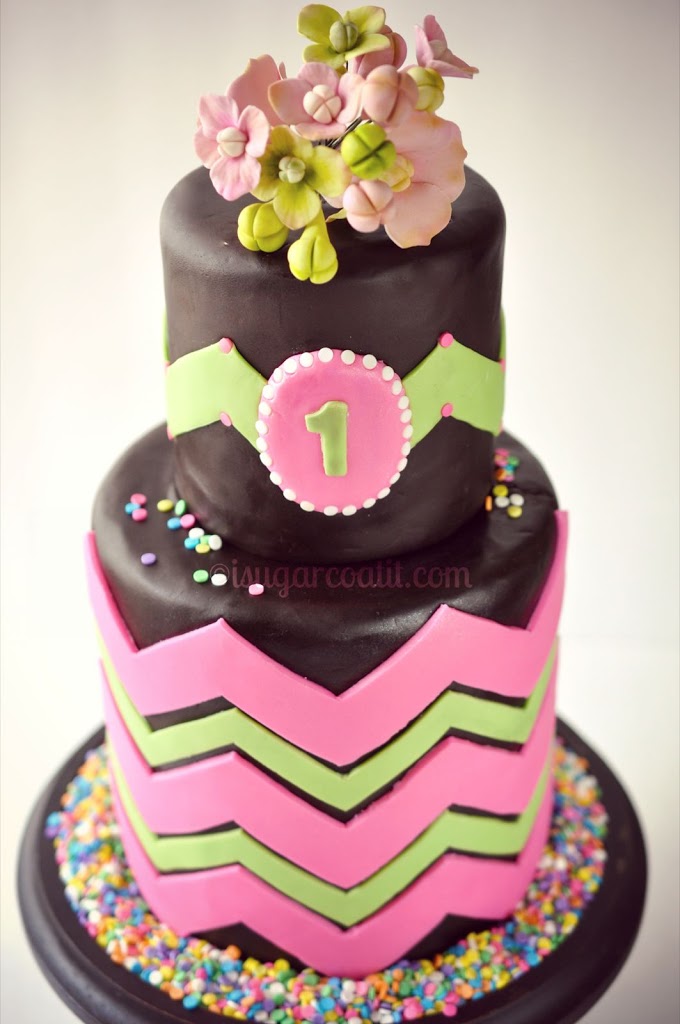
I Sugar Coat It is officially 1!!! Come join in the celebration...


It has been a little over a year since I started blogging, and exactly one year since I Sugar Coat It! was conceived.

I started the celebration early on my Facebook page with a little game of Cookie Scrabble. Four lucky winners scored aprons - a small token of thanks for helping me reach 1K. Then last week I had my first blog giveaway for a few of my favourite things!! Thanks again to everyone who participated!

I have learned a great deal over the last year from a number of sources. I started out with a series of courses offered through my local Michael's store, purchased a few books from Amazon, scoured the web (YouTube), took a weekend course for figure modelling at the Bonnie Gordon College of Confectionery Arts and taught myself a few things along the way. Although my abilities do not yet match my imagination, I am enjoying the learning process.

Anyone who knows me well, is all too familiar with my insatiable appetite for learning - professionally and personally. For me, the best part of learning is sharing knowledge gained, with others. So, for this leg of my blogday celebration I thought I would continue my J's Favourite Things theme and offer you a chance to learn something sweet from a couple of my favourite courses.

I Sugar Coat It Favourite Things Giveaway
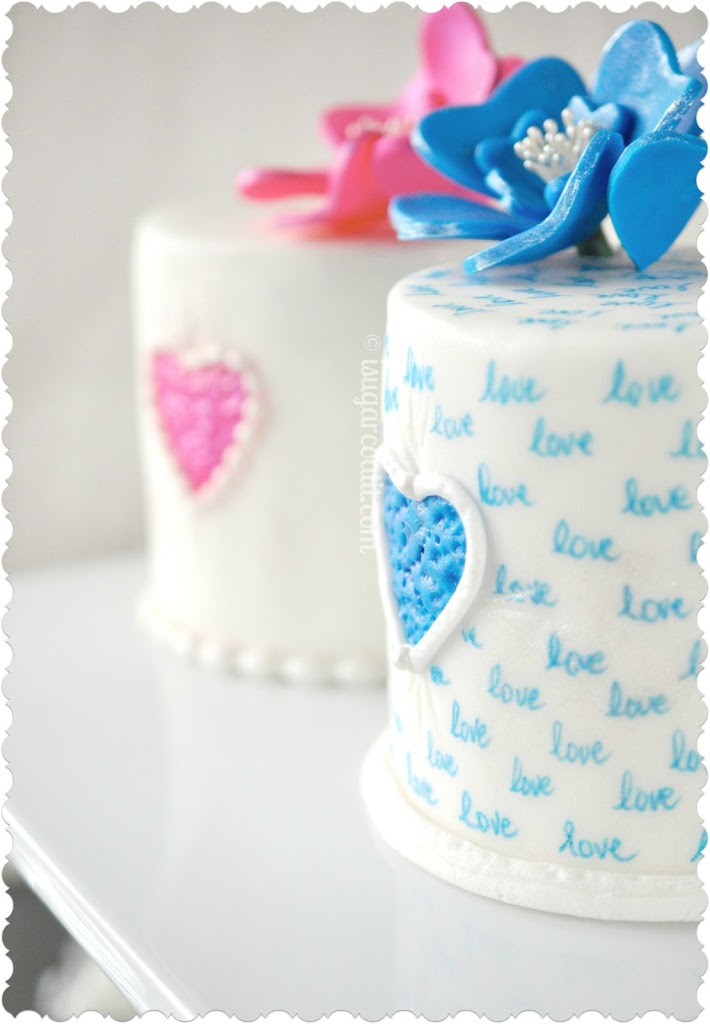
Some techniques I've learned in the Craftsy and MyCakeSchool courses.

I initially thought about making this a single prize pack - winner takes all, but it's always nicer to spread the wealth - so three people will get lucky. And in an effort to acknowledge and include my international readers, I purposely decided on gifts that do not require shipping. Can I get a WOOT-WOOT!!

With the help of Craftsy and MyCakeSchool.com, I am able to offer two online courses - cause there's nothing sweeter than learning (well, cake maybe...), and instead of the two books I wanted to include as prizes, I'm including an Amazon gift card.

So here's how it will go down. There are three prizes - only one prize per winner (to be clear - you can only win one of the prizes listed below). They are:

1 Year Membership to MyCakeSchool.com. WINNER - Radhika S.!
I Sugar Coat It Favourite Things Giveaway

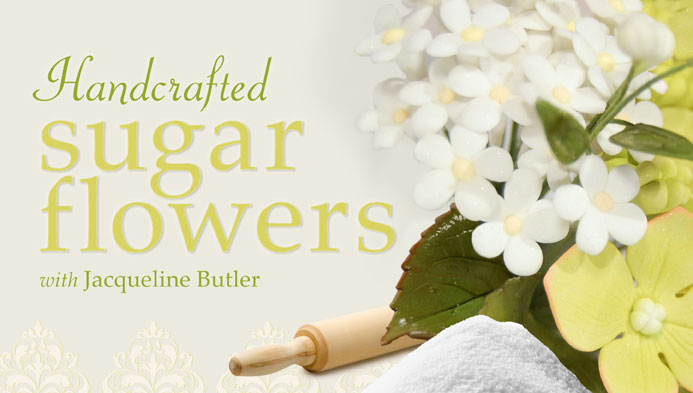
1 Craftsy Online Course - Handcrafted Sugar Flowers with Jacqueline Butler. WINNER - Stephanie B.!

I Sugar Coat It Favourite Things Giveaway


$30 Amazon Gift Card. WINNER - Natalie M.!

I Sugar Coat It Favourite Things Giveaway

If you entered my last giveaway, then you know the drill. If not, it's easy to enter:


  • Login to the PunchTab Giveaway Widget below using your email address or Facebook account.
  • You will be prompted to:


    • Leave a comment telling me, "Where/how you first learned to bake/decorate?." You MUST leave a comment on my blog in order to be entered.
    • For extra entries, perform any or all of the additional actions listed in the widget - Subscribe to My Blog, Follow me on Twitter,  Become a Fan on Facebook, Tweet My Giveaway, Like This Post, PIN my Cake. Each action is a separate entry.

Contest ends Saturday, September 1st, 2012 at 12:00PM (EST)
The winners will be selected using PunchTab's Giveaway Widget random picker and announced in this post and notified by email. (If entering via email, please ensure your email address is valid - it will not be displayed in the comments, but it's how you will be contacted, should you win). Please note that your comment may not appear immediately; that does not mean it was not received.
This giveaway is open to Canadian residents* and the rest of the world. Please see official contest rules here.
Thanks to MyCakeSchool.com and Craftsy for their generous support.
Please note that I did not receive compensation, monetary, or otherwise, for this post.

Gold Starbursts Stencil Cake and Sugar Ranunculus

August 2012 By i sugar coat it! 27 Comments

J's {not Oprah} Favourite Things & Giveaway! Part 1 {Winner Announced}

 Thanks to all who entered and shared my giveaway. This Sweepstake is now CLOSED. See below.
Gold Starbursts Blogiversay Cake and Giveaway
Ice-cream on brownies and frosting on cupcakes
Bright coloured fondant and cake stands that coordinate
Starbursts and gold dust to give it some bling
These are a few of my favorite things...

Does the cake above look familiar to you? Think hard...well, not too hard. You need only click back to my last post to see my Ranunculus flowers perched atop this little beauty. And under all the green and glitter is a moist, mouthwatering, lemon-curd filled, citrus cake.

We'll get to the recipe in a different post, for now, let's talk about the cake's exterior and how those fantastic starbursts came to be.

Back in January, I had an idea for a cake (one that I have yet to make) that would require piping skills, for which I just did not have the patience. So I thought I could try to achieve a similar look with a stencil. I looked, but could not find a culinary stencil in the pattern I'd envisioned. I contacted Designer Stencils and shared with them, a photo of what I had in mind and about a week later they created this, fashioned from one of their wallpaper designs. I thought I would give it a test run... eight months later.
Gold Starbursts Blogiversay Cake and Giveaway

Stencils are a favourite decorating tool of mine and I have a collection to back that up! They are a great alternative to piping and offer so many design options for amateur pipers, like myself (I so desperately need to work on my piping skills). That said, like anything else one wants to be good at, this too requires a little practice. When done well, stencils can yield stunning results - like this, for instance. Here is my first attempt at stencilling. I have since improved, but there is always room.

Stencilling does not always have to be done on fondant, or with royal icing. My giraffe cake is a good example - it's cocoa stenciled on buttercream. This time around I thought I would bring a little bling to the design with the use of edible lustre dusts - another favourite.
Unless I absolutely have to, I avoid cutting my stencils to accommodate any one particular cake size. Instead, I find if you place the cake on a raised surface with a base smaller than the cake, you can better manipulate the placement of the stencil.
Gold Starbursts Blogiversay Cake and Giveaway
I placed the cake on a cake board the same circumference as the cake, covered the top of the cup with a piece of anti-slip cupboard lining (you know the stuff you buy in rolls at the dollar store), and placed the cake board on top. Danger of tipping, so work carefully!
Of course, keeping the stencil in place is also crucial to the process. This is where I find the Cake Wrap Kit comes in handy.
Gold Starbursts Blogiversay Cake and Giveaway
Once I had the stencil positioned to my liking, I used three large brushes, like the one shown in the photo above, to apply the various colours of edible dusts. I carefully removed the stencil and let set a little before attaching the stencil again to do the other side of the cake. I layered some of the colours and BAM, we've got ourselves some blinged-out starbursts!!
 
Gold Starbursts and Ranunculus Blogiversay Cake and Giveaway
Fondant coloured with Avocado food gel. Lustre dusts in Gold Shimmer, Metallic Ginger Glow and Electric Orange mixed with a little Gold Shimmer.
Speaking of starbursts... Did you know the Milky Way will see a starburst in approximately 200 000 000 years? Well, I couldn't wait that long and you don't have to either!
I Sugar Coat It! is celebrating its first birthday this month, and what better way to get the celebration started than with a little fireworks - in the form of starbursts! One lucky reader will have the opportunity to create their own starbursts using some of my favourite cake design tools.
Starburst Cake Side
Starburst Cake Side Stencil 
Designer Stencils Cake Wrap Kit Giveaway
Cake Wrap Kit
Small Scraper
Small Scraper
It's easy to enter!


  • Login to the PunchTab Giveaway Widget below using your email address or Facebook account.
  • You will be prompted to:


    • Leave a comment telling me, "What is your favourite cake design tool?" You must leave a comment in order to be entered.
    • For extra entries, perform any of the additional actions listed in the widget - Tweet, Google+1, Become a Fan.


Contest ends Monday, August 20th, 2012 at 12:00PM (EST)
 
THIS CONTEST IS NOW CLOSED.

We Have A Winner!
CONGRATULATIONS, JUDY ROBINSON!!
~chosen by random draw via PunchTab Plugin~
38
Judy Robinson
comment
2 days ago
You have been selected as a winner in Isugarcoatit's giveaway.

Judy Robinson
My favorite tool is Stephanie (my niece and business partner) I do all the baking and she does all the decorating.

The winner will be selected using PunchTab's Giveaway Widget random picker and announced in this post and notified by email. (You must leave a valid email address - it will not be displayed). Please note that your comment may not appear immediately; it does not mean it was not received.

This giveaway is open to Canadian (excluding Quebec) and continental U.S residents only. Apologies to my international readers - due to high shipping rates, I am unable to extend this giveaway to you. However, future contests that do not require shipping will be available to those outside North America.
Official contest rules are here.
A special thanks to Designer Stencils for donating the stencil for this giveaway. The other two items and shipping are from I Sugar Coat It!.
This is the first of two birthday giveaways - STAY TUNED!!


Designer Stencils has kindly donated the stencil included in the prize pack. I did not receive compensation, monetary, or otherwise, for this post.


August 2012 By i sugar coat it! 15 Comments

Ranunculus Tutorial

Sugar Ranunculus Tutorial

The name Ranunculus is late latin for 'little frog', from rana 'frog' and a diminutive ending. A reference to the many species being found near water, like frogs. They are a large genus of about 600 species of plants in the Ranunculaceae - members of the genus buttercups.
(source: Wikipedia)

In the interior of the Pacific Northwest of the United States the buttercup is called "Coyote’s eyes".  In the legend, Coyote was tossing his eyes up in the air and catching them again when Eagle snatched them. Unable to see, Coyote made eyes from the buttercup.

I absolutely adore the beautiful flowers created by Jacqueline Butler of Petalsweet! I especially adore her Ranunculus flowers.

In nature, I am attracted to their brilliant colours, and their simple, yet complex, petal structure. As Michael MacCaskey puts it in an article in the National Gardening Association - ... their multiple layers of delicate, crepe paper-thin petals resemble origami masterwork.
Sugar Ranunculus Tutorial
Now, my petals aren't paper-thin, nor do they resemble origami masterwork. Still, I am quite pleased with the outcome, as I did these without the help of a tutorial. The next time I make them, I will certainly approach them with the above description in mind.
Until then, here's how I made my Ranunculuses! (I get a kick from saying that)
 

Note: The slide that shows a photo of the tools includes a white veiner. You will notice later in the slideshow that I used a green veiner. I found the larger petals were too big for the veiner I intended to use and switched it after i had taken the photo.
Sugar Ranunculus Tutorial
Don't they just put a smile on your face? What's your favourite flower?
I hope you've enjoyed this post. Would love to hear from you - please consider leaving a comment below.

August 2012 By i sugar coat it! 9 Comments

Sweet Swimmers Revisted

ON YOUR MARK! GET SET! READY! GO!
 

With the 2012 Olympics in full swing, I thought it fitting to revisit my sweet swimmer cookies from last September. Okay, it wasn't all my idea - a friend suggested it during delivery of her cake last Friday. I'd also seen a few Olympic-themed cookies and cakes on Instagram.

 
I had not planned to bake last weekend. I was in a bit of a rut on Saturday and cancelled all my plans - sorry Kimmie :-(.
 
Sunday rolled around and the mister and I were up and about sourcing counters, cupboards, sinks and taps for a remodel (another of my past-times - at least when we actually find the time to attack projects). This project isn't moving along in any fashion resembling what we planned, and after all the rain last week, we discovered a small wading pool in the basement. Sacre bleu!!
 
Back at home, I decided to drown my sorrows in flour, butter, sugar and vanilla beans. Remember all that cookie dough I made for the wedding favour cookies in June? It was time for a frozen batch to make an encore appearance - as athletes!


I enjoy the olympics, particularly the water and gymnastic events. Here I have used some ceramic egg crates to play the part of water - not very effective, but cute, in my opinion. 

This photo is from my post last September.

I used these cutters, but can't seem to remember where I purchased them. I think it was at HomeSense, but I'm not absolutely certain. I am sure you can find them on Amazon.


I also used a heart cutter for the cookies below and used the swimmer cutters to outline the swimmers. Top them off with some fondant caps and swimsuits and you've got your own Olympic team.  


This was a really quick project and just as quick a post. 


What's your favourite Olympic event? Leave me a note below.


You will find the recipe for these cookies here.


Chocolate Espresso Giraffe Cake

July 2012 By i sugar coat it! 6 Comments

Chocolate Espresso Giraffe Cake

Layers of rich chocolate cake enveloped in a quick and easy espresso buttercream, decorated with cocoa powder.

Chocolate Espresso Giraffe Cake is layers of rich chocolate cake enveloped in a quick and easy espresso buttercream, decorated with cocoa powder.

Come help us celebrate two special birthdays with this rich, moist Chocolate Espresso Giraffe Cake with Whipped Espresso Vanilla Buttercream stenciled with cocoa powder. Be prepared to stay up all night!

You have already met Jess, she is Tay's mama and she absolutely adores giraffes - so did Taylor. So when she asked me to make a cake for both her and Taylor's birthdays, which just so happen to be only weeks apart, I immediately knew it would involve giraffes.

I got to work making fondant giraffe toppers in the likeness of a favourite app, Gina and her little one. These were my second try at figure modelling - you may remember my first. The little one turned out alright, but Gina started to fall apart...and doesn't she look like a cow? I enlisted some toothpicks to help keep her together, but the fondant, even with a healthy dose of Tylose, wasn't drying completely. I moved on to the cake...
Chocolate Espresso Giraffe Cake is layers of rich chocolate cake enveloped in a quick and easy espresso buttercream, decorated with cocoa powder.

I decided to leave fondant out of the equation for the cake portion of this project. The cake board, baby giraffe (sadly, Gina did not make the cut), birthday sign and names were made using fondant. The cake and grass are buttercream.

Chocolate Espresso Giraffe Cake is layers of rich chocolate cake enveloped in a quick and easy espresso buttercream, decorated with cocoa powder.

A couple drops of Americolor Leaf Green were used to tint the espresso frosting, which was then piped with a #233 tip. I used this stencil and unsweetened cocoa powder to create the giraffe print. To further enhance the skin effect, I used an angled spatula to add texture and a little edible Daisy Dust yellow lustre dust to play up the colour.

Chocolate Espresso Giraffe Cake is layers of rich chocolate cake enveloped in a quick and easy espresso buttercream, decorated with cocoa powder.

Unfortunately, I was not able to do a proper photo shoot, a number of the photos in this post were taken with my mobile phone and at night. Above is a shot of Jess cutting into her cake. She promises to eat the chocolate fondant-covered board as well...

Chocolate Espresso Giraffe Cake is layers of rich chocolate cake enveloped in a quick and easy espresso buttercream, decorated with cocoa powder.

I was very honoured to have been asked to make this cake. It celebrates Jess' birthday and the memory of her little girl Taylor, who would have seen her third birthday on July 25th. We continue to celebrate your life Taylor, and join your mama in celebrating hers.

Chocolate Espresso Giraffe Cake
Print Recipe

Chocolate Espresso Giraffe Cake

Layers of rich chocolate cake enveloped in a quick and easy espresso buttercream, decorated with cocoa powder.
Prep Time20 minutes mins
Cook Time30 minutes mins
Total Time50 minutes mins
Course: Dessert
Cuisine: Cake
Servings: 8
Author: i sugar coat it!

Ingredients

Cake:

  • 16 oz butter 4 sticks/2 cups
  • 1 cup high quality Dutch process cocoa
  • 2 tablespoon instant espresso powder dissolved into 1 ½ cups water
  • 4 cups granulated sugar
  • 2 cup sour cream
  • 2 tablespoon almond extract
  • 4 large eggs
  • 4 cups all-purpose flour
  • 3 teaspoon baking soda
  • 1 teaspoon salt

Frosting:

  • 4 cups unsalted butter 8 sticks, at room temperature
  • 10 cups powdered sugar
  • 6 teaspoons vanilla bean paste
  • 6 teaspoons espresso powder

Instructions

  • Preheat oven to 350° F. Prepare four to five 7" x 2" round cake pans - I use cake release to prevent sticking.
  • Melt butter in a large saucepan over medium-low heat; add cocoa, stirring until smooth. Whisk in the espresso water and remove from heat.
  • Add the sugar, sour cream, vanilla, and eggs to the warmed cocoa mixture and whisk until smooth.
  • In a medium bowl, combine the flour, baking soda, and salt. Add to the first mixture, whisking until well blended.
  • Pour batter into the prepared pans. Bake for 30-35 minutes, or until it feels firm to the touch or an inserted toothpick comes out clean. Cool in pan on a rack for about 15 minutes.
  • Remove from pan by placing the rack over the cake and invert, tapping pan lightly, if required to loosen.

To make the frosting:

  • Mix vanilla and espresso powder together until dissolved. Using the whisk attachment of your mixer, whisk for 5 minutes, occasionally scraping down sides. On low speed, add powdered sugar a little at a time. I cover the mixer with a damp tea towel to contain the powdered sugar. When all powdered sugar is incorporated, turn up speed and beat until fluffy for about 2 minutes. Add vanilla-espresso mixture and whip until incorporated.

Assembly:

  • Level the cakes using a large, serrated knife or other levelling tool (I use the Agbay Jr.). Fill each layer with generous amounts of frosting, wrap win plastic wrap and refrigerate for an hour. I find this helps the cake to settle and level itself and makes crumb-coating easier. Remove from fridge, add a thing layer of frosting refrigerate for 30 minutes and repeat. Refrigerate until firm enough to accommodate the stencil. Use a medium-size brush to add the cacao pattern.

Notes

(cake recipe adapted from Sweetapolita, frosting found on
Specialty Cake Creations
- adapted from the Brown Eyed Baker) Both recipes have been doubled.
Red Velvet Love Note Mini Cakes & Heart Flowers

July 2012 By i sugar coat it! 9 Comments

Red Velvet Mini Cakes & How I Met My Love {Abridged}

Red Velvet Love Note Mini Cakes & Heart Flowers
I Carry Your Heart With Me
I carry your heart with me (I carry it in my heart)
I am never without it (anywhere I go you go, my dear; and whatever is done by only me is your doing, my darling)
I fear no fate (for you are my fate, my sweet)
I want no world (for beautiful you are my world, my true) and it's you are whatever a moon has always meant and whatever a sun will always sing is you
Here is the deepest secret nobody knows (here is the root of the root and the bud of the bud and the sky of the sky of a tree called life; which grows higher than the soul can hope or mind can hide) and this is the wonder that's keeping the stars apart
I carry your heart (I carry it in my heart)
by E. E. Cummings

Red Velvet Love Note Mini Cakes & Heart Flowers
I remember like it was yesterday, give or take a few years...
It had been a month since I sat the last exam of my first year of University. I had a day off from my crappy summer job, had just completed running my errands and was headed to my aunt's office for our lunch date.
I loved the convenience of living close to campus, transit and all the happening spots. My roommate/best friend and I were in teenage heaven.
I paid my fare and descended the stairs to the platform. It was packed. "Don't people work?" I asked myself, and still do on days off when I run into heavy traffic or long line-ups. I HATE crowds. I was just shy of 100lbs and stood 5'3" - jostling crowds was not my event. I found a pillar and stood with my back against it for fear of being trampled, or pushed onto the tracks.
As the train approached, I positioned myself for the onslaught. I was promptly pushed into one body and then another. I looked up to apologize to that second body and was met with the most mesmerizing green eyes. He flashed me a knowing look and a gentle smile and I returned what must have looked to him as the same, for he did not look away for a long time - all the while being carried by the crowed. I was jolted back to reality when the train doors chimed and found that I was already on the other side of the doors. Mister Green Eyes was nowhere to be seen.
Red Velvet Love Note Mini Cakes & Heart Flowers
I felt a little panicked and found myself searching the crowd for him. But why? I composed myself, pulled out my book and just when I was about to put him out of my head and escape to the last few pages of The Alchemist, the train doors opened, the crowd thinned and he reappeared.
He smiled and I smiled back. I stared at the words on the pages of my book and they stared back, one not making any sense to the other. Each time I looked up from my book, I was met with a smile and I would politely and cautiously return one. This continued for nine subway stops.
With every stop I wondered if he would get off, and secretly hoped he wouldn't. I then began to worry as we neared my stop that I was flirting with a stalker, a killer, a rapist... My mind and heart were in a frenzy - a shouting match of sorts. My smiles became less relaxed and I think he noticed. He began to busy himself with a book.
My stop was next. I found myself noting every detail from his height to his clothing, hair colour, etc. Weekly doses of Law & Order episodes and criminal law courses will do that. But beneath all the panic and worry there was a knowing - I couldn't explain it then and it sounds a little kooky each time we try now. We, because I later learned that he too, felt 'it'.
Red Velvet Love Note Mini Cakes & Heart Flowers
 
My stop was announced and the doors slid open. I remember wanting to turn around to say bye, hi, something - fear and nerves got the better of me.
I made my way off the train and to my surprise and horror, so did he. I became extremely concerned and pretty much sprinted toward my aunt's office building, jumped on the elevator and commenced my ascent. As luck or love would have it, the elevator was a vertical fish tank. I pressed the button and turned to see him standing in the mezzanine searching the crowd. For me?
Then the strangest thing happened. I was compelled by a 'voice' to press the lobby button and head back down. Against my better judgement, I did.
"Are you looking for someone?" were the first words I spoke to him. "Yes, you!" was his response. I took him to meet my aunt, gave her a rain-check for lunch and sat in the park with Mister Green Eyes for over an hour, just talking. It was effortless and familiar - says the normally shy, reserved, guarded girl.
Red Velvet Love Note Mini Cakes & Heart Flowers
He was on summer break as well and would be returning shortly. He loved to read and had recently read the book I was pretending to read on the train. We talked about everything under the sun and as we did, a butterfly landed on his shoulder and remained there for a while. That pretty much sealed the deal for me.
We took the train together and caught a movie. He introduced me to his family and we spent the next couple weeks picnicking, swimming, dining out, visiting museums and galleries. It really was love at first sight and has felt the same ever since - most days ;).
Red Velvet Love Note Mini Cakes & Heart Flowers
These mini 'His' and 'Hers' anniversary cakes were the pefect portion for two. The writing on His is inspired by these cookies I saw on Haniela's blog. They are so adorable - I knew right away that I wanted to borrow that technique. I planned to use the words from our favourite poem that I shared in the opening, but it was more of a challenge than I had time for and after a few tests, I realized my handwriting at the angle at which I needed to work, just wasn't cutting it. I decided only one would have the writing. The flowers are made using a heart cutter and coloured fondant that were wired and assembled around pearl stamen.
The recipe I used for this Red Velvet cake was not my normal tried and true recipe, so I have decided not to share it. Although it tasted fine, I found it a little on the dry side and it did not produce as vibrant a red. I have shared my go-to RV cake recipe below, instead.
The recipe and video instructions for the white chocolate ganache are here.
Would love to hear how you met your love. Leave me a comment below.
 
 
Red Velvet Love Note Mini Cakes & Heart Flowers
Print Recipe

Red Velvet Mini Cakes with White Chocolate Ganache

Prep Time25 minutes mins
Cook Time30 minutes mins
Total Time55 minutes mins
Course: Dessert
Servings: 2 - 8" cakes
Author: I Sugar Coat It

Ingredients

  • Cake:
  • 1 cup unsalted butter
  • 2 tablespoon water
  • ¾ cup unsweetened cocoa rouge E. Guittard makes a good red dutch cocoa powder
  • 3 eggs
  • 1 cup buttermilk
  • 1 tablespoon white vinegar
  • 2 teaspoon vanilla extract
  • 2 tablespoon beet juice 1 medium beet yields about 4 tbsp
  • 2 ½ cups all-purpose flour
  • ½ cup cornstarch
  • 1 ½ teaspoon baking powder
  • 1 ½ cups superfine sugar

Instructions

  • Preheat oven to 350ºF.
  • Place the butter, water, and cocoa in a small saucepan and heat gently, without boiling, stirring until melted and smooth. Remove from heat and let cool slightly.
  • Beat together the eggs, buttermilk, vanilla extract, vinegar and beet juice until frothy. Beat in the butter mixture.
  • Sift together the flour, cornstarch and baking powder, then stir into the mixture with the superfine sugar.
  • Pour batter into two 8" pans and bake for 30-35 minutes, or until risen and firm to the touch.
  • Cool in pan for about 10 minutes, then place on a wire rack and cool completely.
  • Once cooled, cut the circles out with the mould and assemble.

July 2012 By i sugar coat it! 11 Comments

Wedding Cookie Favours

We are confident that with God's guidance, the future will hold for us an ever-growing love. We wish for you, our family and friends, to share with us the beauty of this day, as we joyously unite in marriage before God.

from the wedding program
They did! My sister and her long-time partner tied the knot on Saturday. The weather was great, the service was short and sweet and the reception was held at a manor built in 1906. It's Tudor -Jacobean architecture was the perfect backdrop for the photos and festivities.
I was honoured to be asked to provide the favours and experimented with a number of ideas in the months before - you may remember these test cookies and these bridal shower favours. Between work and all the other things I over-commit to, I was in no position to cut out 100 bride and groom silhouettes like the ones I did for the bridal shower cookies, nor was I comfortable enough with my piping skills to attempt something more elaborate. I really wanted to try my SugarVeil lace mats again, but the thought of it going wrong, as it did last time, just did not sit well with me.

So, in the interest of time, and because I absolutely love these cookies I saw over at Sweetopia, I decided to keep it simple and elegant. Mission accomplished - at least in my humble opinion. 

The cookies were made using a Butter Cookie recipe I found on the Joy of Baking website. I added Vanilla Beans - if you look closely, you may see the little specks of beans in each. I tripled the recipe so that I would have enough for 100+ 4" cookies. At the last minute, I decided to go with a 3" cookie cutter just to be safe - I did not want to run out of dough. 120 cookies later and I quickly learned that I am no good at math - I have enough dough in my freezer for another 100 or so cookies. I guarantee you, it will not go to waste.

Early last week, I was panick-stricken. I knew how I wanted to decorate the cookies, but I was having trouble designing the image. I also realized that I did not own a printer or ink for producing edible images - duh! I sent a quick note to Marian of Sweetopia inquiring about the grocery stores that offer this service - I remembered that little tidbit from her post. I also wanted to know if she could put me in touch with a reputable graphic designer to assist with producing the image on short notice. Her response was quick and provided some good options.

I contacted Holly of Confetti Prints and upon receiving her response, felt some of the tension leave my shoulders. I chose one of her designs and it was customized with the colours (lapis, black and white) and text to complement the wedding theme. She delivered the following day!! 

OK, so I now had the design but was still panicking about getting them printed - it was Wednesday!! Did I mention the wedding was three days away and out of town?

Marian warned me that the grocery stores, depending on who I spoke with, would have no idea what I was referring to when I requested to have frosting sheets printed. She was so RIGHT! Out of frustration, I decided I would go buy the printer and ink and do it myself, but before I did that I needed to purchase the sheets. Before driving out to Mississauga in vain, I set out to call Golda's, but ended up calling McCall's. Not only do they sell the sheets, they print them! I think my eyes misted a little when I heard those words.

After explaining to the rep what I needed and how quickly, I learned that their sheets were called Marshmallow Sheets and would cost $12.00 per page, 10 per page and included the sheets - do the math... I cringed a little and quickly sent her the file via email and kept my fingers crossed. I was at the store picking them up just after 4:00 pm the same day. I just love when everything comes together.

There was no time for drying royal icing, so I cut out 2" fondant circles, applied the circles to the cookies using corn syrup and then applied the Marshmallow Sheets to the fondant in the same way - too much syrup and the colour on the sheets bleed. Trust me!

I used a pearl mould to make the borders and blended some vintage silk lustre dust with alcohol to add a sheen. 100 cookie boxes and some silver ribbon from Creative Bag and it was a wrap! My aunt D helped me package them up all pretty.

In addition to the Wedding Cookie Favours, I made my three year old niece's dress, shipped it to my sister and she added a few details - she was the flower girl. I also felt very honoured to have made my sister's veil. I also made the flower topper for the cake, which I will share in a future post/tutorial.

I wish you both continued love and happiness for many more years to come.

Print Recipe

Vanilla Bean Butter Cookies

Vanilla Bean Butter Cookies Wedding Favors decorated with printed wafer paper and fondant.
Prep Time30 minutes mins
Cook Time10 minutes mins
Total Time40 minutes mins
Course: Dessert
Servings: 12 -16
Author: I Sugar Coat It

Ingredients

  • 1 cup unsalted butter at room temperature 226 grams
  • ⅔ cup granulated white sugar 135 grams
  • 1 large egg
  • 1 teaspoon lemon zest
  • Scrapings of 1 vanilla bean
  • 2 ¼ cups all purpose flour 295 grams
  • ¼ teaspoon salt

Instructions

  • Preheat oven to 350ºF. Place oven rack in the center of the oven. Line a baking sheet with parchment paper or silpat.
  • In the bowl of your electric mixer fitted with the paddle attachment, beat the butter and sugar until light and fluffy.
  • Beat in the egg, lemon zest, and vanilla beans.
  • In a separate bowl, whisk together the flour and salt.
  • Gradually add the flour mixture to the creamed mixture and beat just until incorporated.
  • Scrape down the sides of the bowl as needed.
  • Divide the dough in half and shape each half into a flattened circle. Wrap each disk in plastic wrap and place in the refrigerator until firm (at least two hours or overnight).
  • Remove from fridge and use a rolling pin to roll dough out to about ¼ inch thick - I use dough spacers like
  • these
  • to get even cookies.
  • Cut into desired shapes and place
  • on the baking sheet, spacing about 2 inches apart. Place
  • in freezer for about 3-5 minutes.
  • Remove from freezer, let rest 1 minute and then bake the cookies for about 10 minutes, or until the edges of the cookies are a very light brown.
  • Remove from oven and place on a wire rack to cool. Decorate as desired.

 I-Sugar-Coat-It-Blog-Signature-Green

June 2012 By i sugar coat it! 16 Comments

Summer Sweets - Pina Colada Push Pops

Pina Colada Push Pops and Cupcakes

If you like Pina Coladas, and getting caught in the rain. If you're not into yoga, if you have half-a-brain. If you like snacking at midnight, and a good home-made cake. I'm the dessert you have looked for, press the link and escape.

Well, you're here! So I am guessing that you are a lot like me in that...

You like Pina Coladas, and getting caught in the rain. You're not much into health food, you are into champagne. You should just subscribe to my blog now, and cut through all this red tape. And we'll meet up here weekly, for our sweet, sweet escape.In searching for a song that references Pina Colada, I came across this video and could not stop laughing. Anything that makes me laugh needs to be shared. So I edited the first two choruses of the song and made them the intro to this post. The song is now stuck in my head, and you know what? I don't mind! Cause I like Pina Coladas and getting caught in the rain...
Pina Colada Push Pops and Cupcakes
 
Have a sip, lick or bite! Whatever your preference, these little identity-crisis desserts will deliver. Layers of moist coconut cake, crushed pineapples, shredded coconut and pina colado infused buttercream makes this drink turned dessert a new summer favourite. Not quite ready to tackle a stacked dessert, no worries, I got you covered boo. BAM, cupcakes! - complete with straws. Sip it or bite it - guaranteed to sate your sweet tooth and tropical thirst at once.
Pina Colada Push Pops and Cupcakes
Last week's Summer Sweet hit the spot, both at home and on the web. These are definitely on par in the taste department and like the Key Lime Mojito Mousse cake, not overly sweet.
I started off with a basic coconut cake recipe. My grandmother made a mean coconut cake when we were little. Oddly enough, I am not a huge fan of coconut - I'll chew it, but can't seem to swallow. I enjoy the taste, but have trouble with the texture.  A conundrum, I know.
I didn't use my grandma's recipe, which uses fresh grated coconut. Instead, I used a recipe I found on my Epi App, which calls for cream of coconut. That, I can swallow! For the frosting, I simply made a few alterations to a basic recipe which complemented the cake beautifully. It tasted just like Pina Colada - NO LIE!
Pina Colada Push Pops and Cupcakes
For those of you not familiar with Push Pops, think of a small cup with a syringe-like mechanism that is used to push up the contents of the cup. I purchased my set from Icing Inspiration in Kingston, but they no longer seem to carry them, but you can find them on Amazon. The pretty paper straws were purchased from Sweet Estelle's Etsy shop. Thanks to my sister, I have since found them locally at Creative Bag.
Pina Colada Push Pops and Cupcakes
The recipes for the cupcakes and frosting are provided below. Try this treat for your next get-together and let me know if YOU like Pina Coladas.
Print Recipe

Pina Colada Cupcakes

Layers of moist coconut cake, fresh pineapple and whipped coconut create an edible version of a tropical drink.
Prep Time15 minutes mins
Cook Time25 minutes mins
Total Time40 minutes mins
Course: Dessert
Servings: 12
Author: I Sugar Coat It

Ingredients

Cupcakes:

  • 2 ¾ cups all purpose flour
  • 1 teaspoon baking powder
  • ½ teaspoon baking soda
  • ½ teaspoon salt
  • 1 ¾ cups sugar
  • 1 cup unsalted butter 2 sticks, room temperature
  • 1 cup canned sweetened cream of coconut
  • 4 large eggs separated
  • 1 teaspoon vanilla extract
  • 1 cup buttermilk
  • Pinch of salt

Buttercream:

  • 1 package of cream cheese
  • 1 stick salted butter
  • 2 tablespoons p
  • ina colada mix or pineapple juice
  • 2 teaspoon of cream of coconut
  • 1 teaspoon rum
  • 2 lb of confectioner sugar
  • Pineapple chunks shredded coconut, sanding sugar for garnish

Instructions

  • Preheat oven to 350°F.
  • Line the wells of a 12 cup cupcake pan.
  • In medium bowl, whisk flour, baking powder, baking soda and ½ teaspoon salt.
  • In the bowl of an electric mixer fitted with the flat attachment, beat sugar, butter and sweetened cream of coconut until fluffy. Beat in egg yolks and vanilla extract. (I used setting 4 on my Kitchen Aid mixer)
  • Lower the speed (I used 2 on my KA mixer), beat in dry ingredients and then buttermilk, each just until blended. (To prevent the dry ingredients from blowing out of the mixer, dampen a tea towel and drape over the mixer while mixing.)
  • Using the whisk attachment, beat egg whites with pinch of salt in another large bowl until stiff but not dry. Fold beaten egg whites into batter.
  • Using an ice-cream scooper, distribute the batter evenly into the cupcake liners.
  • Bake cupcakes for 25-30 minutes or until tester inserted into center comes out clean.
  • While cakes are cooling, make the frosting.

To make the buttercream:

  • Cream butter and cream cheese until smooth. Add pina colada mix or pineapple juice, cream of coconut and rum. Gradually add the sugar and mix until creamy on low speed.

To assemble Push Pops:

  • You will need cupcakes, frosting, crushed pineapples, pineapple chunks and shredded or flaked coconut.
  • Once cooled, remove the cupcakes from their liners and use the lip if the push pop cup to cut the cupcake to size. Use a knife to slice the cupcakes in half horizontally.
  • Insert the bottom half of the cupcake into the assembled push pop cup. Add a layer of crushed pineapple along with the pineapple juice. Sprinkle some coconut if you like.
  • Insert the other half of the cupcake and top with crushed pineapple and juice.
  • Attach a piping tip of your choosing (I used the Wilton 1M tip) and fill the piping bag with the frosting.
  • Starting in the middle of the dessert, pipe a circle all the way around the top. Garnish with pineapple chunks, coconut flakes or shreds and a little sanding sugar.
  • Top off with straws or umbrellas for fun!

I-Sugar-Coat-It-Blog-Signature-Green

June 2012 By i sugar coat it! 6 Comments

Summer Sweets - Key Lime Mojito Mousse Cake

Key Lime Mojito Mousse Cake

As the warmer weather rolls in, I am moving towards lighter, no fuss, less time in the kitchen treats. I'm also taking advantage of the fruits that aren't in abundance, or as tasty during the winter months.

First up, a light, taste-bud-teasing blend of tangy, sweet and creamy...

Key Lime Mojito Mousse Cake
Said Orange to Lime before parting ways - "You've lost your zest."

Initially, I intended to write a Father's Day post, but a few minutes in, I realized it was a little too heavy for the light, sweet fare I am featuring today.

My father died in a horrible car accident along with a couple of his friends when I was about five years old, so I remember very little about him. Although I had great male role models in my grandfather and uncles, I often wonder what it might be like to have my own dad. K also lost his dad a few years ago and we aren't parents, so Father's Day usually slips by unnoticed in our household - for now...

See what I mean? Sad...and this cake is anything but. So, on to greener, lighter, sweeter thoughts...

Key Lime Mojito Mousse Cake
The always-too-short Summer arrives on Wednesday, and not a moment too soon!! Mind you, we have had some unseasonably warm weather since the start of Spring, so I really should be thankful.
One of my favourite things to do in the summer months is road tripping - especially up North. Let me just say that if you live in Ontario and have never visited Algonquin Park - YOU MUST. With over 7500 square kilometers, over 2400 lakes and 1200 kms of streams and rivers, one visit just won't do.
We have done three consecutive years there (okay some of that time was spent at the cottage), usually around my birthday and sans-technology - our point and shoot camera being the exception. It is usually very difficult and at the same time a relief, to return to the city, at least for me. The Dude would have us stay there permanently, if he had his way.
Key Lime Mojito Mousse Cake
Back in the city, our backyard - well, our old back yard - was our miniature Algonquin, our serenity. This one is currently a work in progress resembling an overgrown construction zone, but we cleared a space temporarily to sit and enjoy this tasty mousse cake. Paired with Martinis and Mojitos, you would almost believe summer was already here.
Key Lime Mojito Mousse Cake
This photo was included in a Key Lime Dessert line-up on Huffington Post Kitchen Daily.

Try this recipe as is, or with changes of your own - you can't go wrong. It is creamy, yet light with just the perfect balance of sweet and tangy. The perfect summer sweet!

Better yet, the perfect Father's Day after BBQ treat. Hope you all have a great day with the man you call dad.

Happy Father's Day!!

Print Recipe

Key Lime Mojito Mousse Cake

A creamy, sweet and tangy mousse sandwiched between a light vanilla cake - summer has finally arrived!
Prep Time15 minutes mins
Cook Time35 minutes mins
Total Time50 minutes mins
Course: Dessert
Cuisine: Cake
Servings: 12
Author: i sugar coat it!

Ingredients

For the cake:

  • 1 ½ sticks butter softened
  • 1 ⅔ cups superfine sugar
  • 3 large eggs lightly beaten
  • 1 generous cup self-rising flour
  • 1 teaspoon baking powder

For the filling:

  • 1 ½ cups heavy cream
  • 1 ¼ mascarpone cheese
  • 4 key limes juice and zest
  • juice of one small orange
  • 2 tablespoon key lime mojito homemade or storebought
  • 1 tablespoon unflavoured powdered gelatin
  • 2 tablespoon water
  • 2 drops avocado green food gel or Matcha
  • confectioner's sugar for dusting

Instructions

Make the Cake:

  • Preheat the oven to 325ºF. Grease and line a deep 9" springform cake pan.
  • Place the butter and ¾ cups of the sugar in an electric mixer fitted with the paddle attachment and beat until light and creamy.
  • Gradually add the eggs, beating well after each addition.
  • Sift the flour and baking powder together and then gently fold into the butter/egg mixture using a large metal spatula or spoon.
  • Spoon the batter into the prepared pan.
  • Bake for 30 to 35 minutes, or until a toothpick inserted in the middle comes out clean. Remove from the oven and let cool in the pan for 5 - 10 minutes. Remove from pan and allow it to cool completely on a wire rack.

Make the Mousse:

  • To a separate bowl, add the cream, mascarpone cheese, lime zest and juice, orange juice, mojito and remaining sugar and beat into a smooth cream.
  • Add the water to a small bowl and place over a saucepan half-full of simmering water, or use a double boiler if you have one.
  • Sprinkle the gelatin over the water in the bowl and stir until dissolved. Be careful not to overheat - this will cause the gelatin to lose its setting quality.
  • Stir the gelatin into the cream mixture, add the gel paste and beat the mixture again.

To Assemble:

  • Cut the cake in half, horizontally using a cake cutter or sharp, long knife. Return the bottom layer to the springform pan and clip the side of the pan back in place.
  • Pour the mojito lime mousse over the cake in the pan and then place the other layer of cake on top.
  • Refrigerate for at least 2 hours. When ready to serve, transfer to a cake stand or plate and sprinkle with confectioners sugar.

I-Sugar-Coat-It-Blog-Signature-Green

  • « Go to Previous Page
  • Page 1
  • Interim pages omitted …
  • Page 47
  • Page 48
  • Page 49
  • Page 50
  • Page 51
  • Go to Next Page »

Primary Sidebar

Never Miss A Happy Ending...

Previous Sweetness...

Search

Filter by Category

Filter by Date

SWEETEN YOUR INBOX!

All Content Including Images Copyright Jacqueline | I Sugar Coat It© 2026