• Skip to primary navigation
  • Skip to main content
  • Skip to primary sidebar
  • Home
  • About
    • About I Sugar Coat It
    • Features & Press
    • Copyright
    • Disclosure
    • Privacy Policy
  • Recipes
  • How-To
  • Contact
  • sous vide sista

I Sugar Coat It

Home

All Posts

May 2013 By i sugar coat it! 5 Comments

Chocolate Libations

Chocolate Wine Cupcakes w/Vanilla Bean Whipped Cream
There are a number of things that just do not pair well with wine - driving, public speaking, tightrope walking, work. Oh, and chocolate. Say what now!

Yeah, that was no error - chocolate and red wine are a no-no! Well, according to this article on Serious Eats that asks that we Please Stop Pairing Red Wine and Chocolate (with exceptions).
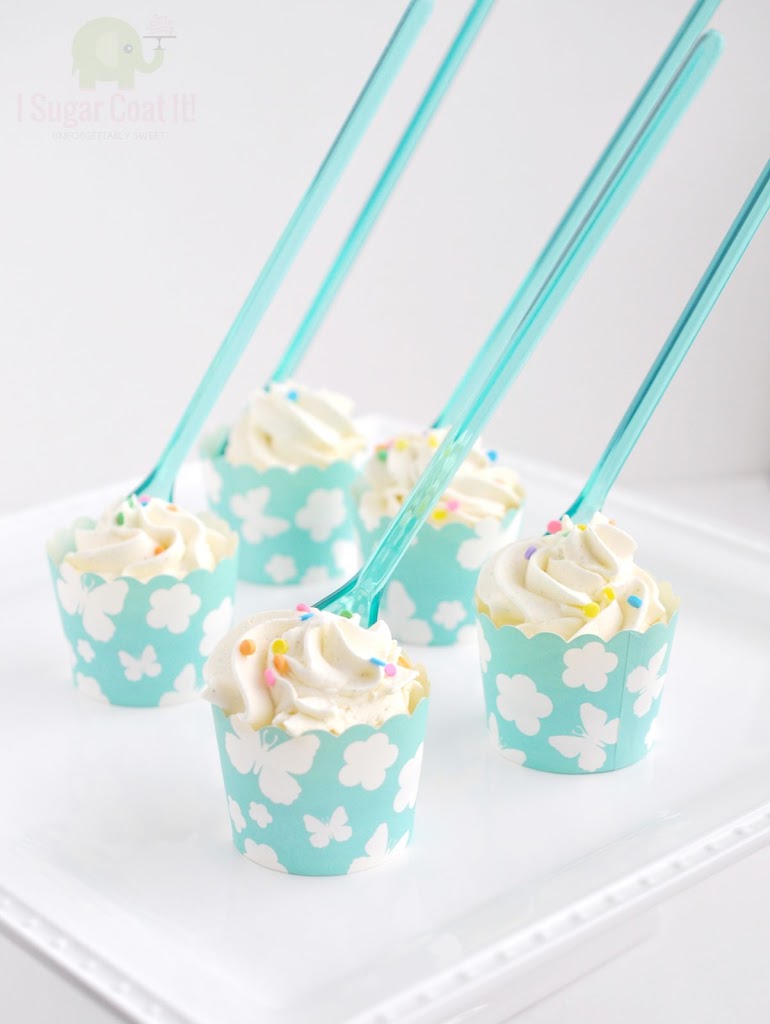
Well, I should just shut this post down and be on my way, glass and bottle in tow. But, I so want us to enjoy some chocolate and wine in these pretty little cups. So, let's ignore the article's plea and live on the edge.
Chocolate Wine Cupcakes w/Vanilla Bean Whipped Cream
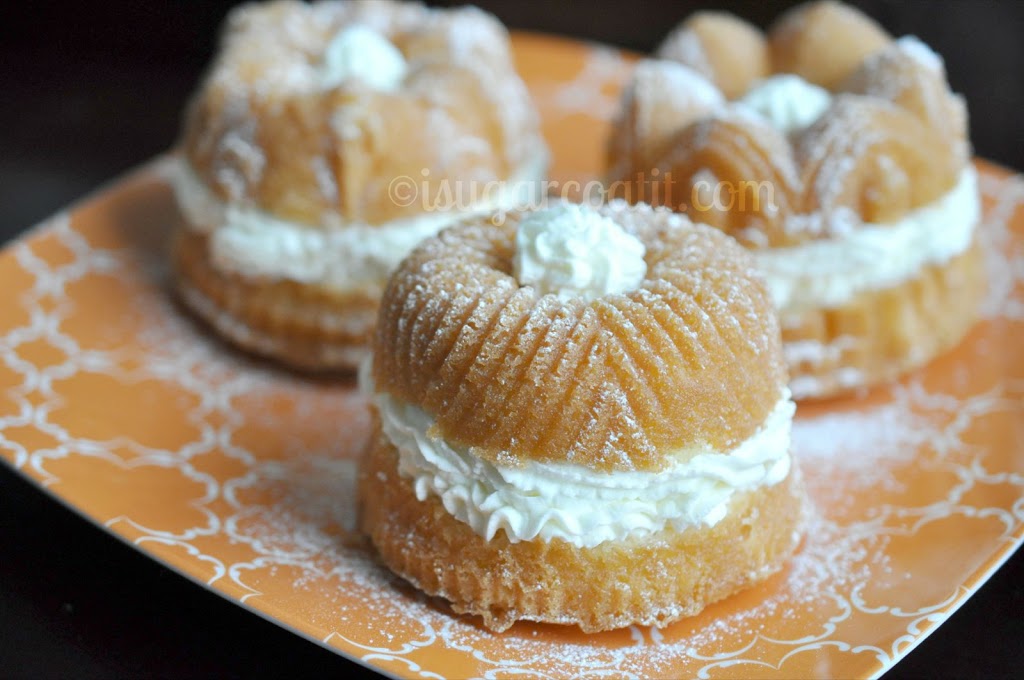
So happy we did that!  Heaven in a paper cup, topped with clouds of creamy, whipped cream and served up with a pretty plastic spoon. Can I get an amen!
I may have received an even bigger amen if I drizzled some glaze over the frosting, but I wanted to keep their innocence in line with the playful cups.
Chocolate Wine Cupcakes w/Vanilla Bean Whipped Cream
I can tell you how the light airy texture of the vanilla whipped cream complemented the rich, moist texture of the cake, how the cherry gelatin coupled with the chocolate helped to boost the notes in the wine, how the glaze was the real cherry on top, or how I convinced myself that three servings were equivalent to one because they are small cups - but I won't bore you. I suggest you give them a try and we'll chat once you have.

Chocolate Wine Cupcakes w/Vanilla Bean Whipped Cream
And what's a great cupcake without an equally great cup? I got these and every other design they had in stock at HomeSense. No telling if you will find the things you like on your next visit, so best to play it safe and strip them of their inventory while you have the chance. Man I love that place!

Unlike paper liners that require a muffin tin for baking, these little scalloped edges of adorableness have claimed their independence. Well, sort of. Just place them on a cookie sheet and you are good to go. It pained me to throw them out once they were scraped clean of their chocolate innards.

Aha - light bulb moment! Line them with plain cupcake liners!! And do my best to not get batter or frosting on them... Wish me luck with that!

Chocolate Wine Cupcakes w/Vanilla Bean Whipped Cream
So yes, there are some things that should not be paired with wine, but everything tastes much better with chocolate, especially when served in cute, little cups like these. Eat up!


Print Recipe

Chocolate and Wine Cupcakes with Vanilla Bean Whipped Cream

Chocolate and wine nestled under clouds of whipped vanilla goodness!
Prep Time15 minutes mins
Cook Time20 minutes mins
Total Time35 minutes mins
Course: Dessert
Servings: 24 mini cupcakes
Author: I Sugar Coat It

Ingredients

Cake

  • 4 ounces bittersweet chocolate
  • 1 cup cabernet sauvignon or another red wine of your preference
  • ⅓ cup 2% lactose-free milk
  • 1 ¾ cups granulated sugar
  • ⅔ cup unsalted butter at room temperature
  • 3 large eggs slightly beaten
  • 2 ¼ cups unbleached all-purpose flour
  • 1 box black cherry gelatin
  • ¼ cup unsweetened cocoa powder
  • 2 teaspoons baking powder
  • ½ teaspoon baking soda
  • ½ teaspoon salt

Glaze

  • 2 tablespoons unsalted butter at room temperature
  • ½ cup red wine
  • ½ teaspoon pure vanilla extract

Frosting

  • 2 cups 35% lactose-free cream
  • 3 tablespoons icing sugar
  • ¼ teaspoon crushed vanilla beans

Instructions

  • Preheat the oven to 350ºF. Place cupcake holders on a medium-sized cookie sheet; set aside.
  • Melt chocolate in a small bowl placed over a small saucepan of simmering water. Let cool 5 minutes. In a small bowl, combine wine and milk; set aside.
  • In the bowl of an electric mixer fitted with the paddle attachment, beat the butter and the granulated sugar on medium speed until light and fluffy. Add eggs; beat for 2 minutes. Add the cooled chocolate mixture and beat until incorporated, scraping down the sides of the bowl as necessary.
  • In a large bowl, whisk flour, gelatin, cocoa powder, baking powder, baking soda, and salt to combine. Add to mixer bowl, along with the wine mixture, and beat on low speed until combined, about 1 minute. Increase the speed to medium and beat for 2 minutes more, scraping down the sides of the bowl as necessary. Spoon batter into prepared cups.
  • Bake for 20-25 minutes, or until a toothpick inserted into the center of the cake comes out clean. Cool completely before decorating.

To make the glaze:

  • Combine the butter, wine, and confectioners' sugar in a medium saucepan. Bring to a boil, stirring occasionally, over medium-high heat. Remove from heat; stir in vanilla. Use a fork to make holes in the cupcakes and using a small spoon, sprinkle a small amount of glaze onto each.

To make the frosting:

  • Ensure the cream is properly chilled - chilling the mixer bowl also helps. Pour the cream into the bowl of an electric mixer and sprinkle in the crushed vanilla beans. Whip the cream on high setting, adding the icing sugar until firm peaks are achieved. Use a piping bag and a
  • #885 tip to pipe swirls onto the cupcakes.

Notes

cake and glaze recipes adapted from Martha Stewart

Chocolate Raspberry Espresso Cake with Raspberry Swiss Meringue Buttercream

April 2013 By i sugar coat it! 13 Comments

Chocolate Raspberry Espresso Cake {Dessert Dating}

Tall, dark, rich and not afraid to show my feminine side. Interested? Click on over and let's get acquainted.

Not what you were expecting? A little too feminine for your taste? Don't dismiss me so quickly. Take a few minutes to get to know me; peel back a few layers and you might be surprised.If you came because you saw my ad on Instagram or Facebook then you're probably a little surprised at how nicely I clean up. Smooth, delicate, pretty - I did say I would be wearing pink. You like?

 
Still interested, huh! Well, since you asked...
Yes, I am about 7" tall. You've probably heard of my dad, Cacao Barry, he's Belgium. I'm also part Mexican, Swiss, Italian and Canadian. I am a model part-time, but I'm mostly in the business of sating sweet-tooths. Oh, it's interesting, but you pretty much get eaten alive. A job hazard I've come to accept. So, am I your type?
Well... am I???
Consider my attributes - a 7" tower of deep, dark, rich, chocolate, held together by three layers of dark chocolate raspberry sauce, fresh organic raspberries and generous amounts of silky, smooth vanilla-filled buttercream, and dressed in the same with an ever so slight hint of pink, complemented by pops of teal in flowers and frills.
I don't know about you, but... um, YES, YES and HELL YEAH!
Ah, but look... my modelling gig is up. Off I go to sate a sweet-tooth, or two at a vintage-inspired bridal shower. She requested simple, clean, vintage and chocolatey, so I did my best.
Not ready to say goodbye? Sorry, gotta go! Hey, if you liked me then you should have put a ring on it taken a slice of me. 😉
Sandy, thanks for allowing me the opportunity to share in your daughter's special day in this manner. I hope the cake was enjoyed by all! Best wishes to the bride and groom to be!
This cake is the same recipe I used for my Birthday Cake last year, but with raspberry, chocolatey goodness added. The recipe for the Swiss Meringue Buttercream is similar to what I used for the Tuxedo Cake I made for my cousin''s birthday. (Recipes were adapted from Sweetapolita and Three Little Black Birds, respectively)
I made the cabbage roses from gum paste and fitted them into a bubble straw before inserting into the cake. The ruffles were piped using a #104 rose tip.
I really enjoyed working on this cake. It gave me a chance to work on my buttercream finishing skills, which aren't as shabby as I thought!
Have an awesome week!
Chocolate Raspberry Espresso Cake with Raspberry Swiss Meringue Buttercream
Print Recipe

Chocolate Raspberry Espresso Cake

Raspberry Chocolate Espresso Delight w/Vanilla Bean SMBC (Yield: 4 - 7” round cakes)
Prep Time30 minutes mins
Cook Time30 minutes mins
Total Time1 hour hr
Course: Dessert
Servings: 4 - 7” round cake
Author: I Sugar Coat It

Ingredients

Cake:

  • 227 g unsalted butter
  • 60 g Dutch process cocoa
  • 7 g instant espresso powder dissolved into 177ml water
  • 450 g granulated sugar
  • 250 g sour cream
  • 11 g vanilla extract
  • 2 large eggs
  • 220 g unbleached all-purpose flour
  • 7 g baking soda
  • 2 g salt

Frosting:

  • 305 g liquid egg whites
  • 425 g sugar
  • 570 g unsalted butter
  • 1 g Tahitian crushed vanilla beans
  • pinch of salt
  • 2 teaspoon fresh raspberry juice

Filling:

  • 160 g Raspberry Dark Chocolate Sauce
  • 300 g fresh chopped organic raspberries

Instructions

  • Preheat oven to 350° F. Prepare the pans - I apply a generous amount of cake release using a pastry brush.
  • Melt butter in a large saucepan over medium-low heat; add cocoa, stirring until smooth. Whisk in the espresso water and remove from heat.
  • Add the sugar, sour cream, vanilla, and eggs to the warmed cocoa mixture and whisk until smooth.
  • In a medium bowl, combine the flour, baking soda, and salt. Add to the first mixture, whisking until well blended.
  • Pour batter into the prepared pans. Bake for 30-40 minutes, or until it feels firm to the touch and has slightly pulled away from the sides of the pan.
  • Cool in pans on a rack for 5 minutes. Remove from pan by placing the rack over the cake and invert, tapping pan lightly, if required to loosen.
  • While still warm, wrap in plastic wrap and place in the freezer to cool. I leave mine overnight. I find this seals in the moisture, flavour and make makes torting and working with the cakes more manageable.

To make the frosting:

  • Ensure all equipment is grease-free.
  • Fill a heavy duty pot about a quarter of the way with water and place on the stove over medium heat to simmer.
  • Add egg whites, sugar and salt to the mixing bowl and whisk together lightly with a hand whisk, just until combined. Attach a thermometer to the side of the bowl and place the bowl over the pot of simmering water, ensuring the bottom of the bowl is not in contact with the water in the pot. Whisk the sugar egg white mixture constantly, but gently, until temperature reaches 160°F.
  • Once at the correct temperature, remove carefully from heat, wipe the moisture away from the bottom of the bowl and transfer mixing bowl to the stand mixer. With the whisk attachment, begin to whip the meringue on high speed until it is thick, glossy, and the bottom of the bowl is no longer warm to the touch. Do not begin adding butter while the bowl is still warm.
  • Switch from your whisk to paddle attachment and with mixer on low speed, add butter cubes, one at a time, until incorporated. Continue to mix until it has reached a silky smooth texture.
  • Add crushed vanilla beans and vanilla extract, continuing to beat on low speed until well combined.

Assembly:

  • Remove cakes from freezer a few hours ahead of assembling, wrap in tea towels and allow to defrost at room temperature. Level cakes, once defrosted.
  • Using a cake board just slightly larger than the size of your cake, spread a small amount of frosting over the board and place the first layer on the board, centering it.
  • Attach a #12 plain round piping tip
  • to a bag and fill with frosting. Pipe a round dam just inside edge of the cake.
  • Generously coat the top of the cake with raspberry chocolate sauce. Place a handful of fresh, chopped raspberries over the sauce and the fill in with frosting.
  • Place a layer of cake on top of frosting and press lightly, but firmly until levelled. Repeat for the remaining layers. Use the frosting in the piping bag to fill in any gaps between layers and use an offset spatula to seal the seams.
  • Add a thin layer of frosting over the entire cake to seal in the crumbs and place in the fridge for 15-20 minutes.
  • Remove from the fridge and frost the cake, using the cake board as your guide for applying an even coat of frosting. Smooth out the frosting using a spatula. Refrigerate.
  • Let stand at room temperature for an hour before serving. Enjoy!


April 2013 By i sugar coat it! 11 Comments

Mother's Day Cookie Bouquet

Mother's Day Cookie Bouquet

It's Sunday and it finally feels like Spring! A little on the cool side, but the sun is doing it's sunshiny thing, the birds are chirping, the lawn is green instead of white, and there is no rain cloud in sight.A nice bright glimpse of things to come!

Nine more weeks and we'll be welcoming summer with sleeveless, open arms. But in the meantime, it's so refreshing to see the trees grow new, fresh, green coats, pops of colour push their way through the almost thawed garden, brighter mornings and evenings and birds singing happily and hopping around cheerfully in the backyard. I just love how all that has lain dormant for months, gradually come to life again. A rebirth.
Mother's Day Cookie Bouquet
And speaking of birth, Mother's Day is just three short weeks away! I am usually so behind on these special occasion posts, so I am quite excited to share this with you today.
I've put together a little pictorial below and video here for any of you wishing to make these for that special lady, or ladies in your life.
Mother's Day Cookie Bouquet
 You will need:
    • A batch of cookies. I made Coconut Vanilla Sugar Cookies (see recipe below). The coconut flavour is achieved with the use of LorAnn Oils Coconut Bakery Emulsion. I have used it in my Raspberry Coconut Meringue and Coconut Swiss Meringue Buttercream. I also have some of the other flavours and just love how they kick the taste up a notch.
    • Modelling Chocolate or Candy Clay in your colour preference. You can find the recipe here.
    • A non-stick surface on which to roll out your modeling chocolate. I use the Ateco Fondant Work Mat. I have had it for a couple years and it never disappoints.
    • Cutters. I used the FMM Five Petal Rose Cutter in two sizes - the larger 90mm cutter to shape the dough and cover the cookie, and the smaller 65mm to make the red flowers.
    • Small rolling pin outfitted with ⅛" spacers.
    • Bamboo skewers or lollipop sticks. Be sure to bake them in the cookies, or insert carefully into baked cookies while still warm.
    • Royal icing in white to use as glue and teal to decorate flower center. I used a small flat brush to coat the cookies and a piping bag outfitted with a #1 tip to decorate the flower center.
    • Mini muffin paper cups to hold and form drying flowers.
Mother's Day Cookie Bouquet
 Allow a few hours for the flowers to dry throughly. I allowed mine to dry overnight.
Mother's Day Cookie Bouquet
Sprinkle a little food safe dust to add some sparkle and shine. Et Voila!!
Mother's Day Cookie Bouquet
If three weeks seem too long to wait to give these a try, it's Earth Day tomorrow. Why not make a batch to celebrate Mother Nature. She will thank you with an early Summer!
 
Print Recipe

Coco- Vanilla Sugar Cookies

(Yield: 2 dozen 3 ½” x ¼” cookies) Coconut and vanilla bloom into buttery, sweet gifts for mom.
Prep Time2 hours hrs
Cook Time12 minutes mins
Total Time2 hours hrs 12 minutes mins
Course: Dessert
Servings: 2 dozen
Author: I Sugar Coat It

Ingredients

  • 230 g unsalted butter cool
  • 295 g all purpose flour
  • 135 g granulated sugar
  • 1 large egg cool
  • ½ tablespoon crushed Tahitian vanilla beans
  • 1 teaspoon coconut emulsion
  • 23 g shredded coconut
  • ¼ teaspoon salt

Instructions

  • Preheat oven to 350ºF. Place oven rack in the center of the oven. Line a baking sheet with parchment paper or silpat.
  • In the bowl of your electric mixer fitted with the paddle attachment, beat the butter and sugar until light and fluffy.
  • Beat in the egg, crushed vanilla beans, shredded coconut and coconut emulsion.
  • In a separate bowl, sift and whisk together the flour and salt.
  • Gradually add the flour mixture to the creamed mixture and beat just until incorporated. Scrape down the sides of the bowl as needed.
  • Divide the dough in half and wrap each portion in plastic wrap and place in the refrigerator until firm (about an hour or two).
  • Remove from fridge and use a rolling pin to roll dough out to about ¼ inch thick - I use dough spacers to achieve even cookies.
  • Cut into desired shapes and place on the baking sheet, spacing about 2 inches apart. Place in freezer for about 3-5 minutes.
  • Remove from freezer, let rest 1 minute and then bake the cookies for about 10-12 minutes, or until the edges of the cookies are a very light brown.
  • Let cool completely before decorating with icing.
  • Enjoy!

Notes

See above pictorial for decorating.

Lactose-Free Strawberry Glazed Mini Donuts

April 2013 By i sugar coat it! 13 Comments

Lactose-Free Strawberry Glazed Doughnuts

Lactose-Free Strawberry Glazed Doughnuts. Light, fluffy, baked mini donuts dripping with fresh and freeze-dried berry glaze.
Lactose-Free Strawberry Glazed Mini Donuts
 Do you have a preference for the proper spelling 'doughnut', or the variant, 'donut'? And while we are on the topic, do you like them baked or deep-fried, plain or dipped? I tend to go for the latter in all instances. How about you?

Since I've started the interrogation early, why not continue. Are you lactose intolerant? Do you stay away from all dairy, or have you found suitable substitutes? Or, do you throw caution to the wind and deal with the consequences curled up in fetal position on the bathroom floor?

If you are indeed lactose intolerant and your love affair with dairy bears the slightest resemblance to mine, then I'm guessing your bathroom floor is well acquainted with the warmth of your skin.That said, I am not completely deterred from enjoying the things I love most - ice-cream, cheese, cheese and more cheese - anything rich and creamy, actually.  And boy do I pay the price...

Lactose-Free Strawberry Glazed Mini Donuts

I bake a great deal, so I am mouth deep in the stuff - cream, butter, milk, cheese. Where I can, I use soy or rice products, mostly to appease K, the vegetarian half of my relationship. Oh the sacrifices! 😉 I like dairy for its richness, which is missing from most substitutes.

I still eat cheese way too often, there just isn't any substitute for a good chunk of cheese. Can you say Gruyere grilled cheese? Yes you can, yes you can! But I digress...
I have been using lactose-free milk for a few years and it seems to have gotten better in taste. I use Natrel Lactose Free 2% milk daily and in my baking. They now have a Lactose Free 35% Cream - holla!!
Homemade lactose free ice-cream, here I come!! Butter, quality butter, is in abundance in my fridge and freezer. It takes about a pound and a bit of butter to make a decent batch of Swiss Meringue Buttercream, and I can't seem to get enough of the stuff, so butter is always on hand.
Lactose-Free Strawberry Glazed Mini DonutsAlthough not much, butter contains traces of lactose - 0.5% as opposed to the 4.9% that is present in cow's milk. So I can avoid butter, or remove the lactose and enjoy even tastier versions of butter - clarified butter and Ghee. And they are easier to make than I initially thought. You can learn all about them here. I think I will revisit this for future baking projects.
So you have yourself a few dozen Lactose-Free Strawberry Glazed Doughnuts...now what? How about some berry glaze and nonpareils!!

Lactose-Free Strawberry Glazed Mini Donuts
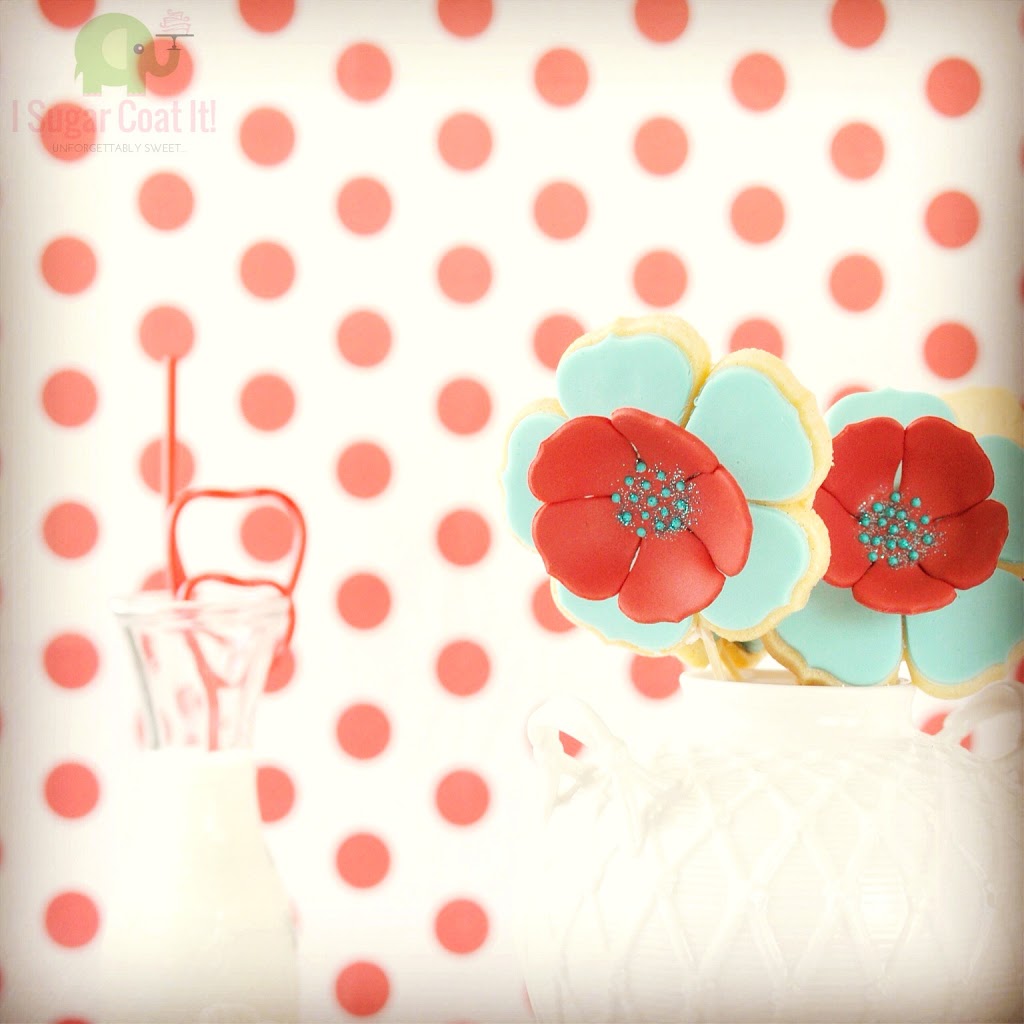
A lot of confectioner's sugar, a little warm lactose-free milk and a handful of fresh or freeze-dried berries - all that's left to do is dip, sprinkle...

Lactose-Free Strawberry Glazed Mini DonutsAnd enjoy with a glass of lactose-free milk and a whole lot of polka dots! 🙂
Lactose-Free Strawberry Glazed Mini DonutsMy niece had a hand in making and decorating these little bites and we managed to make sweet art in the process. Thank you, Shay!
I am so excited to be one of the featured bloggers/bakers asked to take part in the Natrel Lactose-Free Campaign. Head on over to see my contribution along with some other lactose-free sweet treats.
Lactose-Free Strawberry Glazed Mini Donuts
Print Recipe

Lactose-Free Strawberry Glazed Doughnuts

Lactose-Free Strawberry Glazed Doughnuts. Light, fluffy, baked mini donuts dripping with fresh and freeze-dried berry glaze.
Prep Time15 minutes mins
Cook Time15 minutes mins
Total Time30 minutes mins
Course: Dessert
Cuisine: Doughnuts
Servings: 24
Author: i sugar coat it!

Ingredients

For the doughnuts:

  • 120 grams Ghee clarified butter
  • 200 grams granulated sugar
  • 2 large eggs
  • 466 grams unbleached all-purpose flour
  • 19 grams baking powder
  • 3 grams sea salt
  • 2 grams ground cinnamon
  • 2 grams nutmeg
  • 250 ml lactose-free milk
  • 1 vanilla bean scraped

For the glaze:

  • 220 grams confectioners' sugar
  • 10-15 strawberries pureed and strained
  • an assortment of freeze-dried fruit powder blueberry, mango, raspberry, orange
  • 75 ml warm lactose-free milk

Instructions

Bake the doughnuts:

  • Preheat oven to 350ºC. Lightly grease doughnut pan and set aside.
  • Sift together flour, baking powder, salt, cinnamon and nutmeg and set aside.
  • In the bowl of an electric mixer, beat sugar, butter and vanilla beans until smooth. Add the eggs one at a time until fully incorporated.
  • Turn the mixer to the lowest setting and gradually add the flour to the butter mixture. Add the milk and blend thoroughly.
  • Transfer the dough to a piping bag. Cut an opening at the tip and pipe dough into doughnut pans.
  • Bake for 12 to 15 minutes.

Make the glaze:

  • Sift confectioner’s sugar into a clean bowl. If using freeze-dried fruit powder, whisk in with the sugar.
  • If using fresh fruit, puree and strain to remove seeds.
  • Warm the milk and add to the sugar/fruit mixture. Stir until the mixture reaches a consistency similar to that of honey.
  • Dip tops of doughnuts into glaze. Decorate as desired.

{Disclosure: I received payment for my contribution as part of this campaign.}

April 2013 By i sugar coat it! 10 Comments

Leopard Print Madeira Sponge Cake

Leopard print Madeira Sponge Cake with a colourful print baked into the layers and decorated with a cocoa stencilled swiss meringue buttercream.

Hi, there! It feels like an eternity since I've been here. I don't know about you, but I've sure missed being here with ya'll. So let's catch up, shall we? Grab a drink, I brought dessert!

Hmmm, where did we leave off two weeks ago? Oh yeah, Bunny Magic! Since then, I became unemployed, re-employed, managed to fit in some long overdue sleep and travel, gained a few pounds, started training for a marathon ;), enrolled in more courses, spring cleaned, redecorated, and got back to sewing. I'd say it's time for a loooong vacation! Yes?

Well, that was the plan, for the entire months of April and May, in fact. However, I received and accepted a job offer sooner than expected. Even with my savvy nogotiations skills, I could not negotiate my way out of starting immediately, so I jumped right in and have been ridiculously busy. This new arrangement does offer some time flexibility in the form of a compressed work week, which has been a huge plus.

So with most Fridays off,  I thought I would spend some quality time with my niece. She likes sewing and plans to become a Fashion Designer one day. So we hung out in the little sewing room tucked in the back corner of my house creating skinny jeans -  RED skinny jeans. We measured and cut and talked and laughed and sang and it was fun. Lots of fun. I realized how much I've missed sewing and how much we two have in common (for now anyway).

While she was getting comfortable on the Serger, I thought I would spend some time catching up on my blog reads, when I came across this Cheetah/Leopard print cake by Masam Manis. I seem to be attracted to blogs written in entirely foreign languages. Thank goodness for visuals and translation tools.  I was already familiar with Madeira cakes, but colourful prints in a cake was new and so exciting!
I'm not sure where it originated, but I've been meaning to try it. I showed it to my niece and she turned the machine off and demanded we head to the kitchen. I wasted no time marching right in behind her, on the condition that she would do most of the work. 😉 She even took the process shots.
We set out to make three 7" Madeira Sponge cakes, but quickly realized that we coloured too much of the batter and didn't leave enough of the plain batter for covering the stripes. We settled on two pans instead. That seemed to do the trick.

Shay felt we should make the leopard spots pink and teal, I agreed without hesitation. So we:

  1. Spooned some of the plain batter into the bottom of each pan, about two inches deep.
  2. Separated the remaining batter and coloured one third, teal, another pink and the final was left plain. You need not colour as much batter as we did, as it resulted in a shortage of the plain batter for the top layer. You will need to play around to determine what is a suitable amount based on the cake size.
  3. Filled three piping bags each with plain, pink and teal batter.
  4. Piped a layer of teal in circles, then a layer of pink directly onto the teal, then another layer of teal onto the pink.
  5. Filled in the gaps between each circle by piping the plain batter and then used the remaining plain batter to cover it all up.
  6. Tapped the pans and into the pre-heated oven they went.

While the cakes rose in the oven, we whipped up some Vanilla Bean Swiss Meringue Buttercream. The cakes were then filled, frosted and yada, yada, yada, we had ourselves a Leopraffe. A leopard in giraffe's clothing. Um...yeah, best to not explore that any further. It's my niece's creation and that's all you need to know about that. Well, and that it was very tasty and the recipe is super easy!

We used the stencilling technique that I created on my Chocolate Espresso Giraffe cake last July. A little cocoa powder, some food colour and a tasty, wild, hybrid was created.

Print Recipe

Madeira Sponge Cake

Madeira Sponge Cake with a colourful print baked into the layers and decorated with a cocoa stencilled swiss meringue buttercream.
Prep Time30 minutes mins
Cook Time40 minutes mins
Total Time1 hour hr 10 minutes mins
Course: Dessert
Servings: 2 -7" round cakes
Author: I Sugar Coat It

Ingredients

  • 240 grams unsalted butter room temperature
  • 200 grams granulated sugar
  • 100 ml milk
  • 3 eggs room temperature
  • 250 grams unbleached all-purpose flour
  • 16 grams baking powder

Instructions

  • Preheat oven to 325ºC.
  • Place the butter and sugar in the bowl of an electric mixer, or hand mixer. Beat on medium speed until well incorporated and fluffy.
  • Turn the mixer to low and add the eggs one at a time, adding a tablespoon of flour with each egg addition.
  • Add the remaining flour and the baking powder and continue to mix on low.
  • Add the milk and mix until fully incorporated.
  • To make your pattern in the cake, proceed as described in the post above, and bake for 40 minutes.
  • Cakes are ready when an inserted toothpick or cake tester comes out clean.
  • Allow the cakes to cool on a rack for about ten minutes, then invert onto the rack to cool completely.

Notes

Recipe from Masam Manis


Easter Bunny Layered Cookies

March 2013 By i sugar coat it! 15 Comments

How Easter Bunnies Are Made

What are Easter Bunnies? Do they really lay eggs? Are they any relation to chickens? Where do they live? What do they eat? How are they made? All pressing questions that keep us up at night. Perhaps, I can put your mind at ease.
Pastel Layered Easter Bunny Cookies

First, let's clear up some of the rumours and misconceptions surrounding Easter Bunnies. Contrary to popular belief, they are of no relation to Stuart Little, Remy from Ratatouille, or any of the other famous rodent clan. And the claims that suggest they are the illegitimate siblings of Peter, Flopsy, Mopsy and Cottontail are incorrect. I have even heard rumours of Jessica Rabbit's illicit affair with a famous yellow bird (who shall remain unnamed) brought about these colourful, egg-laying hoppers. False, I tell ya! And disturbing, actually...

Pastel Layered Easter Bunny Cookies
Easter bunnies are a special rabbit breed, born from real magic! None of that pull one out of a hat waving a handkerchief nonsense. Real magic! I am talking potions and powders and crystals and fire kind of magic! And you don't need to travel to Vegas and pay to see it - the nearest kitchen will do just fine.
First, you will need to get your hands on some magical crystal disaccharide, unbleached dried and grounded grains, a couple blocks of emulsion of animal fat extracted from a cow (sheep, buffalo and yak may be substituted), one Ova of the Gallus gallus domesticus, a few grains of vaina and scrapings of the genus Citrus.
Next, pull down the shades, lock the doors and light up the cauldron - an oven works just as well - follow the steps below, and...
Pastel Layered Easter Bunny Cookies
ABARACADABARA - POOF! You've got bunnies!
Pastel Layered Easter Bunny Cookies
And you know what they say about bunnies. Before you know it, two turn into twenty, into two hundred, into... Luckily, we have a satisfyingly, effective means of controlling their population - NOM-NOM-NOM!
Pastel Layered Easter Bunny Cookies
I first saw this layered technique on a beautiful blog I have been frequenting since last Spring, Mensaje En Una Galleta, where inspiration abounds.
I really enjoyed making these Pastel Layered Easter Bunny Cookies - a nice break from royal icing, fondant and frosting. I think you would too!
So what did we learn? Well, not much about the Easter Bunny, but maybe a little black bunny magic. Yes!?!
More Easter Treats:
Carrot Cupcakes with Easter Bunny Cookie Toppers
Easter Egg Cakes
DIY Easter Eggs
Easter Bunny Layered Cookies
Print Recipe

Vanilla Bean Bunny Sugar Cookies

Pastel layered bunny sugar cookies.
Prep Time20 minutes mins
Cook Time15 minutes mins
Total Time35 minutes mins
Course: Dessert
Servings: 12
Author: I Sugar Coat It

Ingredients

  • 226 grams salted butter cold
  • 135 grams granulated white sugar
  • 1 large egg
  • 1 teaspoon lemon zest
  • ½ teaspoon crushed Tahitian vanilla beans
  • 295 grams all purpose flour
  • 1 drop each of gel paste colour

Instructions

  • Preheat oven to 350ºF. Place oven rack in the center of the oven. Line a baking sheet with parchment paper or silpat.
  • In the bowl of your electric mixer fitted with the paddle attachment, beat the butter and sugar until light and fluffy.
  • Beat in the egg, lemon zest, and vanilla beans.
  • Gradually whisk the flour into the creamed mixture and beat just until incorporated.
  • Scrape down the sides of the bowl as needed.
  • Divide the dough in thirds and colour each ball of dough using gel colours of your choice. Shape each ball of dough into disks and wrap separately in plastic wrap. Place in the refrigerator until firm, or overnight if not baking immediately.
  • Remove from fridge and use a rolling pin to roll dough out each disk to about ¼ inch thick. Place the sheets of dough in the freezer for about two minutes. Remove from freezer and lay the coloured sheets of dough one on top of the other in the desired order.
  • Use the rolling pin to press the layers together. Cut into desired shapes and place
  • on the baking sheet, spacing about 2 inches apart. Place
  • in freezer for about 3-5 minutes.
  • Remove from freezer, let rest 30 seconds and then bake the cookies for about 12-15 minutes, or until the edges of the cookies are a very light brown.
  • Remove from oven and place on a wire rack to cool. Decorate as desired.

I-Sugar-Coat-It-Blog-Signature-Green

Stenciled Cake with Pink Sugar Peony

March 2013 By i sugar coat it! 19 Comments

The Princess Peony

The Princess Peony Cake
Oh March, with your break from school, green beer and shamrocks, Spring, Passover and Easter to close things out. I had not noticed before what an eventful month you are. I blinked and found myself already halfway through your four weeks! Why must you move so quickly?

I can't seem to wrap my mind around being three months into the new year. More shocking... how little I have baked! This is only my third cake this year!! My first was this Orchid Flower Cake I made for the redesign of my blog and then this mouthwatering Butter Pecan Cake the mister and I whipped up for Valentine's Day. All my other posts, with the exception of these Elephant Cookies, have been of treats made last year.

But I have good reason. Life's been quite hectic behind the scene. 2013 has brought with it a number of challenges, some welcomed, others, not so much. I won't bore you with the details this time around. Let's talk peonies and princesses today.

Pink Sugar PeonyPink Sugar Peony
Those of you who follow me on Facebook and Instagram may remember my teaser last weekend for the flower in this post. Well, it finally joined forces with this stenciled, teal number to help a blushing bride-to-be celebrate her final days of bachelorettehood.:)
I have been on a flower making frenzy of late. In the wee hours of the morning, when I should be resting for work, I've been cultivating my private sugar garden where cabbage roses, anemones, dahlias, tulips, carnations, roses, orchids and peonies are in bloom - all waiting their turn to adorn future cakes. The more I make them, the more patience and appreciation I acquire for the process, and pure admiration for those who have mastered the art.
Teal Cake with Grey Stencil and Pink Sugar Peony
I think I appreciate the art of stenciling as much as I do sugar flowers. I've used a number of mediums to stencil on cakes - edible paint, lustre dusts, even cocoa - this was only my third time using royal icing. I somehow convinced myself otherwise, but a quick check of my photo archive confirmed that fact. I have actually stenciled more cookies than I have cakes.
My admiration for stenciled cakes has resulted in an impressive collection of stencils. I haven't had opportunity to use many, but perhaps I will get around to them this year. I used this Victorian Crochet lace stencil and royal icing tinted gray for this design. I then used pink edible luster dust mixed with a little vodka to add some pink accents to the design. My attempt at piping a pearl border did not end so well - I forgot to change the icing consistency, so it began to lose its shape when left to set. Unfortunately, I did not have time to correct it. 🙁
 
Marshmallow FondantDoweling A Cake
Teal Marshmallow FondantStacking A Cake
I used marshmallow fondant to cover both tiers. It tastes so much better than the store-bought stuff, but it is a messy, pain in the behind to make and can be quite sticky. Explains why I've only made it a couple times. I think I'll make more of an effort though, as it's more cost effective and as I mentioned above, tasty. If you have not tried it, you should - the recipe is below.

The base tier is an 8" double barrel vanilla cake, filled with raspberry and white chocolate swiss meringue buttercream. The top tier is 6" of the same flavour. Both were covered in white chocolate ganache before the fondant was applied.

Teal Cake with Grey Stencil and Pink Sugar Peony
I call her Princess Peony! Her teal and pink girlish charm exterior conceals two tiers of a sweet, decadent, chocolatey inside. Much like the bride-to-be! 😉 All the best to you, Mel, as you prepare to enter a new chapter of your life.
Princess Peony - I Sugar Coat It
Print Recipe

Marshmallow Fondant

Course: Dessert
Author: I Sugar Coat It

Ingredients

  • 400 g mini marshmallow
  • 30 ml water
  • 1.5 g salt
  • 1 ml pure lemon extract
  • 30 ml clear corn syrup
  • 5 ml pure vanilla extract
  • 900 g confectioners sugar sifted
  • 118 ml vegetable shortening
  • Gel colours of your choice

Instructions

  • Grease microwave-safe dish and spatula with vegetable shortening. Place marshmallows and water into dish and microwave on high for one minute. Remove and stir well.
  • Microwave on high for 30-second intervals until the marshmallows are completely melted.
  • Remove from microwave and add the
  • gel colour(s) and the remaining ingredients, except the sugar. Stir with the spatula to combine.
  • Add half the sugar and mix until fully incorporated.
  • Pour the remaining sugar onto a clean counter and place the fondant on the sugar.
  • Slowly knead the fondant, working from the outside in. Knead until most of the sugar is incorporate.
  • Rub your hands with a generous amount of vegetable shortening and continue kneading the fondant until it becomes smooth and confectioners sugar is incorporated.
  • Continue to add a little shortening until it’s pliable and smooth.
  • Coat again with vegetable shortening and wrap in two layers of plastic wrap. Place in a zip-top plastic bag and allow to rest at room temperature overnight.

Notes

(adapted from Cake Central)


March 2013 By i sugar coat it! 11 Comments

Eat Your Tea Tuesday: Lemon Myrtle Crème Chantilly Mini Cakes

Lemon Myrtle Crème Chantilly Mini Cakes
There isn't much I like about winter. So why I moved to this part of Canada from a perfectly warm, beautiful, albeit hurricane-prone state, is still a mystery.But, what do they say about life and lemons?

Strangely, I like the sports/activities associated with this season - skiing, skating, tobogganing, and who knows, I just might try ice fishing some day in the very, very distant future...or not. The very thought makes me shudder.

Quick, run the reel where we are half naked, skipping though the lawn sprinkler before jumping in the pool from which we emerge to large colourful plastic cups filled with sweet lemonade and mounds of crushed ice. Ahhhhhhh...

Lemon Myrtle Crème Chantilly Mini Cakes


Lemonade! Just saying it makes me want to shed my sweater and long underwear. My grandmother made THE BEST lemonade I have ever tasted. Bizarrely, she used limes - freshly picked limes straight from the garden.

As kids, we were given the important task of prepping them for the squeeze. This involved, washing them, lining them up on the kitchen table and using our tiny palms to press and roll before passing them off to be cut and stripped of their deliciously tangy juices and pulp. We would sometimes sprinkle a little salt on the gutted halves and suck the little remaining juices out before discarding them. Not sure why, but we clearly enjoyed it.

While we were busy being kids, my grandmother worked in the background transforming the freshly squeezed juice into lemonade with the addition of brown sugar, water and a touch of  Angostura Bitters. Yeah, you heard, bitters! The same stuff used by mixologists around the world to flavor drinks and cocktails was being served up in my grandmother's kitchen to us kids!!

But before you judge, you should know that bitters is believed to have restorative properties. What they restore exactly, I am not sure, but I do know for a fact that it cures hiccups! So there!! And just so that we are clear, I will never call it limeade. It will always be THE BEST lemonade EVAH!

Sadly, try as I might, I could never replicate the taste...

Lemon Myrtle Crème Chantilly Mini Cakes
As you may already know, I'm a tea girl and now you are acquainted with my  love for lemonade. So imagine my delight when I sampled Organic Lemon Myrtle tea from DAVIDsTEA. I've tried it warm, iced and now baked and whisked in my Lemon Myrtle Crème Chantilly minis- it does not disappoint either way.
I made these little treats this past New Year's Eve and they were so good I had to make a second and third batch. No lie! The texture was light and refreshing, and the sweet, tangy, creamy flavour combination certainly put me in a summer state of mind. The presence of lemon in both the cake and crème were reminiscent of warm summer days laid out by the pool, cold glass of lemonade close at hand. Can you tell I've just about had it with winter?
Lemon Myrtle Crème Chantilly Mini Cakes
 The mini cakes are Angel Food Cake recipe infused with Lemon Mrytle tea. To further heighten the lemony taste, I made a tea-infused crème Chantilly by simmering simmering the whipping cream with two heaping tablespoon of tea before adding it to the remaining cream. I then chilled it in preparation for the Chantilly.
These mini treats are wonderfully light with a prominent citrusy flavour. They make a refreshingly cool treat topped with fresh fruits, or a generous dollop of lemon curd sandwiched in with the cream, or on the side.


Print Recipe
5 from 1 vote

Lemon Myrtle Crème Chantilly Mini Cakes

Lemon tea infused mini angel food cakes filled with cool clouds of a citrusy Crème Chantilly.
Course: Dessert
Servings: 8 -10
Author: I Sugar Coat It

Ingredients

Cake

  • 350 g superfine sugar
  • 1.5 g salt
  • 125 g cake flour sifted
  • 375 g egg whites at room temperature
  • 4 g cream of tartar
  • 100 ml water
  • 1.5 g Lemon Myrtle tea

Crème Chantilly

  • 475 ml whipping cream 35%
  • 3-5 g icing sugar adjust to taste
  • 2 g Lemon Myrtle tea
  • The rind of 1 lemon optional

Instructions

  • Preheat oven to 325°F.
  • Bring some water to a boil and pour 100ml into a measuring cup. Add the tea leaves to the water, cover and leave to steep and cool for a few minutes.
  • In a large bowl, sift the salt and flour.
  • In the bowl of an electric mixer fitted with the whisk attachment, whisk together egg whites,
  • and cream of tartar until soft peaks form. Add the sugar and tea and whip for a few more minutes
  • at medium speed until medium peaks form.
  • Remove bowl from mixer stand and using a sieve, sift the flour mixture, a little at a time, in with the egg mixture.
  • Use a spatula to gently fold the flour mixture into the egg mixture.
  • Scoop batter into the wells of a mini Bundt pans and bake for 20-25 minutes.
  • Insert a toothpick in each to check that they are fully baked.
  • Remove from the oven and place upside down on cooling rack until completely cooled.

To make the crème:

  • Chill the mixing bowl in the freezer for 5-10 minutes, or in the fridge for 15 minutes.
  • Place the cream and the tea leaves in a small sauce pan and bring to a simmer.
  • Let cool before refrigerating.
  • Pour the chilled whipping cream into the bowl of an electric mixer and whip to soft peaks, adding the sugar to taste as you whip.
  • Grate the lemon rind into the cream mixture and whip again briefly to form medium peaks.
  • Chill until ready to use.

Assembly:

  • Slice the mini cakes in half, horizontally and pipe a generous amount of crème on the bottom half using a decorative tip.
  • Place the top half on the crème and pipe a little crème in the center. Serve with a side of berries and lemon curd (optional).


Baby Shower Decorated Elephant Cookies

February 2013 By i sugar coat it! 3 Comments

The Elephants In The Room - Vanilla Rose Elephant Cookies

Baby Shower Decorated Vanilla Rose Sugar Cookies
When my auntie D requested cookies for my cousin's baby shower, I surprised myself when I suggested elephants. I adore elephants, so the thought of eating cookies in their likeness was a little unsettling. But I do love a good cookie, it's my nickname after all, so Vanilla Rose Elephant Cookies, it was!
But let's face it, I am not overly skilled in the art that is Royal Icing. My earlier attempts at cookie decorating using the stuff - Sweet Swimmers and Baby Bump - have yielded mediocre results. It's not rocket science, yet achieving the right icing consistency has been somewhat of a challenge. But hey, I am always up to challenging myself, even in the smallest of ways. Plus, it gave me a chance to use the elephant cutter from the Zoo Animal set I purchased while at the first annual Canada Baking & Sweets Show back in 2011. Long overdue.

Baby Shower Decorated Vanilla Rose Sugar Cookies
There is an abundance of baby shower-related elephant cookies and cakes on the web, so this isn't exactly a new idea, needless, I like the idea of elephants for a baby shower. They are such a beautiful, gentle, intelligent animal, symbolic of strength, honour, stability and patience. In Hinduism, the elephant is represented in the form of Ganesha, who symbolizes luck, fortune, protection, and blessings. All the things one would want for a little one on the way.
Baby Shower Decorated Vanilla Rose Sugar Cookies
I set about creating these beautiful creatures in sugar form using a generous mixture of butter, sugar, flour, eggs, crushed Tahitian vanilla beans and rose water. Once mixed, I chilled the dough then rolled it out using spacers to help keep them even. I then used the cutter to cut out the shapes and chilled them before baking. Soon after, I had my lifelong wish, a room filled with elephants!!
Baby Shower Decorated Vanilla Rose Sugar Cookies

I let them cool completely, while I whipped up a batch of royal icing using the recipe from Sweetopia. Actually, I was inspired by Marian's elephant cookies post.

I took about three table spoons of icing, added to a small bowl and coloured it with a couple drops of Americolor Brown gel paste. I used just a touch of Americolor Avocado gel paste to color the rest of the icing a very light green for outlining the elephants and separated out about a cup. I then darkened the bulk of the icing by adding additional gel paste in the same colour - about three drops.

Baby Shower Decorated Vanilla Rose Sugar Cookies

I thought I had the right consistency, but the texture of my test cookie looked and felt like that of a real elephant - not exactly what I was aiming for. I added a little more water, mixed, did the 10-second test and we were good to go. I used a PME 1.5" tip, which resulted in a much more subtle border than intended. In the end I preferred it. I was feeling pretty confident and thought I'd try the wet-on-wet technique for the ears and eyes.
All flooded and laid out to dry, they looked like little ceramic elephants while the icing was still wet and shiny. The Dude stuffed the plastic bags in preparation for the labels, which I made using free clip art and then printed on Avery labels.

Baby Shower Decorated Vanilla Rose Sugar CookiesBaby Shower Decorated Vanilla Rose Sugar Cookies

I was quite pleased with the way they turned out, so I snapped a few shots and was on my way to celebrate with family, my cousin's little bun in the oven. I say it's a girl and predict she will arrive on February 28, but I have never been correct about this sort of stuff.

In parting, here is a little elephant joke I found and just had to share:

An elephant was walking in a park. With each step he took, he squished many little ants. Upset, the ants began to crawl up on the elephant -- first his legs and then up all over his body. When the elephant started feeling all the little ants on him, he shook hard, making all the little ants, except for one, fall to the ground. As the only ant on the elephant hung on close to the elephants neck, the ones on the ground began to yell, "Strangle him!!! Strangle him!!!" Source

Print Recipe

Vanilla Rose Elephant Sugar Cookies

Vanilla Rose Elephant Cookies - vanilla bean sugar cookies flavoured with rose water and shaped into elephants.
Prep Time1 hour hr
Cook Time10 minutes mins
Total Time1 hour hr 10 minutes mins
Course: Dessert
Servings: 4 dozen
Author: I Sugar Coat It

Ingredients

Cookies

  • 452 g salted butter normally I use unsalted, but did not have any on hand, cool
  • 690 g all purpose flour
  • 270 g granulated sugar
  • 2 large eggs cool
  • 1 tablespoon crushed Tahitian vanilla beans
  • 1 teaspoon rose water

Icing

  • I used this recipe and added 1 teaspoon of Rose Water

Instructions

  • Preheat oven to 350ºF. Place oven rack in the center of the oven. Line a baking sheet with parchment paper or silpat.
  • In the bowl of your electric mixer fitted with the paddle attachment, beat the butter and sugar until light and fluffy.
  • Beat in the egg, crushed vanilla beans and rose water.
  • In a separate bowl, sift the flour.
  • Gradually add the flour mixture to the creamed mixture and beat just until incorporated. Scrape down the sides of the bowl as needed.
  • Divide the dough in half and shape each half into a flattened circle. Wrap each disk in plastic wrap and place in the refrigerator until firm (at least two hours or overnight).
  • Remove from fridge and use a rolling pin to roll dough out to about ¼ inch thick - I use dough spacers shown in the photo above to get even cookies.
  • Cut into desired shapes and place on the baking sheet, spacing about 2 inches apart. Place in freezer for about 3-5 minutes.
  • Remove from freezer, let rest 1 minute and then bake the cookies for about 10 minutes, or until the edges of the cookies are a very light brown.
  • Let cool completely before decorating with icing.


I-Sugar-Coat-It-Blog-Signature-Green

  • « Go to Previous Page
  • Page 1
  • Interim pages omitted …
  • Page 42
  • Page 43
  • Page 44
  • Page 45
  • Page 46
  • Interim pages omitted …
  • Page 51
  • Go to Next Page »

Primary Sidebar

Never Miss A Happy Ending...

Previous Sweetness...

Search

Filter by Category

Filter by Date

SWEETEN YOUR INBOX!

All Content Including Images Copyright Jacqueline | I Sugar Coat It© 2026