• Skip to primary navigation
  • Skip to main content
  • Skip to primary sidebar
  • Home
  • About
    • About I Sugar Coat It
    • Features & Press
    • Copyright
    • Disclosure
    • Privacy Policy
  • Recipes
  • How-To
  • Contact
  • sous vide sista

I Sugar Coat It

Home

All Posts

No Bake Maple Berry Vegan Cheesecake

July 2013 By i sugar coat it! 6 Comments

No Bake Maple Berry Vegan Cheesecake {Summer Sweets}

No Bake Maple Berry Vegan Cheesecake
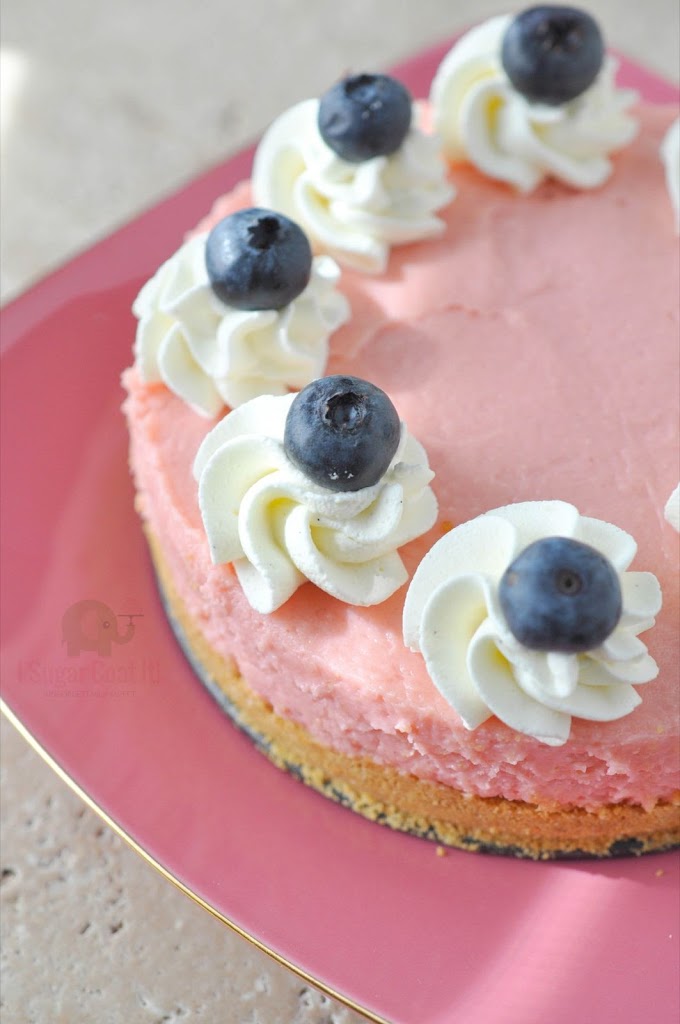
Happy Humpday! Today's no bake treat is super easy to make and perfect for a mid-week sweet. So easy, in fact, that the most difficult part was waiting for it to set. Click on over to try my No-Bake Maple Berry Cheesecake!

I made this a couple weekends ago to entertain a couple friends, but mostly for the mister, who is vegetarian. It is filled with fresh Ontario berries, almond milk, tofu, nuts and maple syrup. And guess what? It tastes absolutely AH-mazing!

No Bake Maple Berry Vegan Cheesecake
The most difficult part was the wait, but having good company and a few drinks seemed to remedy that a little. Next time, I'll make it the night before, so that it sets longer and sleep can quell the desire to poke my finger in it every fifteen minutes. I'm pretty sure I was one of those annoying 'are we there yet?' type of kid.
No Bake Maple Berry Vegan Cheesecake
The base is a combination of the crumbs of one of our favourite vegan, gluten free crackers, mixed with pure maple syrup and pressed into a springform pan. The cheesecake is a mix of strawberries, raspberries, blueberries, tofu, almond milk and maple syrup. Are we saying yum, yet?
As mentioned earlier, my mister is vegetarian, so tofu is a staple in our household. Properly flavoured, it is quite tasty. It will basically take on any flavour, so when we use it in our cooking, we normally let it sit overnight and marinate. My favourite flavours are peanut sauce and oyster sauce, not together, but stir-fried with veggies.

 
So back to the cheeseFAKE! Here is an IG video of me adding the finishing touches of whipped coconut cream - the recipe used in my Nautical Chevron Baby Shower Cake and fresh blueberries, just before serving it up.
No Bake Maple Berry Vegan Cheesecake
I was basically messing around with this, but the flavours came together beautifully. I found that placing it in the freezer five minutes before serving made cutting with a warm knife, like butter. I'd say this No Bake Maple Berry Cheesecake definitely deserves an encore!
How about you, do you have a go-to, no bake recipe?
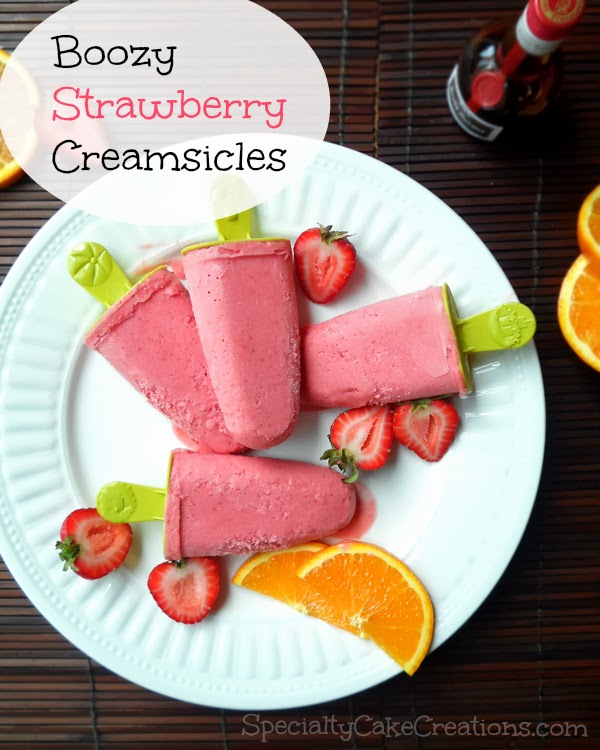
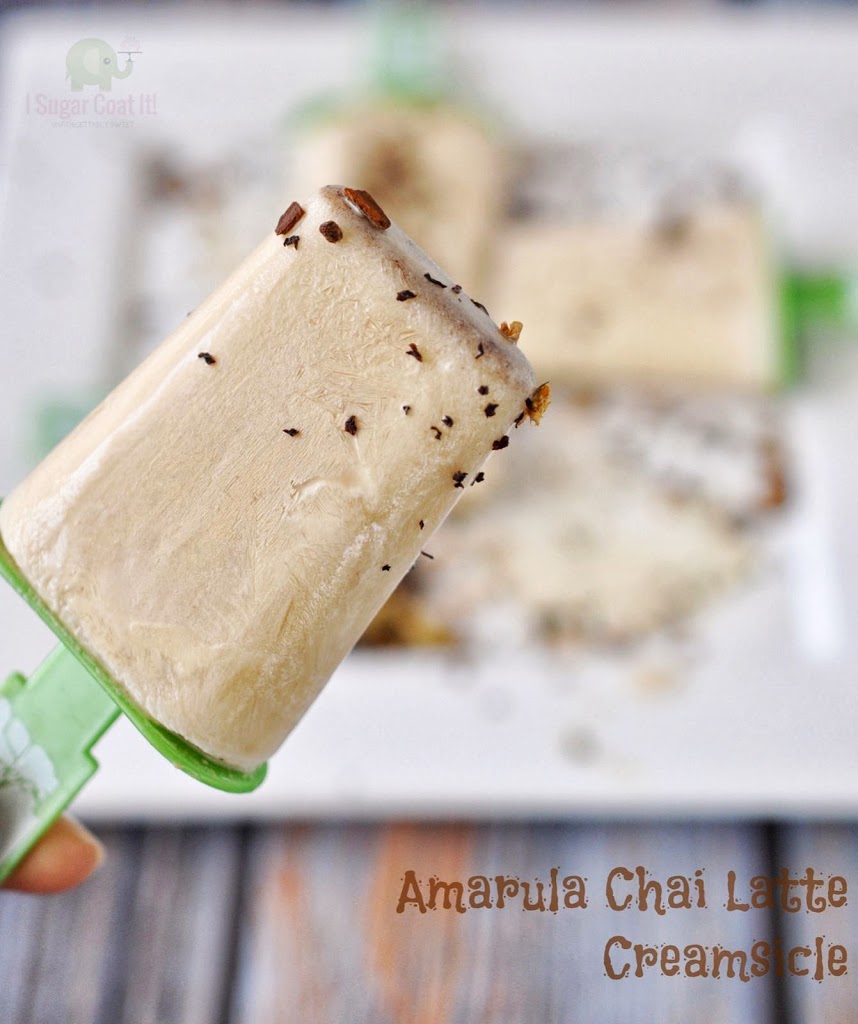
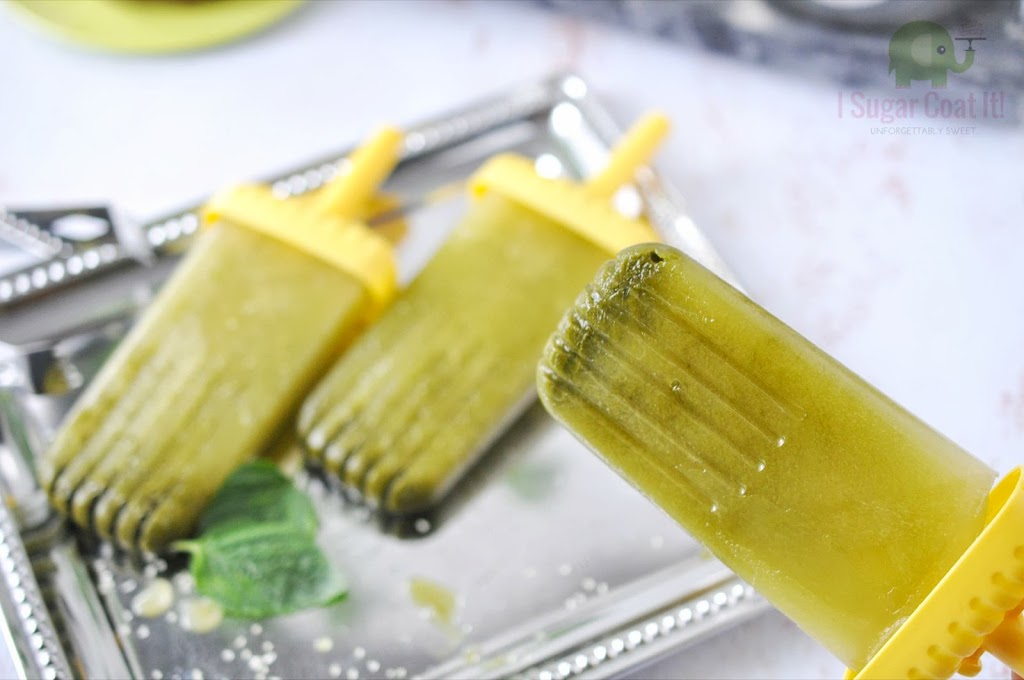
Stay A While and Check Out These Summer Sweets:
  • Key Lime Mojito Mousse Cake
  • Matcha Cheesecake
  • Pina Colada Push Pops
  • Strawberry Shortcake
I used the following to prepare this recipe:
  • 6 Inch Springform Pan
  • Disposable 12 Inch Decorating Bag
  • Pastry Tube - Closed Star - Size 6
  • Silicone Spatula
No Bake Maple Berry Vegan Cheesecake
Print Recipe

No Bake Maple Berry Vegan Cheesecake {Summer Sweets}

Easy, no bake, gluten and dairy free deliciousness.
Course: Dessert
Servings: 6
Author: I Sugar Coat It

Ingredients

Base:

  • 135 g cracker crumbs 1 ½ cups, I used Mary's Cupboard
  • 117 g Pure Maple Syrup ⅓ cup

Filling:

  • 340 g Silken Tofu 1 ¼ cups
  • 227 g Tofutti 1 cup
  • 81 g almond milk ⅓ cup
  • 66 g pure maple syrup 3 tbsp
  • 151 g washed and hulled strawberries 1 cup
  • 50 g raspberries ½ cup
  • 50 g blueberries ½ cup
  • Powdered sugar to taste

Topping:

  • 1 can full fat coconut milk or cream
  • 22 g pure maple syrup 1 tbsp
  • 3 g pure vanilla extract ½ tsp
  • Fresh blueberries

Instructions

  • Blend crackers in food processor until finely ground and sift out any larger pieces. Blend again and add the syrup until well combined. Use the bottom of a cup to pack the mixture into a springform pan. Set aside.

To make the filling:

  • Blend the fruits and milk in a blender and pour through a fine sieve to remove any seeds and chunks. Rinse blender.
  • Return mixture to the blender, add all the remaining ingredients and blend on high until fully incorporated, thick and smooth. Pour over cracker base and refrigerate for five hours or overnight.

To make the topping:

  • Chill the coconut milk overnight. This will allow the milk solids and liquids to separate. DO NOT shake the can when you remove it from the fridge.
  • Open the can, remove the solids only and place in the bowl of a stand mixer.
  • Whip on high for a few seconds before adding the maple syrup and vanilla extract. Continue to whip for two minutes, or until full and creamy. Fit a piping back with a #6 closed star tip and pipe swirls around the cake. Top with fresh blueberries.
  • Use the remaining on fresh fruit.

Notes

Sweet Tip: For best results, chill the bowl and whisk in the freezer for five minutes prior to making whipped cream.

July 2013 By i sugar coat it! 7 Comments

Boozy Strawberry Creamsicles {Guest Post}

 Happy Friday! Now I know it's five o'clock somewhere, so let's raise our popsicle sticks in a strawberry toast to today's TGIF Frozen Summer Sweet. It's a boozy number by Regina from Specialty Cake Creations!
 
Boozy Strawberry Creamsicles
For months I've lived vicariously through Regina, as she shared her travels (with her husband) through South East Asia, on Instagram. In fact, we struck up a virtual friendship over a bowl of street Pad Thai on IG about a year ago and have been blogging buddies since. Please welcome the beautiful and talented Regina from Specialty Cake Creations!
Hi, I am Regina and I blog over at SpecialtyCakeCreations. I am so excited to guest blog for Jacquee here on I Sugar Coat It! Jacquee always comes up with the most creative series for her blog. I love her current summer cocktail popsicles series. So I thought I would join the party and bring over a frozen cocktail as well.
At a local restaurant here they serve a cocktail called a "Strawberry Amaretto Crush". It is kind of like a boozy strawberry milkshake. This cocktail was the inspiration for the Boozy Strawberry Creamsicles. For a fresh summery touch of citrus I swapped Grand Marnier (which is an orange liquor) for the Amaretto (almond liquor).
Boozy Strawberry Creamsicles
 
I soaked the strawberries in Grand Marnier overnight before blending them up with frozen whipped topping. The strawberries smell amazing after soaking! I had to try hard not to eat them all right then and there.
Boozy Strawberry Creamsicles

If you have been over to SpecialtyCakeCreations you might have noticed that I have a thing for strawberries. In one way or another they seem to make it into many of my desserts – from this Strawberry Ruffle Cake to Peanut Butter Oatmeal Bites and even my favourite summer chocolate: Strawberry Pistachio White Chocolate Bark and finally these Boozy Strawberry Creamsicles.
Boozy Strawberry Creamsicles

The whipped topping makes these popsicles wonderfully creamy - the reason I call them creamsicles. For a healthier version you could try Greek yogurt instead, but you might need some sweetener as well then (try honey or stevia for healthy sweetness).

You may use a food processor to blend the strawberries and whipped topping but my blender worked just fine. For easier unmolding it is best to freeze the popsicles for at least 24 hours and then run the molds under warm water before removing.

Boozy Strawberry Creamsicles

For an alcohol-free/child-friendly version, try replacing the Grand Marnier with orange juice.

More Ways To Stay Cool:
Chocolate Rocket CosmopoliTEA
Peach Bellini Pops
Matcha Mojito Popsicles
Amarula Chai Latte Creamsicles

 
Print Recipe

Boozy Strawberry Creamsicles {Guest Post}

Boozy Strawberry Creamsicles
Prep Time1 day d
Total Time1 day d
Course: Dessert
Servings: 6
Author: I Sugar Coat It

Ingredients

  • 2 cups strawberries washed, hulled, quartered
  • 3 tablespoon Grand Marnier
  • 1 cup frozen whipped topping I use fat-reduced

Instructions

  • In a medium bowl or measuring cup, combine quartered strawberries with Grand Marnier. Cover with plastic wrap and soak for at least 2 hours at room temperature or overnight in the fridge. Stir occasionally.
  • Place soaked strawberries and frozen whipped topping in a blender or food processor. Blend until smooth.
  • Fill in popsicle molds and freeze for a minimum of 24 hours.
  • Run molds under hot water before attempting to remove.
____________________________________

A great big thanks to Regina for the deliciously boozy treat and for being my first guest post!! Please take a moment to visit Specialty Cake Creations. Regina's blog offers a plethora of easy and inventive treats, as well as beautifully designed custom cakes.

While you're there, check out Regina's super easy and just as tasty, Banana & Blueberry Whip, or try a glass of her refreshing Mango Iced Tea, and on my list to try, these Crispy Healthier Cinnamon Buns!

 I hope you have enjoyed this post. See you back here in a few days for some long overdue CAKE!!

July 2013 By i sugar coat it! 6 Comments

Amarula Chai Latte Creamsicle {Summer Sweets}

 TGIF! Time for another sweet and boozy frozen treat to help cope with the summer heat. This week's cool-down moment is brought to you by spicy Masala Chai and sweet Marula Fruit.

So let's first talk spicy!

While I love Matcha for all its impressive health benefits, complex flavour and stunning color, chai's aroma and blend of black tea and spices transport me to worlds unknown... well ok, India. And not just any chai tea, but the coveted PC Memories of India Masala Chai Loose Leaf Tea.
I am on my last of twenty-five cans I stockpiled when my aunt told me it was being discontinued a couple years ago. Since then, there has been some serious WW2-type rationing going on up in hur! (translation 'here' or 'hair' according to the urban dictionary).
I especially enjoy this tea in its latte form and when I am not whipping it up at home, you can usually find me toting a piping hot cup of Starbucks Chai Latte, grande style. I also like using it in its powder form for baking, as I've done with these Chai Eggnog Latte Cupcakes  and Vegan Vanilla Chai Cupcakes.
If chai is not your flavour, simply substitute your favourite tea or coffee! And the virgin version is just as tasty. Simply sweeten the tea with a touch of raw honey.
 

Are you familiar with the Marula fruit? It's what gives these pops their sweet, boozy flavour. But it offers so much more than just good taste.

  • The peel alone is believed to have more than 27 different kinds of flavours and contains ten newly-isolated volatile esters that may be able to be extracted for use in aromatherapy, homeopathic medicines and essential oils.
  • The freeze dried pulp of the marula fruit can be used in a number of cosmetic applications.
  • The fruit pulp contains up to four times the vitamin C of oranges.

I was drawn to the Amarula Cream liqueur because of the elephant on its label, and later its taste. You may remember my Amarula Swiss Meringue Buttercream, shared back in February.

Soon after purchasing my first bottle, I learned about the Amarula Elephant Research Program, co-funded by Distell, the makers of this drink. And you should know by now that any friend of elephants, is a friend of mine.

These were my test batch. I ate them. All four of them. Then I made four more to share. And will make another batch this weekend - they're that good.

Yup, the self-imposed rationing has been lifted. I'm taking these last few spoonfuls out with a boozy bang. Hope you'll join me and whip up a batch of your own - see recipe below.

More Ways To Cool Down:
Peach Bellini Popsicles
Lychee Lime Coconut Pops
Berry Pistachio Cream Pops
Matcha Mojito Popsicles
Chocolate Rocket CosmopoliTEA
Print Recipe

Amarula Chai Latte Creamsicle

Spicy meets sweet and creamy in this delicious frozen merger of Masala Chai and Amarula Cream.
Prep Time6 hours hrs
Total Time6 hours hrs
Servings: 4
Author: I Sugar Coat It

Ingredients

  • 110 g evaporated milk ½ cup
  • 4 g loose leaf chai tea 3 tbsp
  • Amarula Cream
  • 20 g raw honey 1 tbsp
  • * non-alcoholic version
  • Popsicle mold

Instructions

  • Bring the milk to a simmer over low heat, add the chai leaves and continue to simmer.
  • Cover and remove from heat. Allow the chai to steep for a few minutes, depending on your tea strength preference.
  • Pour the milk and tea mixture through a sieve into a clean measuring cup, or bowl with a spout and allow to cool.
  • Stir in the Amarula Cream.
  • *Should you choose to omit the alcohol, just add honey to the mixture once removed from heat and stir until melted. Let cool.
  • Pour into popsicle molds.
  • Insert sticks and freeze for at least four hours, or overnight.
  • Remove from freezer once fully set and hold mold under warm running water to loosen. Popsicles should slide out easily from mold after a few seconds.
  • Now get to lickin', stay cool and enjoy!

I-Sugar-Coat-It-Blog-Signature-Green

July 2013 By i sugar coat it! 12 Comments

Bananarama Butterscotch Cake

Mother's Day Bananarama Butterscotch Cake
Happy Monday! Hard to believe it was only a week ago we were hit with a month's worth of rain in only one hour. Completely bananas, right!


We had just pulled into our driveway and barely out of the car when it started to rain. It skipped the drizzle and went straight to a surprisingly full-on deluge, depositing ankle-high amounts of water into our basement and causing power outages across the GTA.
 
Coming from a tropical climate, I'm no stranger to hurricanes, but this was just bizarre! The last time the city saw this much rainfall was back in 1954, and that's before my mom was born!!
Mother's Day Bananarama Butterscotch Cake
We were pretty bummed, but once we saw and heard what others experienced, we felt a little silly for going all bananas about our little flood. At least we were warm and dry in our home during the worst of it. A colleague was one of 1400 trapped on a GO Train for over seven hours. Um, can you say water snakes. Yikes!
 
Things have settled somewhat, with clean-up and claims underway, and I don't believe any lives were lost and that's all that matters really.
 
Mother's Day Bananarama Butterscotch Cake
So now to this cake. We had to get rid of a refrigerator that was in the basement, which meant relocating embarrassing amounts of butter, eggs, cream and milk stockpiled to feed this baking hobby of mine. The fridge on the main floor could not handle all of it, so I got to baking - thank goodness for gas ovens!
 
This Banana Butterscotch Bombshell cake from Mother's Day was first on my list. This time, without the chocolate layer. Instead, I filled the cake layers with fresh slices of banana piled on top of thick clouds of banana butterscotch swiss meringue buttercream and then topped with copious amounts of homemade butterscotch sauce. Did I hear a collective, YUM?
Mother's Day Bananarama Butterscotch Cake
It didn't need to be fancy, just a six inch piece of rustic heaven; a welcomed break from licking our storm inflicted wounds.  A quick spin with a Wilton Comb and it wasn't long before the sugar bees came a buzzing. You may remember seeing similar insects in my Gastro-Entomology Lavender Honey Cupcakes post from last April.
 
It was looking pretty blah, so I added a pop of orange using an extra ranunculus flower that was left over from my Quatrefoil Stencil cake from last September. By the way, these plastic cupcake holders provide a great, dust-free way to store your flowers and are reusable. They have worked really well for me. How do you store yours?
Mother's Day Bananarama Butterscotch Cake
 
The cake came together nicely and was quickly devoured by our small crew. Looking back, things could have turned out a lot worse. I am very thankful they didn't.
 
Were you affected by the recent stormy weather? How did you cope?  Have a slice of my going-bananas cure and tell me all about it. 😉
 
Stay a while:
  • Learn how to make the Ranunculus Flower in this post.
  • See how I used sweet bees in my Gastro-Entomology Lavender Honey Cupcakes.
  • Check out my Banana Butterscotch Bombshell post laced with a little chocolate.
  • Grab a slice of my Peanut Butter & Jam Banana Bread.


Print Recipe

Mother's Day Bananarama Butterscotch Cake

Prep Time30 minutes mins
Cook Time30 minutes mins
Total Time1 hour hr
Course: Dessert
Keyword: cake
Author: I Sugar Coat It

Ingredients

Cake

  • 320 g cake flour
  • 4 g baking soda
  • 2 g baking powder
  • 3 g salt
  • 300 g mashed bananas 3 large bananas
  • 61 g buttermilk
  • 5 g pure vanilla extract
  • 1 g crushed vanilla bean
  • 114 g unsalted butter
  • 285 g superfine sugar
  • 2 large eggs

Sauce

  • 60 g butter
  • 210 g brown sugar
  • 70 g cup 35% cream
  • 60 g 35% cream
  • 2 g Banana Bakery Emulsion
  • Frosting
  • 150 g liquid egg whites
  • 250 g sugar
  • 340 g unsalted butter
  • a pinch of salt
  • 0.5 g  Tahitian Crushed Vanilla Beans
  • 250 g butterscotch sauce
  • 2 g  Banana Bakery Emulsion

Instructions

  • Preheat oven to 350ºF (180ºC). Prepare 3 - 6" round pans. Use a pastry brush to apply Cake Release to the bottom and sides of pans. Wrap pans with dampened Wilton Bake Even Strips.
  • Using a whisk, combine flour, baking soda, baking powder and salt in a bowl.
  • In a separate bowl combine mashed bananas, buttermilk, and vanilla.
  • Add butter and sugar to the bowl of your stand mixer and using the paddle attachment, beat until light and fluffy.
  • Add the eggs one at a time and continue to beat. Scrape down the sides of the bowl as needed.
  • Add the flour mixture in thirds, alternating with the banana mixture - ⅓ flour mixture, ½ banana mixture - repeat, ending with the flour mixture. Beat until fully incorporated.
  • Divide the batter evenly between the three pans. I use my scale to help distribute the batter evenly among the pans.
  • Bake for 25-30 minutes, or until an inserted toothpick comes out clean.
  • Remove from the oven and allow the cakes to cool on racks for about 10-15 minutes. Invert on a wire rack to cool completely, if using immediately. Or wrap in plastic wrap while still warm, return to the pan and store in freezer until needed.

To make the sauce:

  • Place butter, brown sugar and heavy cream in a  saucepan over medium heat. Stir until the mixture is smooth. Once it is smooth stop stirring. Let the mixture cook at a bubbling simmer for 3 minutes. Remove the mixture from the heat. Stir in the remaining  cream. Let the mixture cool. Stir in vanilla extract. Store butterscotch in a mason jar in the refrigerator.

To make the frosting:

  • Using a clean towel and some lemon juice or vinegar, clean all equipment and utensils to be used for preparing the meringue.
  • Fill a heavy duty pot about a quarter of the way with water and place on the stove over medium heat to simmer.
  • Add egg whites, sugar and salt to the mixing bowl and use a hand whisk to combine. Attach a candy thermometer to the side of the bowl and place the bowl over the pot of water, ensuring the bottom of the bowl is not in contact with the water. Lightly whisk the sugar and egg white mixture constantly until temperature reaches 160°F. This took me about 12 minutes.
  • Once at the correct temperature, remove from heat, wipe away condensation from the bottom of the bowl  with a towel and transfer mixing bowl to the stand mixer. be careful not to burn yourself.
  • With the whisk attachment and the mixer set to high (8-10), whip the meringue until it is thick, glossy and the bottom of the bowl is no longer warm to the touch. Do not begin adding butter while the bowl is still warm. This took about 10 minutes.
  • Switch from your whisk to paddle attachment and with mixer on low speed, add butter in small pieces until incorporated. Continue to mix until it has reached a silky smooth texture. This took approximately 12 minutes.
  • Add emulsion, vanilla beans and butterscotch sauce and continuing to beat on low speed until well combined. About 2-3 minutes.
  • Assembly: Center one layer of cake on a cake board of the same size, using a dab of buttercream. Spread a generous amount of buttercream on the top of the layer and add slices of banana on top of the buttercream. Pour a few spoonful of sauce over bananas and place another later of cake on top. Repeat for the next layer. Crumb coat the cake, cover and place in the fridge to set for fifteen minutes. Remove from fridge and frost with buttercream. Use a Wilton comb of your choice to decorate.

Notes


{Disclaimer: This post contains affiliate links. Purchasing items through these links will result in a commission for I Sugar Coat It.}
Matcha Mojito Popsicle

July 2013 By i sugar coat it! 4 Comments

Matcha Mojito Popsicle - Summer Sweets {My First BFFF Post!}

Matcha Mojito Popsicles
Hey ya'll! Today I'm sharing my Matcha Mojito Popsicles over at Best Friends for Frosting, my first post as a BFFF contributor!

Popsicles are a refreshingly cool summer treat that appeal to the kid in each of us. These however, were made with the adult in mind. Head on over to BFFF for a taste of my Matcha Mojito Popsicles!

Matcha Mojito Popsicles
 
More Frozen Treats:
Peach Bellini Popsicles
Lychee Lime Coconut Pops
Berry Pistachio Cream Pops
Amarula Chai Latte Creamsicles
{Update: Recipe added on September 9, 2013 for your convenience}

Matcha-Mojito-Popsicle-I Sugar Coat It!
Print Recipe

Matcha Mojito Popsicle

Prep Time10 minutes mins
Cook Time5 hours hrs
Total Time5 hours hrs 10 minutes mins
Course: Dessert
Servings: 10
Author: I Sugar Coat It

Ingredients

  • 1 cup hot water
  • 1 teaspoon Matcha green tea powder
  • ¾ Smirnoff Mojito Vodka
  • 1 lime
  • Fresh mint leaves
  • Matcha salt if desired

Instructions

  • In a shallow bowl, whisk together the hot water and Matcha green tea powder.
  • Matcha-Mojito-Popsicle-I Sugar Coat It!
  • Add in the Smirnoff Mojito Vodka and freshly squeezed lime juice, and continue whisking until combined.
  • Muddle some fresh mint leaves inside each popsicle mold, and pour in the Matcha Mojito mixture.
  • Insert the mold cap/stick, and freeze for at least 5 hours (or overnight).
  • Place frozen molds under warm running water for a few seconds and extract the popsicle carefully by pulling the base.
  • If desired, sprinkle with Matcha salt immediately before eating (if let to sit for too long, the salt will melt your popsicles!).

July 2013 By i sugar coat it! 6 Comments

Matcha Mojito Macarons {Guest Post!}

Matcha Mojito Macarons
I am super excited to be guest posting over at one of my cookie crush blogs, where I'm sharing the recipe for these Matcha Mojito Macarons!

Melissa was kind enough to invite me to add to The Baked Equation formula. How cool is that name, BTW!! If you have not checked out Melissa's work, you simply must! She makes and decorates beautiful cookie sets and cakes, all in the name of her charity.

I was recently treated to some of her goodies for my birthday, and let me tell you, the lady delivers more than just looks; she brings the taste! Her decorated cookies and her naked salted butterscotch cookies were DELICIOUS!

Matcha Mojito Macarons
So head on over to The Baked Equation and check out my Matcha Mojito Macarons and snoop a while - there's so much sweet stuff to see on Melissa's blog.
Matcha Mojito Macarons
{Update: Recipe added on September 11, 2013 for your convenience!}


More Summer Sweets:
Orange Blossom Crème Chantilly Macarons
Lavender Rose French Macarons
Key Lime Mojito Mousse Cake
Matcha Cheesecake

Print Recipe

Matcha Mojito Macarons with Matcha Mojito Whipped Filling

My favourite tea and cocktail come together in one delicious bite!
Prep Time1 hour hr
Cook Time10 minutes mins
Total Time1 hour hr 10 minutes mins
Course: Dessert
Servings: 24
Author: I Sugar Coat It

Ingredients

  • Macarons
  • 60 g liquid egg whites
  • 115 g confectioner's sugar
  • 90 g almond flour
  • 50 g granulated sugar
  • 2 g  Matcha tea powder
  • Filling
  • 250 ml Lactose Free 35% cream
  • 3 g confectioner’s sugar
  • 2 g Matcha Tea
  • 15 ml Mojito Mix
  • Matcha salts to decorate

Instructions

  • Line a cookie sheet with parchment or silpat mat.
  • In a food processor, pulse the almond flour and confectioner's sugar together for about 20 seconds, or until well combined.
  • Using the whisk attachment, whip the egg whites in a grease-free bowl of a stand mixer until foamy.
  • Add the granulated sugar a little at a time and continue to whip on high until stiff peaks form.
  • Stop the mixer and add the tea powder. Whip for a few more seconds until fully combined.
  • Remove bowl from mixer and sift the almond mixture onto the egg whites. Use a clean, grease-free spatula to gently fold the the mixture into the egg whites. Should be the consistency of molasses when ready.
  • Fit a piping bag with a 1.5" plain tip and fill the bag with the batter. Pipe small circles onto the parchment/baking mat.
  • Tap the pan on the counter a couple times to remove any air bubbles or peaks. Let the batter rest for about 30 minutes.
  • While the batter rests, preheat the oven to 325ºF. Bake for 8 -10 minutes. Do not allow to brown.
  • (bake time may differ for your oven)
  • Remove from oven and allow to cool completely before assembling.

To make the filling:

  • For best results, chill the cream and bowl prior to starting. Place all the ingredients in the bowl and using the whisk attachment of your stand mixer, whisk on high until soft, stable peaks form - about 5 minutes. Store in refrigerator until ready to use.

Assembly:

  • Attach a tip #18 Star Tip to a piping bag and fill with the whipped cream. Pipe in circles on the flat side of a cookie and pair with a another cookie. Press together lightly. Place the matcha salt in a small bowl and use a spoon to sprinkle the salt onto the exposed filling sparingly. Place in an airtight container and refrigerate overnight.


July 2013 By i sugar coat it! 4 Comments

Ships Ahoy, It's A Boy! Nautical Chevron Cake

 Nautical Chevron Baby Shower Cake
Do you remember the first time you learned where babies come from? I do! I learned it in Sunday school - something to do with a storm and a whale...right?
 At least that's what my over-active imagination led me to believe as a child. Remember Jonah & the Whale?
This is probably one of the more bizarre bible accounts I can remember from my forced attendance at church, sunday school, bible camp etc. I don't know what led me to parallel Jonah's three-day stay in the belly of a whale with the miracle of birth.
I certainly don't remember the full account, but my young mind felt that was the most plausible explanation at the time. Even after I learned the truth.
Nautical Chevron Baby Shower Cake
Friends of ours are due to have their first child any day now! I wanted to make them something special, a cake that combined their love of sailing with my idea of where babies are from. I guess I could have undertaken a re-enactment of the whole Jonah ordeal in sugar form, but that could have proven both traumatic and labour inducing. And we definitely don't want that to happen any sooner than it's meant to!
Instead, I chose a light-hearted, colourful route and added a few cookies to match. Oh, and just in case you missed it, they are having a boy!
Nautical Chevron Baby Shower Cake
I so enjoyed making this cake! I used marshmallow fondant over a rich layer of white chocolate ganache. I used freshly grated coconut that was left over from my Lychee Lime Coconut Popsicles from last week in an attempt to recreate my grandmother's coconut cake, for which there is no documented recipe. I filled the layers with coconut whipped cream. YUM!
I cut out the whale and yacht by hand, using candy clay and a scalpel. The chevron pattern was made using a brand new product by Marvelous Molds called Onlays. I've decorated at least one other cake with a chevron pattern, using a technique shared by Jessicakes on her blog before it became a Craftsy sensation. Onlays are a similar concept, but takes a lot less time and effort. I shared this little video on Instagram not too long ago to quickly show you how it's done.
I purchased mine from Icing Inspirations in Kitchener and absolutely LOVE them! They are a little costly, but well worth it in my opinion, as they save time; a valuable commodity.
Nautical Chevron Baby Shower CookiesNautical Chevron Baby Shower Cake
If you read my recent Elephants, Kokeshi Dolls & Kopykake post, then you already know about my newly acquired Kopykake and my struggles thus far. Well, I tried it again last week to make these cookies. I am keeping the designs simple until I get a better handle on it. Second time around was less expletive-inducing. 🙂
I added what was to look like a rope border around each cookie to play up the nautical theme. A royal icing technique shared by Amber from SweetAmbs. I clearly require more practice.
Nautical Chevron Baby Shower Cake
I do believe this is my first matching cake and cookies combo!! Hope you like it!
 

Print Recipe

Ships Ahoy, It's A Boy!

Prep Time15 minutes mins
Cook Time30 minutes mins
Total Time45 minutes mins
Course: Dessert
Servings: 10
Author: I Sugar Coat It

Ingredients

Cake

  • 140 g self-rising flour 1 ¼ cups
  • 5 g baking powder 1 ½ tsp
  • 1 g grated nutmeg ½ tsp
  • 172 g unsalted butter ¾ cups
  • 225 g   granulated sugar 1 cup
  • 3 eggs
  • 50 g freshly grated coconut ⅔ cups
  • 25 g coconut cream 3 tbsp

Filling

  • 1 can full fat coconut milk or cream
  • 22 g pure maple syrup 1 tbsp
  • 3 g pure vanilla extract ½ tsp

Instructions

  • Preheat the oven to 350ºF and prepare three 7" round pans - grease, line and flour. I use Cake Release.
  • In the bowl of a stand mixer, sift together the flour, baking powder and nutmeg.
  • Add the butter, sugar, eggs and using the paddle attachment of your stand mixer, beat together until smooth.
  • Lower the mixer speed to the stir setting and add the fresh coconut and coconut cream.
  • Divide the batter among the three pans. I weigh my batter in the pans to ensure even distribution and more uniformed cakes.
  • Bake for 20-30 minutes depending on your oven and pans used. When completed, they should have a golden brown appearance and a toothpick inserted in the middle comes out clean.
  • Remove from oven and allow to cool in pan for 5-10 minutes. Turn out onto a wire rack and allow to cool completely before decorating.

To make the filling:

  • Chill the coconut milk overnight. This will allow the milk solids and liquids to separate. DO NOT shake the can when you remove it from the fridge.
  • Open the can, remove the solids only and place in the bowl of a stand mixer.
  • (Tip: I always chill my bowl and whisk in the freezer for five minutes prior to making whipped cream).
  • Whip on high for a few seconds before adding the maple syrup and vanilla extract. Continue to whip for two minutes, or until full and creamy.
  • Fill cakes and enjoy! Also pairs deliciously with fresh fruit.


Lychee Lime Coconut Pops

July 2013 By i sugar coat it! 8 Comments

Lychee Lime Coconut Pops {Summer Sweets}

Lychee Lime Coconut Pops
This beautiful, warm, summer day is brought to you by Lychee Lime Coconut Pops - coolness personified!

Um, they're good! I mean really, really good. Like slap your mama, scream hallelujah, crazy GOOD! Well, that's if you like coconut, lychee and lime. Take it from a girl who isn't a big coconut fan. Correction - I like the flavour of coconut water and milk; however, I am not a fan of the texture of the meat/jelly.

Lychee Lime Coconut Pops
So, I know you're asking/begging/pleading to have these in your life, like stat! Well, you're in luck! They are easy to make and are the perfect night-before-the-barbecue, frozen treat. Limited or no access to fresh coconut and lychee? Not to worry, you can easily find the canned versions in the international aisle of most supermarkets.
Lychee Lime Coconut Pops
You're probably thinking that the trickiest part to all this was getting the water from the coconut, right? Nah, that would be keeping them from melting, or being eaten, while photographing.
Draining the coconut is as easy as 1, 2, 3! Find the face of the coconut. At least one of the indentations will be soft enough to pierce with a sharp object - I used kitchen shears. Drain the water and strain. To get to the meat use a hammer to crack the shell and peel out the meat. If cracked the right way, you will end up with two bowls that make great vessels for drinks and desserts.
Keep an eye out for the resulting coconut cake.
 
Lychee Lime Coconut Pops
There wasn't a great amount of water in the one coconut, so two were used, which provided approximately ½ cup. The remainder of the liquids used for these pops are from the lychee and carbonated water.
If you have a juicer, simply peel and pit (remove the seeds) from the lychees and put them in the juicer. Two cups of lychees yielded just over 1 cup of juice and man was it tasty. The juice is really sweet, but super rich in vitamin C.
I like my popsicles to have a little fizz, hence the addition of the san Pellegrino. Something about the fizz makes it more refreshing, at least that what I've convinced myself. Adding the water also helps to cut down on the sweetness of the lychee juice. Feel free to eliminate this step, if your preference is sweeter popsicles.
Lychee Lime Coconut Pops
I found these cute little bamboo cups, plates and spoons at my local Superstore and thought they would be great for this purpose. Sometimes it can be quite difficult to unmold popsicles, as I so painfully learned from my bout with these Berry Pistachio Cream Pops and Peach Bellini Popsicles. So I thought I would try to remedy tis by using plastic wrap in two of the cups and use the other two as is to see if there would be a difference.
Unmolding the pops without the plastic wrap was way easier than the ones with the plastic. I simply held the cups under lukewarm running water and they slipped out. The ones with plastic came out almost as easily, but the plastic was a pain to remove from the popsicle. And the pops didn't take on the shape of the cup as well as the other two.
 
Lychee Lime Coconut Pops by I Sugar Coat It!
To keep the spoons upright in the popsicles while still in liquid state, I enlisted a few pieces of floral wire. Do not allow them to come into contact with the juice/popsicle. You can also freeze without the spoon and insert them about halfway into the freezing process. You'll just have to remember to do so!
I made four as a test, and they were devoured as soon as the camera was turned off. This will most certainly happen again this summer. Give it a try!
More Frozen Treats:
Peach Bellini Popsicles
Matcha Mojito Popsicles
Berry Pistachio Cream Pops

Print Recipe

Lychee Lime Coconut Pops

The perfect balance of sweet, tart and refreshing - coolness personified!
Prep Time4 hours hrs
Total Time4 hours hrs
Course: Dessert
Servings: 4
Author: I Sugar Coat It

Ingredients

  • Juice from 12-15 peeled and pitted lychees
  • Water from 2 coconuts
  • 1 small lime zested
  • ⅓ cup San Pellegrino

Instructions

  • Peel the lychees and remove the seeds. Place in a juicer, or in the absence of a juice, push through a sieve.
  • Drain water from coconuts and strain to remove any debris. Add to the lychee juice.
  • Zest half a lime directly into the lychee coconut mixture. Squeeze the juice from half the lime into the mixture. Slice the other half of the lime thinly place in popsicle molds.
  • Cut up little pieces of lychee and add to the mixture. Add san pellegrino.
  • Pour into molds and freeze for at least four hours.
  • Unmold by holding under lukewarm water for a few seconds.
  • Enjoy!


July 2013 By i sugar coat it! 8 Comments

Elephants, Kokeshi Dolls, & KopyKake

Elephant and Kokeshi Dolls Sugar Cookies
 Konnichiwa and welcome to the greatest show on earth!

OK, maybe not the greatest - no tight rope walkers or fire eaters here, but we got rare and beautiful albino elephants, a Harlem Globetrotter wanna-be seal, a dilapidated tent, a Tom Selleck moustache look-a-like ring leader, and a couple Kokeshi dolls. HUH!?!

Yup, Kokeshi Dolls! Nothing to do with the circus, but it was the first thing I wanted to try out on my KopyKake!

Elephant and Kokeshi Dolls Sugar Cookies
If a year ago, when I cut each detail for these fondant Kokeshi Doll toppers by hand, you asked me whether I needed this piece of equipment, I would have answered a resounding YES, YES, YES!! If asked a month ago, you probably would have gotten a meh. Today, a half-hearted yeah.
My on the fence attitude is probably as a result of my unfamiliarity with its use. It didn't help that the room was flooded with sunlight at the time, or that the image my printer spat out was sub-par, or that a certain someone was rushing me to go out, or that whenever I tried to pipe a line my shadow got in the way, or... well, you get the picture - lots of variables. I just need to play around with it a little.

Elephant and Kokeshi Dolls Sugar Cookies
Worse than being on the fence, however, were the events surrounding the delivery. The equipment itself was on sale for a very attractive price and that's where the feel good part of the story ends and CUSTOMS monster rears its head! A nasty, ugly word that will forever be associated with this piece of equipment (well, for the first week, or so, not so much any more).I won't bore you with the details, there would be too many expletives involved. Let's just say the fees would have exceeded the cost of the projector. For those aware of the saga, you will be pleased to know that after days of relentless emails and phone calls to the carrier, the vendor and the 'bad people', I was able to recover some of the charges.
Elephant and Kokeshi Dolls Sugar Cookies
Let's shake that horrible mess and move on. I plan to make some going away cookies for a BFF who will be relocating to the US in a few weeks --- leave room for tears here. These were my practice cookies. A slight improvement from some of my earlier attempts at royal icing. Remember these Baby Bump cookies? Yikes!!
Elephant and Kokeshi Dolls Sugar Cookies
With Kokeshi dolls practiced and devoured, I felt like starting a circus. Not the kind where animals are held captive or are mistreated. I will have nothing of the sort! In my circus, the animals roam freely and were created to be enjoyed.
I did the elephants free-hand, as I did with these Elephants In the Room baby shower cookies. Simply outline and flood. The tent, seal and circus guy were KopyKake tests. I am not thrilled with them, but they are a part of my circus family and no one gets left behind.
Elephant and Kokeshi Dolls Sugar Cookies
With a little more practice, I'll be bringing you edible works of art the likes of Paul Gauguin. You just wait and see...hahahaaIn the meantime, go ahead and ooh and aah at the feats performed by this bunch. Feel free to get as close as you want, the only biting will be done by you. ;)* I used the same cookie recipe that I used for my Coco-Vanilla Cookies.


Google Reader retired on July 1. Click below to:

Follow on Bloglovin


  • « Go to Previous Page
  • Page 1
  • Interim pages omitted …
  • Page 40
  • Page 41
  • Page 42
  • Page 43
  • Page 44
  • Interim pages omitted …
  • Page 51
  • Go to Next Page »

Primary Sidebar

Never Miss A Happy Ending...

Previous Sweetness...

Search

Filter by Category

Filter by Date

SWEETEN YOUR INBOX!

All Content Including Images Copyright Jacqueline | I Sugar Coat It© 2026