• Skip to primary navigation
  • Skip to main content
  • Skip to primary sidebar
  • Home
  • About
    • About I Sugar Coat It
    • Features & Press
    • Copyright
    • Disclosure
    • Privacy Policy
  • Recipes
  • How-To
  • Contact
  • sous vide sista

I Sugar Coat It

Home

All Posts

September 2013 By i sugar coat it! 4 Comments

Malibu Summer Soothers {Summer Sweets}

Malibu Mango Coconut Popsicle
Hey all! It's TGIFF - Thank Goodness It's Frozen Friday! And we're doing it Malibu style!

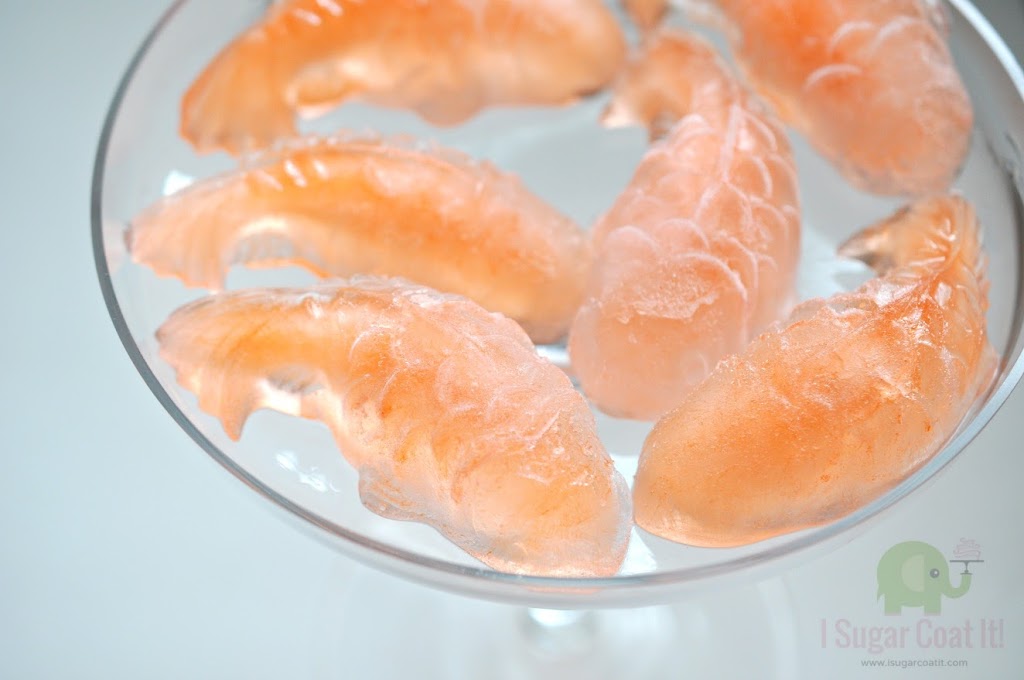
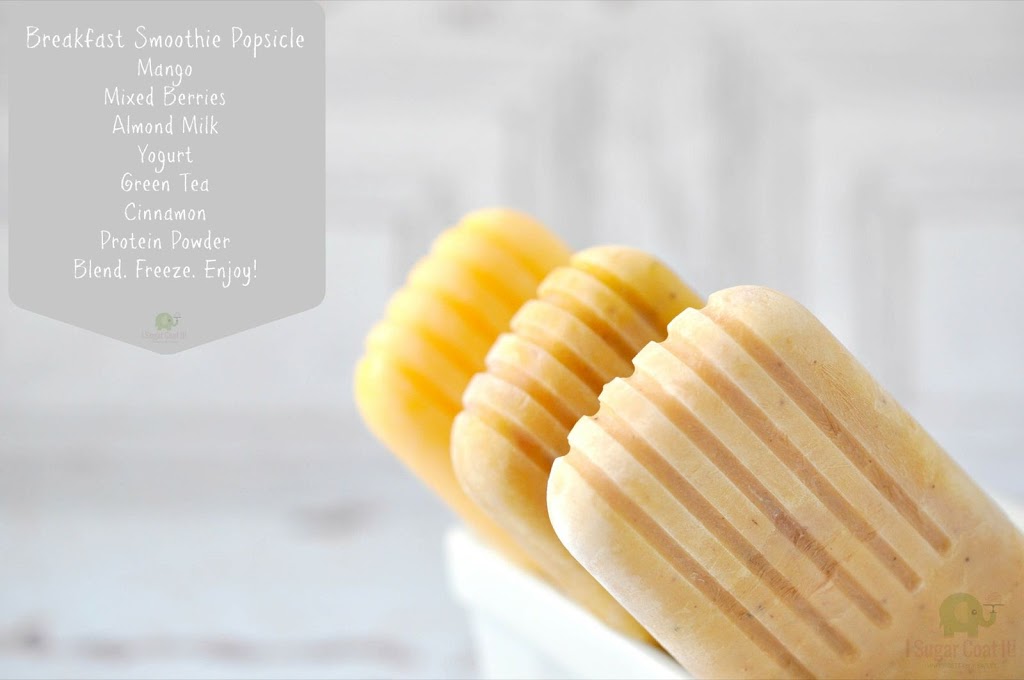
Summer's visit is quickly winding down. But before she flatlines and drifts off to the Southern Hemisphere, we're giving her a taste of Malibu! The rum version, that is - used to infuse these frozen colour blocks of mango, coconut, pineapple and passion fruit with a little Caribbean flavour! Yeah man!

Malibu Summer Soothers

I like to refer to popsicles, especially the ones laced with alcohol, as adult soothers. Think about it... no explanation required, right! Heck, if I were a crying baby, I'd want my soother to come in these two flavours, or any of the other popsicles I've made this summer. Hmmm, maybe they already do! That would explain all the giggling that quickly turns to sobs and screams. You babies got it made! But I digress...
Malibu Summer Soothers.
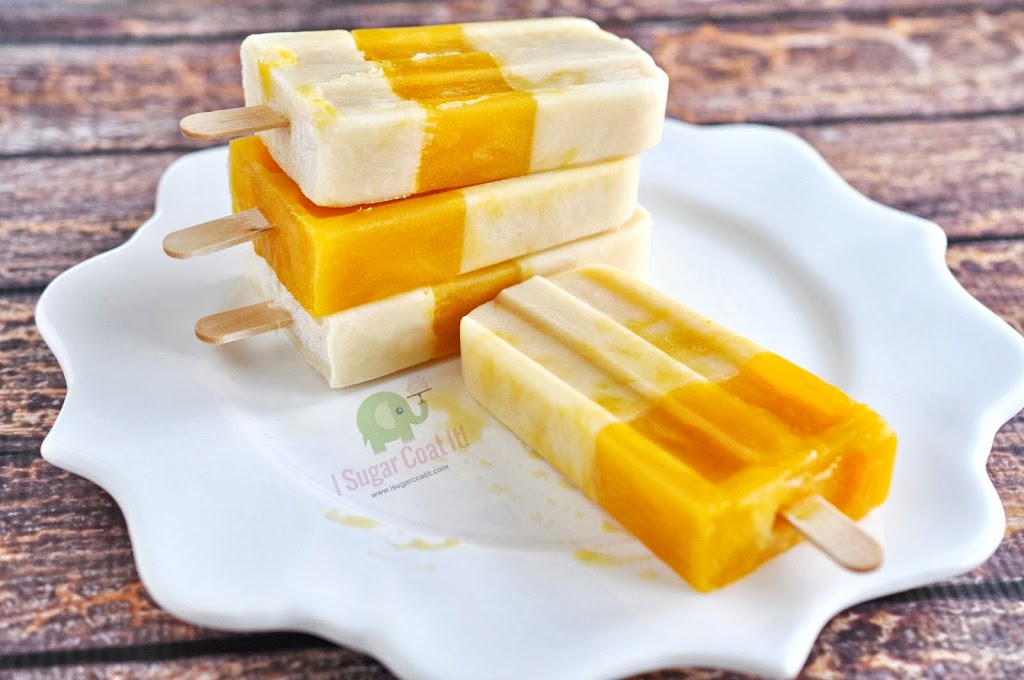
I was inspired to try this colour-blocking effect after seeing these on Pinterest. There wasn't any instruction that went along with the post, but a little common sense and I was on my way to creating boozy layers of mango/coconut and pineapple/passion fruit.

And can I tell you just how much easier this particular popsicle mold made this task! The notched cover that comes with the mold held the popsicle sticks in place and doubled as a display prop. 

Malibu Summer Soothers.
It's basically done in stages and the amount of layers you want will determine how long the process takes. I have laid it all out for your below - a full road map to take you back to Cali! I guarantee you won't want to leave.

More Adult Soothers:
Take a trip to the moon on Chocolate Rocket Cosmopoli-TEA
Go green with Matcha Mojito Popsicles
Eat Like an Elephant with Amarula Chai Latte Creamsicles

Print Recipe
1 from 2 votes

Malibu Summer Soothers {Summer Sweets}

Malibu Summer Soothers deliver serious Caribbean flavour thanks to an intoxicating blend of mango, pineapple, passion fruit, coconut and Malibu rum!
Course: Dessert
Servings: 8
Author: I Sugar Coat It

Ingredients

Malibu Mango Coconut Pops

  • 2 cups coconut smoothie organic and BPA-free coconut milk, 2-3 frozen ripe bananas
  • 1 cup mango nectar fresh or store-bought
  • ¾ cup Malibu Rum

Malibu Passion Fruit Pineapple Pops

  • 1 cup pineapple smoothie organic and BPA-free coconut milk, pineapple
  • 1 cup passion fruit nectar fresh or store-bought
  • ¾ cup Malibu Rum

Instructions

Mango Coconut Pops:

  • Make the coconut smoothie, by adding the coconut milk and bananas to a blender and blend in medium-high until smooth. Add the rum and blend for a couple seconds.
  • Decide on the colour scheme. For the popsicle with the horizontal mango band in the middle, fill ⅓ of each popsicle mold first with the coconut/rum smoothie, insert the popsicle stick and let freeze for about an hour.
  • Remove from the freezer and fill ⅓ with mango nectar. Return to freezer for an hour. Remove and fill the last ⅓ with the coconut/rum smoothie. Allow to freeze for about five hours.

Passion Fruit Pineapple Pops:

  • Blend coconut milk and fresh pineapple chunks on medium-high in a blender until smooth. Add half the rum and blend for a couple more seconds. Pour through a sieve to remove any unwanted chunks.
  • Add the remaining rung to the passion fruit nectar.
  • Pour the smoothie into the popsicle mold to the halfway point. Insert popsicle sticks and place in freezer at a safe angle to avoid spills. Allow to freeze for no less than an hour.
  • Remove from freezer and fill the mold with the passion fruit/rum mixture. Return to the freezer in a fully upright position and allow to freeze for five hours.
  • Unmold and enjoy!

Products Used In This Post:

September 2013 By i sugar coat it! 2 Comments

Cake Central Magazine - The Fashion Issue

Don't ask me how or why, but I'm super excited to share that I am in Cake Central Magazine!!
Fashion Inspired Cake for Cake Central Magazine

Well, not my likeness, but a cake I designed in response to an invitation from the magazine back in February of this year. I initially thought the email I received was in error, or a joke, so I ignored it at first. Then I thought I might as well respond - the only way to find out for sure. I was pleased to learn it was neither.

Pleasure quickly turned to panic, however. OMG, I don't know what I am doing and... WHAT? Two weeks? For me that's really just a couple days, once you factor in my regular work and other commitments. I was ready to throw in the towel, even before starting, but since that's not how I roll, I accepted the invitation. It was the Fashion Issue, after all, and I like, um... LOVE fashion!
Fashion Inspired Cake for Cake Central Magazine
Once I accepted, I was sent an inspiration photo. I kept thinking of Fitzgerald's, The Great Gatsby, which was a favourite book of mine. I love the era for its over-the-top opulence, which was visible in its fashion. I've often thought that I would have been a part of the flapper crowd, had I lived back then. I am especially intrigued with the headdresses, which, in addition to the Antonio Berardi inspiration dress provided, influenced the end product. At least, I hope they did...
I tried to convey a look of aged/vintage opulence by staining the pearls with a mixture of gold and teal lustre dust and vodka, then wiping it away, then added somewhat tarnished feathers and a decorative button to imitate the headdresses of that era.
Fashion Inspired Cake for Cake Central Magazine
My photos don't show the variation in the jewel-toned colours of the fondant very well, but they're there. I used a Wilton stone impression mat to create the fabric effect, then painted gold lustre dust in the crevices. With the exception of the feather mold, I've included a list of the tools I used to create this cake.
Thirty minutes prior to the deadline, I was just editing photos and hoping there wouldn't be a power outage or some mini disaster that would prevent me from submitting on time. In the end, it was rushed and didn't look exactly as I'd planned, but I am proud that I completed it and that the folks at Cake Central Magazine saw fit to include it.
Fashion Inspired Cake for Cake Central Magazine
Two years ago when I started this blog, I had no idea of the opportunities and accomplishments that awaited me. What an amazing way to step into year three! To all of you who visit my little sweet corner - comment, share, email, allow me to share in your special occasions  purchase from my store, ways big and small - know that I am greatly appreciative of your support. I hope you're able to feel my great big virtual hug. 🙂 Thank you!
I'll be back in a couple days with some blueberry goodness. In the meantime, if you haven't already, take a second to enter my blog birthday giveaway here!

September 2013 By i sugar coat it! 6 Comments

Quick and Easy Dogwood Flower Tutorial

Quick and Easy Dogwood Flower Tutorial
Hiya! Today, post is going to be short, sweet and a little flowery. I'm sharing a quick and easy dogwood flower tutorial.

You will need a few items, for which I've included links below. These little sugar flowers make the cutest addition to baked goods. So grab your tools sand let's get to work on this quick and easy dogwood flower tutorial.

  1. Roll out the paste. For a uniformed sheet, run the paste through a pasta roller, or use spacers on your rolling pin.
  2. Cut various size petals using the dogwood cutters. I like to cut all at once, but you'll need to keep them covered with plastic to keep the paste form drying.
  3. Shape dime-sized pieces of paste into a ball and press into the mold. Use petal dust to add colour to the flower centres.
  4. To give the flowers shape and movement, let dry on a flower form - you can buy foam or plastic forms, or use egg cartons or foil.
  5. Add a little colour to the petals and tips.

You can find more sugar art how-to's on my Tutorial page.

Enjoy!

More Sugar Flower Tutorials:
Ranunculus Tutorial
Poppy Tutorial
Mother's Day Cookie Bouquet
Products Used In This Post:

Cake Central Fashion Issue 2013

September 2013 By i sugar coat it! 223 Comments

Two Year Blog Birthday + Giveaway! {Winner Announced}

 Marvelous Molds Giveaway
Pssst! Have you heard? I'm TWO! And I am so looking forward to celebrating with you!
OK, so it was a week ago that my blog officially saw its second birthday, but it's never too late to celebrate. Right! Even better, you are not required to bring me a birthday gift - I've got that covered! I've put together a gift package for one lucky reader!

Thanks to the folks at Marvelous Molds, one lucky person will soon have a few of their newest product. These decorating tools are wonderful time savers. If you have had the painstaking task of cutting chevrons, then you'll understand. Here's a quick video I shared on Instagram two months ago to demonstrate the ease of use, while making my Ships Ahoy, It's A Boy cake, shown above.

The winner will receive, not one, but 5 Silicone Onlays shown above, mailed directly to you from Marvelous Molds!

Cake Central Fashion Issue 2013
I subscribe to Cake Central Magazine and look forward to receiving my digital issues on my iPad. It is always filled with such great cake inspiration and useful information. I think you'll enjoy it as well, so the folks at Cake Central Magazine have provided a 1 Year Subscription To Cake Central Magazine! The winner will receive 12 issues via PDF and, if you own one, on your iPad as well. You can download the free app here.
Side note: I am so very pleased to share that one of my cakes is included in the current issue of Cake Central Magazine! More on that in a future post.
I Sugar Coat It Blogiversary Giveaway
Craftsy, with its many courses taught by recognized industry professionals, has been a huge learning resource for me over the last year. The platform allows students to learn at their pace, while offering interaction with other students and course instructors. If you learn well on your own, as I do, then you will appreciate this format. What I spend in a year on classes amounts to what one might spend on an in-person class with any of these industry professionals. And you have lifetime access to all courses on Craftsy.
So, in the spirit of sharing the knowledge, I've included Nicholas Lodge's Classic Sugar Flowers as my gift of learning to the winner. Through this class, I was able to produce the peony featured on my Peony Princess Bridal Shower cake shown above!
I Sugar Coat It Blogiversary Giveaway
Winner takes all! And as an additional bonus, I've teamed up with  Flour Confections to offer all I Sugar Coat It readers 15% off any Make Your Own Mold (Marvelous Molds) and Earlene`s Enhanced Lace Molds (manufactured by Make Your Own Molds) on Flour Confections website. Simply enter coupon code: ISCONLAY15. The code is good from today to September 7th 2013 (at 11:59 PM EST).
(Restrictions: The code excludes ALL items except Make Your Own Molds (Marvelous Molds) and Earlene`s Enhanced Lace Molds, manufactured by Make Your Own Molds (the customer can put the code in…. but it will ONLY calculated the discount of the above products). The code cannot be combine with any other coupon code. We will honour the code ONLY when the code is used at the time of purchase. The code will automatically become in-active at 12:00 AM (midnight) September 8th. The discount is not available in-store.)

 
The winner of the I Sugar Coat It 2nd Blog Birthday Giveaway is: #736 Goreti Pavao! Congratulations, Goreti!  You were also notified by email.
 
It's easy to enter! Login to the PunchTab widget using your email address or Facebook account and do the following:
  • Leave a comment in my comment section below this post, in response to the following question: What one tool would you most like to add to your baking/decorating toolbox? You must leave a comment in order to be entered.
  • For additional entries, perform any of the additional actions listed in the widget and leave a comment to let me know you have. Each corresponding comment will count as an additional entry.
For example:
  • Visit my Facebook page and "Like" I Sugar Coat It!, then come back here and leave a note in the comment section below letting me know you did. That will count as an extra entry.

This giveaway ends at midnight EST on Monday, September 9, 2013. The winner will be chosen at random using PunchTab's Giveaway Widget and announced in this post and notified by email. Please note that your comment may not appear immediately; it does not mean it was not received.

Special thanks to Marvelous Molds and Cake Central Magazine for their contributions to this giveaway. Be sure to visit and like their pages.

August 2013 By i sugar coat it! 6 Comments

Guava Cadabra Koi-Teani Pops

 Hello again, my fellow sweet fiends and TGIF! Today's summer sweet comes complete with gills and scales. Grab, your rods, baits and lures and come catch a few with me...
Guava Cadabra Koiteani Pops by I Sugar Coat It!
Yup, we're cooling things down with itty-bitty frozen fishies I made a few weeks ago! And although the fishing gear isn't necessary for these ordinarily ornamental carp, I think you'd agree that these are quite a catch.
These aren't your run of the pond carp - they're Koi-Teani Pops! A deliciously, refreshing adult blend of Guava tea and vodka, frozen!
Guava Cadabra Koiteani Pops
These koi little fishies are the perfect conversation starter for your end of summer BBQ.
I started with Guava Cadabra tea from DavidsTEA - a taste-bud-teasing blend of guava, mango, apple, hibiscus blossoms, elderberries and rosehips - added a little vodka, poured into a mini koi mold, froze, popped and enjoyed. They were that easy!
Guava Cadabra Koi-Teani Pops
And you can offer your guests options, like this version shown above. I added small pieces of guava paste to the vodka/tea blend before freezing. These were a definite treat.
Guava Cadabra Koi-Teani Pops
No time for freezing? A cocktail version is just as good, with or without the vodka. Or, go ahead and make that bland cup of water blush a little by replacing regular ice-cubes with these Koi-Teani Pops!
Either way, they do not disappoint. So, which would you choose?
More Tea-Inspired Frozen Cocktails:
Chocolate Rocket CosmopoliTEA Pops
Matcha Mojito Popsicles
Amarula Chai Latte Creamsicles
Boozy Strawberry Creamsicles

Print Recipe

Guava Cadabra Koi-Teani Pops

A deliciously, refreshing adult blend of Guava tea and vodka, frozen!
Prep Time5 hours hrs
Total Time5 hours hrs
Course: Dessert
Servings: 12
Author: I Sugar Coat It

Ingredients

  • 1 cup hot water
  • 2 tablespoon Guava Cadabra tea
  • ⅓ cup vodka
  • 1 tablespoon extra dry vermouth
  • Guava paste optional
  • Ice optional
  • Cocktail Shaker optional
  • Plastic koi mold

Instructions

  • Steep the tea in the hot water for 2-5 minutes, depending on your strength preference.
  • Let cool a little by placing in refrigerator to chill for about 15 minutes, or the freezer for faster cooling. Stir in the vodka and vermouth.
  • Pour into molds and freeze for 3-5 hours, or overnight. If you can remember (I didn't) add popsicle sticks before they are fully frozen.
  • If adding the guava paste
  • - place small pieces of paste along the base of each mold before adding the liquids.
  • If enjoying as a drink
  • - Place the steeped tea, vodka, vermouth and ice in a cocktail shaker and shake for a few seconds. Strain into a chilled martini glass and enjoy.
  • Omit the vodka and vermouth for a deliciously refreshing mocktail.
  • Enjoy!


August 2013 By i sugar coat it! 14 Comments

Orange Chocolate Anniversary Cake & Tutorial

Oval Orange Chocolate Cake Decorated With Daisies and Pearls
To me, orange and chocolate are the yin-yang of flavour pairings - great independently, but dynamic as a pair. The dream team!

Before I get to this oval piece of orange-chocolatey goodness, let me just say HI YA'll and YIKES! It has been three weeks since my last post!

Blame it on the lazy, care-free, summer and a little on burnout. All the work that goes into blogging, coupled with my regular work and other commitments, can be overwhelming. And to be honest, I sometimes wonder whether anyone would notice if I stopped showing up here altogether. 🙁
Oval Orange Chocolate Cake Decorated With Daisies and Pearls
As quickly as that thought entered my mind, I quashed it. I'd notice! And I'd most definitely miss it and that should count for something, yes?! Even if no one ever shows up here again, I'd still pop in and speak to myself, enjoy a slice and a cup and do it all over again the next week. Every day for the last few weeks, my absence from this place I've built and grown to love, weighed heavily on me. It has become such a great outlet and I have 'met' such good people/friends. I may not always hear from you all, but I know you're here and it feels great to be among you again!
So now that my heart is through trickling blood all over this post, let's clean things up and add some sugar already, yeah!
 
Oval Orange Chocolate Cake Decorated With Daisies and Pearls
Sugar Pearls
 
So, as I was saying... I love the flavour pairing of chocolate and orange. I especially liked the results achieved in this Chocolate Orange Coffee Bavarian Cream I made last November. So I thought I would try that flavour combination in cake form.
I shared the naked version of this cake three weeks ago on Instagram. I made it for a friend's grandparent's anniversary - fifty-five years, I believe she said. GULP!
She showed me some photos of the big day that I am still not sure qualify as colour photos proper, but instead some Kodacolor, sepia-toned, blurred over impostors. And... I loved every one of them! Her gp's looked so very young and scared, but happy.
Although I suspect more a result of the photo processing than the actual chosen wedding colour scheme, these two colours stood out in my mind - orange and teal. As well, there were a few fan/accordion pleat dresses that caught my eye. And is it me, or did everyone in that time own a pearl necklace? So elegant!
Oval Orange Chocolate Cake Decorated With Daisies and Pearls
So, I took those pearls, pleats and Kodacolors and blended them into this sweet, little chocolate and orange gift of love from a grandchild to her grandparents. There might just be a tear or two (of joy) mixed in with the batter.
I really enjoyed making the decorations for this Oval Orange Chocolate Anniversary Cake - simple, fun and so versatile - so I thought I'd share with you how I made them. They're reminiscent of the pleated dresses from the photos, complete with a string, or two, of pearls.

 
Tools Used:
  • Daisy Molds (75mm and 110mm)
  • Gum Paste
  • Small Rolling Pin (with spacers)
  • Pasta Roller Attachment (optional)
  • Cookie Cutters (68mm and 88mm)
  • Vegetable Shortening & Cornstarch Pouch
  • Shimmer Dusts (Super Pearl, Emerald and Moonstone)
  • Paint Brushes
  • Non-stick Surface
  • Vodka
  • Wilton Performance Oval Pans
Hope you enjoyed!
I will share the recipe for this cake in a future post, where I am able to share a slice with you. 🙂
Other Celebration Cakes:
Ships Ahoy, It's A Boy Baby Shower Cake
Princess Peony Bridal Shower Cake
Ruffles & Pearls Mother's Day Cake


August 2013 By i sugar coat it! 6 Comments

Breakfast Smoothie Popsicles {Summer Sweets}

Do you have a difficult time getting up and going in the morning? Alarms, coffee, crying babies and snoring spouses no longer do the trick? Well, it's time you tried Breakfast Smoothie Popsicles!
Breakfast Smoothie Popsicle via I Sugar Coat It

Like a cold shower the morning after, these little frozen energy pills will put the sleep back to bed, the hangover out to dry and you, out the door. No prescription or visits to shady street corners required. Available in convenient single packs and an endless combination of flavours and doses.

WARNING! Some side effects may occur: Breakfast Smoothie Popsicles are slightly addictive. You may experience occasional brain freeze. Stickiness and dripping may develop on extremely warm days. Consult your meteorologist before consuming.
Breakfast Smoothie Popsicle via I Sugar Coat It
We like a good smoothie in the morning and will generally switch things up to keep it interesting - sometimes fruit, sometimes, vegetables and often both. K is vegetarian, so we tend to stay away from animal products as much as we can in making these. Just throw your favourite combination into a blender with your liquids of choice, give it a whirl, add a straw and consume. Boring, you say?
Breakfast Smoothie Popsicles - I Sugar Coat It!
That's what I thought, while blending up a batch a couple weekends ago. So, I pulled out my popsicle mold and a few hours later, enjoyed breakfast on a stick! And then it struck me, if I ever have kids, I could quite possibly be the most amazingly popular mom on the planet! Popsicles for breakfast, anyone?

Breakfast Smoothie Popsicle via I Sugar Coat It
So, barring the scary list of side effects, I strongly recommend trying one of these little frozen pills for breakfast. If nothing else, they are guaranteed to put a smile on your face. Popsicles, in general, will do that and smiles are always good!


For a more adult experience, try these:
Chocolate Rocket CosmopoliTEA Popsicles
Matcha Mojito Popsicles
Peach Bellini Popsicles
Boozy Strawberry Creamsicles

Print Recipe

Breakfast Smoothie Popsicles

Breakfast redefined and on-the-go!
Prep Time5 minutes mins
Total Time5 minutes mins
Course: Breakfast
Servings: 6
Author: I Sugar Coat It

Ingredients

  • 1 cup mango pulp or frozen mango chunks
  • 1 cup mixed berries raspberry, strawberry, blackberry
  • 1 cup Almond milk or regular milk
  • Yogurt I used a dairy free, nut-based product by So Delicious Dairy Free, regular yogurt may be substituted
  • 1 tablespoon Matcha Green Tea powder
  • 1 teaspoon ground cinnamon
  • 2 tablespoon protein powder I used a rice-based, vanilla flavoured brand

Instructions

  • Place all ingredients in a blender and mix until fully liquified.
  • Add more liquids or solids as needed to reach your desired consistency and taste.
  • Pour into popsicle molds and let freeze overnight for the next day's breakfast.
  • Pour any leftover into a glass and enjoy immediately.

August 2013 By i sugar coat it! 4 Comments

Polka Dots And Poppies

Happy Monday, sweet friends!
Have you noticed how cold it has gotten around here? With all the frozen concoctions popping up here every Friday, one might assume I'd lost my baking mojo. Not entirely true...

Mini Hat Cake by I Sugar Coat It

Although, it has felt that way some days. However, it's not for lack of ideas or desire, but time. It's the summer after all, and what better place to spend it than outdoors! After work and on the weekends.


So, while my cake mojo continues to elude us, I thought I'd share a couple projects from last year that I'd forgotten about, until a recent re-org of my image files.
Mini Hat Cake by I Sugar Coat It
I made this cake as a little thank you for a friend back in October, and for some unknown reason, never got around to sharing. Bizarre, because I thought it was the cutest little thing and remember being so proud of my hat. Even more bizarre, I could only find three shots, all pretty much identical...

The cake was chocolate with a chocolate mousse filling. I remember, because K and I ate the remaining mousse with our fingers straight from the bowl. I also remember baking half spheres in a silicone mold that just would not cooperate. That is how I achieved the shape at the top. I've since purchased better molds that work beautifully. You may have seen them in action here.

The hat and ribbon were crafted using modelling chocolate and I used a piping tip to cut out the polka dots on the hat band. To give the brim some movement, I used some scrunched up plastic wrap and propped them up randomly with popsicle sticks.

You can expect to see another version of this hat soon!

Poppy Patchwork Chocolate Coconut Cake
This cake, I chose not to share when I made it back in November, as I was not sure how I felt about it then...or now. It was a little chocolate cube with layers of coconut cream filling for my coconut-loving aunt. 

I am not sure why I added fondant, or why I went bat-crazy with the poppy patchwork design, as she is not a fan of either. I'll blame my momentary lapse of design judgment on the alkaloids.
Poppy Patchwork Chocolate Coconut Cake
In the end, after all that work, I peeled away the fondant from the ganache it covered - a messy job, I might add - cleaned it up, added another coat of ganache to help smooth things out and piped a little coconut cream to pretty up any rough edges. 

Poppy Patchwork Chocolate Coconut Cake
The end product wasn't as neat and pretty as its first incarnation, but still delicious. My aunt, who isn't much into dessert, loved it! 1 - because of the coconut flavour, 2 - it wasn't too sweet, and 3 - I made it! And in case you haven't noticed, I make all my cakes from scratch, infused with lots of love and laughter. 😉


Try A Few More Bites:
Red Velvet & White Chocolate Gift Box Cake
Red Velvet With Coconut Swiss Meringue Buttercream
Momma's One-Bowl Coconut Cake
Chocolate Cake With A Kick
I'll be back in a few days with another instalment of my Friday Frozen Summer Sweets and more cake! 

August 2013 By i sugar coat it! 8 Comments

Chocolate Rocket CosmopoliTEA Pops {Summer Sweets}

There's chocolate in my tea...and berries and booze! The perfect start to an extra long weekend, wouldn't you agree?
Chocolate Rocket Tea Cosmopolitan Popsicles
I have been having so much fun experimenting with frozen treats for this series, that I fear I've lost my baking mojo. To be honest, I have not had much time for anything more elaborate in the kitchen.
In fact, my freezer is filled with all sorts of frozen concoctions; some not so share worthy and others waiting to be photographed and blogged. And everyday I get to hear about how little space there is for actual food. My advice to the man - suck it up, literally! 😉
Chocolate Rocket Tea Cosmopolitan Popsicles
Now, if you have been hanging here with me long enough, you already know I am a tea girl. I am also a big fan of DAVIDsTEA. So, if you are ever stumped for a gift for me, look no further.
Chocolate Rocket is a mix of Yerba mate, cocoa nibs, almonds, roasted chicory root and raspberries. You can have it hot, cold or berried and boozed up on a stick. Either way, it certainly is The Ultimate Trip it claims to be. And these Chocolate Rocket CosmopoliTEA Pops are a one-way shuttle to the coolest spot on the moon!
Chocolate Rocket Tea Cosmopolitan Popsicles
 Won't you join me?
Add These Boozy Pops To Your Weekend:
Peach Bellini Popsicle
Amarula Chai Latte Creamsicle
Boozy Strawberry Creamsicles
Guava Cadabra Koi-Teani Pops

Print Recipe

Chocolate Rocket Tea Cosmopolitan Popsicles

A refreshingly frozen blend of tea, berries and booze.
Prep Time6 hours hrs
Cook Time10 minutes mins
Total Time6 hours hrs 10 minutes mins
Course: Dessert
Servings: 7
Author: I Sugar Coat It

Ingredients

  • 500 ml hot water 2 cups
  • 24 g Chocolate Rocket tea leaves 3 tbsp
  • 250 ml Raspberry Cosmopolitan Vodka mix 1 cup
  • 125 ml Pellegrino ½ cup
  • Handful of mixed berries

Instructions

  • Pour hot water over tea leaves and allow to steep for 5-10 minutes, depending on how strong you like your tea.
  • Please in the fridge to cool for about 20 minutes, or in the freezer for 10. Add the cosmopolitan mix and Pellegrino.
  • Pour into popsicle molds, add berries, insert sticks and freeze for at least five hours, or overnight.
  • To unmold, place under warm running water for a few minutes.
  • Enjoy!


  • « Go to Previous Page
  • Page 1
  • Interim pages omitted …
  • Page 39
  • Page 40
  • Page 41
  • Page 42
  • Page 43
  • Interim pages omitted …
  • Page 51
  • Go to Next Page »

Primary Sidebar

Never Miss A Happy Ending...

Previous Sweetness...

Search

Filter by Category

Filter by Date

SWEETEN YOUR INBOX!

All Content Including Images Copyright Jacqueline | I Sugar Coat It© 2026