• Skip to primary navigation
  • Skip to main content
  • Skip to primary sidebar
  • Home
  • About
    • About I Sugar Coat It
    • Features & Press
    • Copyright
    • Disclosure
    • Privacy Policy
  • Recipes
  • How-To
  • Contact
  • sous vide sista

I Sugar Coat It

Home

All Posts

Vanilla Bean Blackberry Scones

April 2014 By i sugar coat it! Leave a Comment

Gluten-Free Vanilla Bean Blackberry Scones {Breakfast Club}

 Good morning! I'm serving up fluffy, melt-in-your-mouth, Gluten-Free Vanilla Bean Blackberry Scones for breakfast today! Click on over for a bite...
Gluten-Free Vanilla Bean Blackberry Scones

Before I get into these wonderfully, delicious wedges, I need to acknowledge my disappointment with the photos as they appear in this post. My displeasure actually lies with Blogger - this is just one of many issues. I am actually pleased with the photos I shot, as they appear in Lightroom. However, the second I uploaded them to my blog, the quality diminished...ten-fold. This has happened a few times recently. WTH!

I tried a number of fixes, but with zero result. Needless to say, I am extremely disappointed with the over-processed feel and look of the images that follow. But I wanted to share this recipe, so here goes...
Gluten-Free Vanilla Bean Blackberry Scones
I like scones. I love blackberries. I adore vanilla. Bring these together and you get perfect breakfast bites that disappear rather quickly.
 
I started with a basic scone recipe from old course material and subbed in a gluten-free flour blend that is now my go-to GF flour. So much more reliable and easier than making my own.
Gluten-Free Vanilla Bean Blackberry Scones
I generally don't like fruit cooked or baked into anything - with the exception of blueberry and only in muffins, cake and scones. Never pie. Odd, I know. 
 
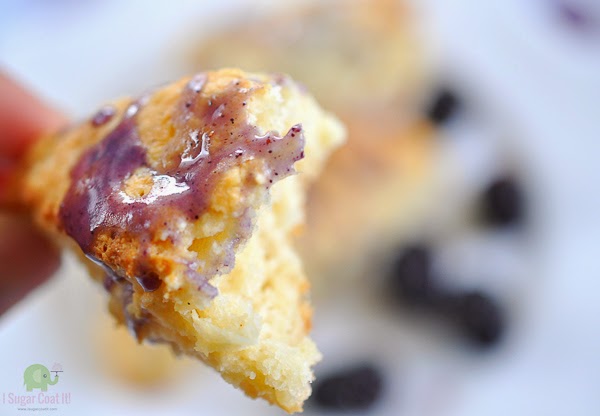
So to get the fresh blackberry taste I wanted to complement these scones, I opted for a glaze. Applied while the scones are still warm, it forms a pretty pattern inside the scone, giving them the appearance of melted fruit inside.
Gluten-Free Vanilla Bean Blackberry Scones
These Gluten-Free Vanilla Bean Blackberry Scones are perfect for a small brunch gathering, which seems to be synonymous with Sundays now that the weather is warming. YAY!! I'll see you back here in a few days for some Easter treats! 
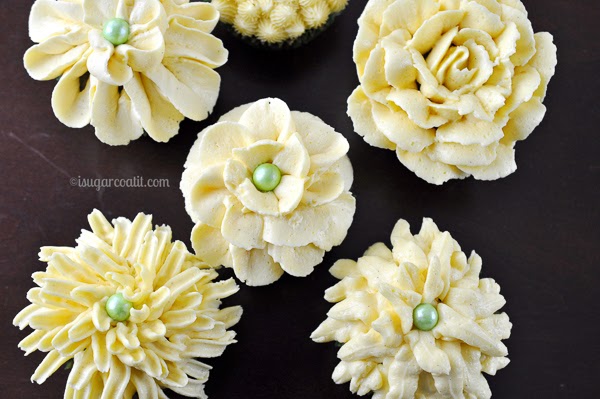
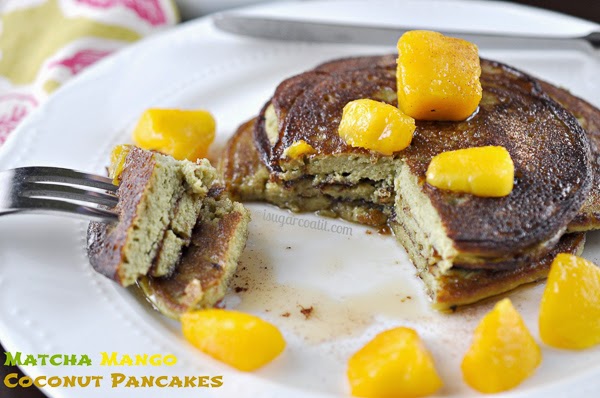
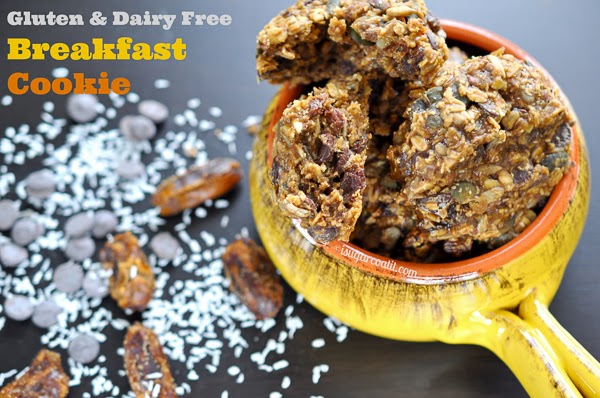
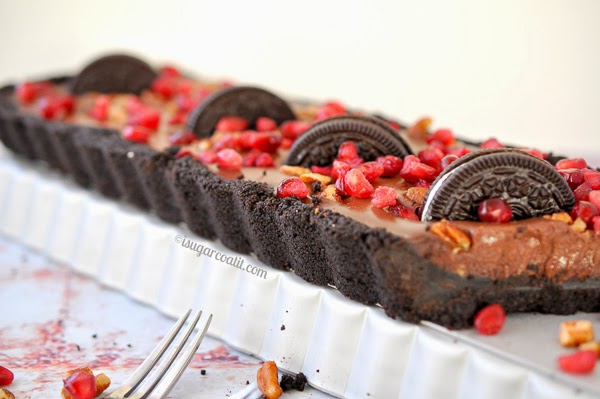
 
More Brunch Bites
Coffee Chocolate Chip Scones
Almond Oat Bran Pancakes
Vanilla Bean Malted Mini Muffins
Vanilla Bean Blackberry Scones
Print Recipe

Gluten-Free Vanilla Bean Blackberry Scones {Breakfast Club}

Light, fluffy, flavourful, gluten-free vanilla scones, topped with fresh blackberry glaze.
Prep Time15 minutes mins
Cook Time20 minutes mins
Total Time35 minutes mins
Course: Breakfast
Servings: 8
Author: I Sugar Coat It

Ingredients

Scones

  • 270 g gluten-free flour 2 cups, I used Cup4Cup
  • 10 g baking powder 2 tsps, I use Magic Baking Powder. It's gluten and aluminum-free
  • 3 g baking soda ½ tsp
  • 28 g granulated sugar 2 tbsp
  • 3 g salt ½ tsp
  • 113 g unsalted butter 1 stick, chilled
  • 1 egg
  • 167 cup buttermilk ¾
  • 11 g vanilla bean paste 1tbsp, I use Nielsen-Massey Madagascar Bourbon Vanilla Bean Paste

Glaze

  • 50 g confectioner's sugar ½ cup
  • 5 g vanilla extract 1tsp
  • 10 g fresh 2tsp, blackberry juice

Instructions

  • Preheat oven to 350ºF.
  • Line a baking sheet with a silpat mat, or parchment, if you do not own a mat.
  • Sift the flour, baking powder and baking soda into a medium bowl. Add the sugar and salt and use a hand whisk to combine.
  • Cut the butter into cubes while still cold and add to the flour mixture. Use a pastry blender to cut the further cut butter into the flour mixture until it reaches a coarse, crumb-like texture.
  • In a measuring cup or small bowl, lightly whisk together the egg, buttermilk and vanilla bean paste. Add to the flour mixture, leaving a little brush the scones before baking.
  • With your hands covered in food-safe gloves, work the dough only until it holds together.
  • Flour a clean surface and move the dough onto the surface, continuing to work the dough until it forms a ball. Use hands to flatten and shape dough into a 7-inch disk. You may also use a 7-inch cake pan to assist in flattening and shaping the dough.
  • Use a sharp knife to cut a plus-sign (cross shape) into the dough, creating four wedges. Cut cross-wise again, creating two additional wedges from each wedge. You should end up with eight wedges.
  • Brush wedges with remaining milk mixture and place on the silpat-lined cookie sheet.
  • Bake on the middle rack for 20 minutes. Baking times may differ depending on your oven.
  • Remove and allow to cool slightly on a wire rack before glazing.

For the glaze:

  • While the scones are baking, blend a handful of blackberries in a blender or small food processor. Pour through a sieve, using a spoon or spatula to press the juices through.
  • Place the confectioner's sugar in a small bowl and stir in the vanilla extract juice until fully combined.
  • Drizzle over scones while still warm. Enjoy!!

April 2014 By i sugar coat it! Leave a Comment

Almond Oat Bran Pancakes {Breakfast Club}

 Happy April Fool's Day! How about some pancakes to kick things off!!
Almond Oat Bran Pancakes
No tricks here today, just a couple pancakes that pack a serious punch, both in taste and sate. These are so tasty thanks to the almond flavour throughout. Add some fresh fruit, lots of cinnamon and a little maple syrup and BAM... BREAKFAST!
They are also quite filling and filled with all the benefits of oat bran - rich in soluble fibre, essential vitamins and minerals and gluten-free! Almond is also gluten-free and is said to lower the rise in blood sugar and insulin after meals, nourish the nervous system and boost brain activity, among other things.
And who among us would not benefit from a good boost in the morning?
Almond Oat Bran Pancakes
I adapted this recipe from Chelsey over at Powerhouse Fit Foodie . I omitted the sweetener and added crushed vanilla bean and cinnamon and instead of water, I used almond milk and increased the amount from ¼ to ½ cup. I also increased the coconut oil to 1 tablespoon. These Almond Oat Bran Pancakes are really good - give them a try!
Want more breakfast ideas, or have some of your own you would like to share? Join my Breakfast Club Pinterest Board and start pinning!! Use my Contact Form to send a request, if you would like to be a contributor to this board. Happy pinning!
I'll be back in a few days with cake!!
Have Some More Breakfast!
Matcha Mango Coconut Pancakes
Blueberry Chia Breakfast Smoothie
Breakfast Cookies
Print Recipe
3 from 3 votes

Almond Oat Bran Pancakes {Breakfast Club}

Almond Oat Bran Pancakes are gluten and dairy free and deliciously filling!
Prep Time10 minutes mins
Cook Time10 minutes mins
Total Time20 minutes mins
Servings: 4
Author: I Sugar Coat It

Ingredients

  • 45 g almond flour ¼ cup
  • 25 g oat bran ¼ cup
  • a pinch of crushed vanilla beans
  • 1 g cinnamon ½ tsp
  • 1 large egg
  • 13 g coconut oil 1 tbsp
  • 122 g almond milk ½ cup
  • Fresh fruit cinnamon, almonds and pure maple syrup to garnish

Instructions

  • Place the almond flour, oat bran, cinnamon and crushed vanilla beans in a food processor and pulse about 5 times.
  • In a bowl, whisk together the egg, oil and almond milk.
  • Add almond flour mixture to milk mixture and use a spatula to combine. Batter will appear somewhat thick and lumpy.
  • Add a bit of coconut oil to a skillet and heat over medium heat. Pour batter to desired size and allow to cook until bubbles start form on the surface of the batter. Flip and cook until batter is set.
  • Top with berries and almonds, drizzle with syrup and top off with a dusting of cinnamon. Enjoy!

Notes

{adapted from Powerhouse Fit Foodie}

March 2014 By i sugar coat it! 6 Comments

Mango White Chocolate Ganache Macarons

Macaron shells coloured with organic, ground wild blueberries and filled with a mouth-watering mango white chocolate ganache.
Happy Friday!! Double-digit temps mean only one thing - time to bring sexy back! A little Foodporn Friday, anyone?

When I think of sexy food, anything that whets my appetite immediately upon sight, gets my vote. While we're voting, dark chocolate anything takes the cake, forks down. Followed closely by Macarons - French, Swiss or Italian - all equally seductive in my foodporn world. These Mango White Chocolate Ganache Macarons are no exception.

What makes a Mac sexy? Well, let's start with the feet - a fetish developed around April of 2012 when these French guys entered the scene, sporting lavender coats and smelling like a bed of roses.
White Chocolate Mango Macarons are white chocolate mango ganache sandwiched between blueberry flavoured and coloured macarons!
Next, a sexy Mac is a well-dressed Mac. Whether in screaming fuchsia, or steely, subdued blue, a well put together Mac always gets my attention.
Strong, smooth skin that reveals a soft, meringue-like texture when bitten, would be next on my sexy list. I'm not looking for perfection here - a little stubble can be just as attractive under the right circumstances. Full-on beards and me aren't friends, however.
Finally, what's inside is equally as important, as it's what seals the deal (pun intended). Whether buttercream, ganache, fruit compote...don't skimp. A sweet Mac is not a cheap Mac.
Macaron shells coloured with organic, ground wild blueberries and filled with a mouth-watering mango white chocolate ganache.
Speaking of what's on the inside... I've recently begun to experiment with powdered fruits as a natural colorant for my macaron shells and fillings.
To create the masculine blue/grey shells for these Mango White Chocolate Ganache Macarons, I used a tablespoon of Organic Wild Blueberry Powder. It was just enough to achieve the steely tone, without overpowering the almond flavour that one expects from a macaron.
And to tie all this sexy together, I whipped up a smooth batch of White Chocolate Ganache and filled it with the flavour of the tropics using mango puree. You got it - Mango White Chocolate Ganache Macarons!
Now pass me the sunscreen, please!
Macaron shells coloured with organic, ground wild blueberries and filled with a mouth-watering mango white chocolate ganache.
Of the macarons I've made to date, these have been the most flavourful and the sexiest! I love the masculine feel they lend to the photos.
What dessert do you find most sexy?
More Macarons
Painted Passion Fruit Macarons
Orange Blossom Macarons
Matcha Mojito Macarons
Lavender Rose French Macarons
 
Print Recipe
3.92 from 23 votes

White Chocolate Ganache Mango Macarons

Macaron shells coloured with organic, ground, freeze-dried wild blueberries and filled with a mouth-watering mango white chocolate ganache.
Prep Time1 hour hr
Cook Time8 minutes mins
Total Time1 hour hr 8 minutes mins
Course: Dessert
Cuisine: Macarons
Servings: 24 assembled macarons
Author: i sugar coat it!

Ingredients

Macarons

  • 60 grams liquid egg whites ¼ cup, or two egg whites
  • 115 grams confectioner's sugar ¾ cup
  • 90 grams almond flour 1 cup
  • 50 grams granulated sugar ¼ cup
  • 2.5 grams freeze-dried wild blueberry powder 1 tsp

Ganache

  • 230 grams white chocolate 1 ¼ cups
  • 170 grams heavy whipping cream 35% ¾ cup
  • 87 grams mango puree ¼ cup
  • 28 grams unsalted butter 2 tbsp

Instructions

  • Line a cookie sheet with parchment or silpat mat and place a template beneath.
  • In a food processor, pulse the almond flour, confectioner's sugar and blueberry powder together (about 10 pulses), or until well combined.
  • Using the whisk attachment, whip the egg whites in a grease-free bowl of a stand mixer until foamy.
  • Slowly add the granulated sugar to the egg whites, a little at a time and continue to whip on high until stiff peaks form. Do not over-whip.
  • Remove bowl from mixer and sift the almond mixture onto the egg whites  in three additions. Use a clean, grease-free spatula to fold the the mixture into the egg whites. Should be the consistency of molasses when ready - at about 50 folds.
  • Fit a piping bag with a 1.5" plain tip and fill the bag with the batter. Pipe small circles onto the parchment/baking mat. remove the template.
  • Tap the pan on the counter firmly a few times to remove any air bubbles or peaks. Let the batter rest for 30 minutes to an hour to allow a skin to form on the tops of the piped macarons.
  • While the batter rests, preheat the oven to 325ºF. Bake for 8 -10 minutes. Do not allow to brown. (bake time may differ for your oven)
  • Remove from oven and allow to cool completely and pair up equal sized shells before assembling.

To make the ganache:

  • Place chocolate in a heat-resistant bowl and melt over a double boiler. Set aside.
  • Bring cream to a simmer in a pot over medium heat. Once the cream begins to bubble around the edges, remove from heat and immediately and add to the chocolate in three additions while stirring. 
  • Add the mango puree and stir to incorporate fully. Add butter while mixture is still warm and whisk until completely melted and mixture appears smooth. If needed use a hand blender to emulsify.
  • Allow to set to a consistency that is good for piping. Pipe generous amounts onto one of the paired shells and then sandwich the piped ganache with the second shell. 
  • Place in an airtight container and allow to chill overnight before enjoying. Perfect for afternoon tea with friends!
 

March 2014 By i sugar coat it! Leave a Comment

Blueberry Chia Seed Breakfast Smoothie {Breakfast Club}

 Blueberry Chia Breakfast Smoothie
Show of hands if it feels like Spring in your neck of the woods. Nah? Well, click on over... I've got just the thing for you!

Soooo, before we get to sipping and slurping on this tall glass of jewel-toned awesomeness I call Blueberry Chia Seed Breakfast Smoothie, I need to throw in my all-too-frequent moan and groan about the weather.

Last year, Spring sucked. Hard. She was a roller-coaster of emotions with all her water-works and cold-shoulder nonsense (my displeasure was duly noted in this post). I am not prepared to put up with such behaviour this year - not after such a brutal winter. So stop your silly Jedi mind tricks and just warm the hell up, missy. STAT!
Blueberry Chia Breakfast Smoothie
OK...this Blueberry Chia Seed Breakfast Smoothie! A real beaut, right? It's also extra large on taste and so very good for you. Can you say Anthocyanins?
With a BPA-free, coconut milk base, this smoothie is perfect for you vegans and us lactose-intolerant types. Add a little plant-based protein powder, a mix of frozen berries and banana, organic wild blueberry powder and a generous scoop of chia seeds and you've got liquid sapphire. Sip on that Marilyn Monroe!
Blueberry Chia Breakfast Smoothie
Never heard of blueberry powder? We all know what a powerhouse fresh blueberries are said to be. This powder version boasts all the attributes of its little blue 'pre-carnation' - antioxidant, cholesterol regulator, bone protector, heart-friendly, brain food and just as tasty.
I find fruit powders to be such a versatile alternative to fresh or out-of-season fruit and for that reason we tend to keep some on hand. Lately, however, I've been experimenting with such powders in place of food colour in baking. The results of which I'll be sharing with you shortly!
Blueberry Chia Breakfast Smoothie
So blend a batch of my Blueberry Chia Seed Breakfast Smoothie, grab a straw (not sure why you hadn't already) and let's slurp a toast to Monday and to Spring. May she not be a total disappointment this year. Cheers!
Eat Breakfast! 
Breakfast Cookies
Breakfast Smoothie Popsicles
Matcha Mango Coconut Pancakes
Print Recipe

Blueberry Chia Breakfast Smoothie

A delicious blend of coconut milk, berries, banana and chia seeds for a healthy breakfast on-the-go.
Prep Time5 minutes mins
Total Time5 minutes mins
Course: Breakfast
Servings: 2 cups
Author: I Sugar Coat It

Ingredients

  • 2 cups BPA-free coconut milk
  • 1 cup mixed berries strawberries, blueberries, blackberries, frozen or fresh
  • 1 ripe banana frozen
  • 1 scoop plant-based protein powder
  • 1 tablespoon organic wild blueberry powder
  • 1 tablespoon chia seeds

Instructions

  • Place all ingredients in a blender and blend until smooth.
  • Pour into tall glasses, sprinkle with chia seeds, and a fun straw and enjoy!


Passion Fruit Macarons

March 2014 By i sugar coat it! Leave a Comment

Painted Passion Fruit Macarons {Macaron Day 2014}

 Painted Passion Fruit Macarons
Happy Macaron Day, ya'll!! I couldn't let this day go by without sharing my Painted Passion Fruit Macarons! Click on over to check them out!

I am so in love with these macarons! I made them for Valentine's Day last month and shared them with my colleagues at work. Just over a month ago, but just in time for Macaron Day!

Painted Passion Fruit Macarons
Painting on macarons was new for me, but so relaxing and fun! I saw a quick pictorial on Flour Confections Instagram feed and whipped up a batch of macarons, just so I could try out the technique. I made a quick video, but holding my phone in one hand and painting with the other yielded subpar footage this time around.
I definitely need to practice this technique a few more times to give my roses more depth and subtler definition. You'll definitely see more in the future. Looks aside, these Passion Fruit Macarons were mouth-watering. But that's just my humble opinion...
Painted Passion Fruit Macarons
These babies needed a little something to hold them together, so I whipped up a silky, smooth batch of Passion Fruit Swiss Meringue Buttercream and piped swirls of fruity deliciousness onto their backsides to seal their almond-y fate.
Painted Passion Fruit Macarons
Impale them with a few polka-dotty straws and VOILA... Shabby Chic Painted Macaron Pops filled with the smooth taste of summer!
Check out the Macaron Day Toronto map, for all the spots you can pick up some of these sweet treats and support Red Door Family Shelter. Two birds with many macs - mission accomplished!
More Macarons
Lavender Rose French Macarons
Orange Blossom Crème Chantilly Macarons
Matcha Mojito Macarons
Passion Fruit Macarons
Print Recipe
5 from 1 vote

Painted Passion Fruit Macarons

Prep Time1 hour hr
Cook Time10 minutes mins
Total Time1 hour hr 10 minutes mins
Course: Dessert
Servings: 48 shells
Author: I Sugar Coat It

Ingredients

Macarons

  • 60 g liquid egg whites
  • 115 g confectioner's sugar
  • 90 g almond flour
  • 50 g granulated sugar
  • a couple drops of yellow food colour

Filling - see recipe for

  • Passion Fruit Swiss Meringue Buttercream

Instructions

  • Line a cookie sheet with parchment or silpat mat.
  • In a food processor, pulse the almond flour and confectioner's sugar together for about 20 seconds, or until well combined.
  • Using the whisk attachment, whip the egg whites in a grease-free bowl of a stand mixer until foamy.
  • Add the granulated sugar to the egg whites, a little at a time and continue to whip on high until stiff peaks form. Do not over-whip.
  • Stop the mixer and add the food colour. Whip for a few more seconds until fully combined.
  • Remove bowl from mixer and sift the almond mixture onto the egg whites. Use a clean, grease-free spatula to fold the the mixture into the egg whites. Should be the consistency of molasses when ready.
  • Fit a piping bag with a 1.5" plain tip and fill the bag with the batter. Pipe small circles onto the parchment/baking mat.
  • Tap the pan on the counter a couple times to remove any air bubbles or peaks. Let the batter rest for about 30 minutes to an hour to allow a skin to form on the tops of the piped macarons.
  • While the batter rests, preheat the oven to 325ºF. Bake for 8 -10 minutes. Do not allow to brown.
  • (bake time may differ for your oven)
  • Remove from oven and allow to cool completely before assembling.

Happy first day of Spring!! See you back here in a few days for more macarons!


Matcha Coconut Passion Fruit Cupcakes

March 2014 By i sugar coat it! Leave a Comment

Matcha Passion Fruit Spring Cupcakes

Matcha Passion Fruit Cupcakes with Piped Buttercream Flowers
Hello Spring! We couldn't be more happy about your arrival, yet you look and feel so much like your cousin, Winter...BRRRR.

As we wait for pops of colour to push their way up through the snow-drenched earth, I've cultivated a few blooms of my own to welcome Spring's arrival - which is officially tomorrow. Best part, these Spring blooms are all edible!

Mounds of smooth, rich, light Passion Fruit infused Swiss Meringue Buttercream piped in rose, buttercup, pompom, ferns and dahlia add just the needed sweetness to the Matcha Green Tea cupcakes beneath.
Matcha Passion Fruit Cupcakes with Piped Buttercream Flowers
I made these three weeks ago, along with their mini cacti counterparts - my contribution to a farewell potluck at work to send one of our interns off to medical school (in the not-so-distant future, we hope). The very best to you, Kate!
Matcha Passion Fruit Cupcakes with Piped Buttercream Flowers
These types of piped cupcakes are nothing new - similar floral styles can be found pinned across many Pinterest boards. I've just always wanted to give them a try. Now I have!
The cupcakes they covered, however, were another of my coconut flour experiments.  A simple blend of matcha green tea, coconut oil, coconut flour, eggs, coconut sugar and vanilla beans that was very low on the sweet meter. This made them the perfect base for my Passion Fruit SMBC. YUM!
Matcha Passion Fruit Cupcakes with Piped Buttercream Flowers
Before the sweets, I enjoyed a number of dishes made by my colleagues (a few are shown above). All so very tasty and some I intend to recreate.
Matcha Passion Fruit Cupcakes with Piped Buttercream Flowers
Here are links to the various tips I used to create these Matcha Passion Fruit Spring Cupcakes:
Wilton #125 - held at different angles to pipe the Rose and the Buttercup
Ateco #81 - to pipe the dahlia
Inox #8 - to pipe the pompoms (not on Amazon, but it looks like a closed French tip)
Wilton #352 - to create the fern
Wilton #8B - to pipe the mini cacti (as shown on my Instagram)
So until Spring graces us with warmer, prettier outdoors, go ahead and create your own indoor blooms of the buttery, sweet variety! Have a wonderful Wednesday! I'll see you back here in a couple days for some shabby chic macarons.
More Matcha Munchies:
Matcha Mojito Macarons
Matcha Cheesecake
Matcha Mojito Popsicles

Matcha Coconut Passion Fruit Cupcakes
Print Recipe

Matcha Passion Fruit Spring Cupcakes

Delicious blend of matcha tea, coconut flour and passion fruit make these mini cupcakes the perfect spring treat!
Prep Time30 minutes mins
Cook Time25 minutes mins
Total Time55 minutes mins
Course: Dessert
Servings: 24
Author: I Sugar Coat It

Ingredients

Cupcakes

  • 180 g organic coconut flour 2 cups
  • 4 g baking powder 1 tsp
  • 28 g Matcha green tea powder 2 ½ tbsp
  • 215 g coconut oil 1 cup
  • 230 g organic coconut palm sugar 1 cup
  • 12 large eggs room temperature
  • 4 g vanilla bean paste ½ tsp

Buttercream:

  • 300 g liquid egg whites 1 ⅓ cup
  • 500 g granulated sugar 2 ½ cups
  • 680 g unsalted butter 3 cups
  • 5 g Tahitian crushed vanilla beans 1 tsp
  • pinch of salt
  • 87 g Passion Fruit Compound ¼ cup

Instructions

  • Preheat oven to 350ºF and line the muffin tins with paper cupcake liners.
  • In a medium bowl, sift together the coconut flour, baking powder and matcha powder. Set aside.
  • In a separate bowl, whisk together the coconut oil, sugar, eggs and vanilla bean paste, until combined.
  • Add the flour mixture to the egg mixture and fold until fully incorporated.
  • Scoop into the cupcake liners using a small ice-cream scoop for the minis and a regular size scoop for the larger cupcakes, filling each about half way.
  • Bake the mini cupcakes for 15-20 minutes and the larger for 25-30 minutes. This may differ based on your oven, so keep an eye on them as they bake.
  • Insert a cake tester (or toothpick) into the center to test for readiness. When it comes out clean, they are ready!
  • Remove from oven and allow to cool in pan on a cooling rack for about 10 minutes before transferring them directly onto the cooling rack.
  • Allow to cool completely before decorating.

To make buttercream:

  • Using a clean towel and some lemon juice or vinegar, clean your mixing bowl, whisk attachment and any other utensils you will use, to remove any traces of grease.
  • Fill a heavy duty pot about a quarter of the way with water and place on the stove over medium heat to simmer.
  • Add egg whites, sugar and salt to the mixing bowl and whisk together lightly with a hand whisk, just until combined. Fit the bowl onto the pot, ensuring the bottom of the bowl is not in contact with the water in the pot. Insert a thermometer. Whisk the egg white mixture constantly, but gently, until temperature reaches 160°F.
  • Once at the correct temperature, remove carefully from heat, wipe the moisture away from the bottom of the bowl and transfer mixing bowl to the stand mixer. With the whisk attachment, begin to whip the meringue until it is thick, glossy, and the bottom of the bowl is no longer warm to the touch.
  • Do not begin adding butter while the bowl is still warm.
  • Switch from your whisk to paddle attachment and with mixer on low speed, add butter cubes, a little at a time, until incorporated. Continue to mix until it has reached a silky smooth texture.
  • Add vanilla beans and passion fruit compound, continuing to beat on low speed until well combined.
  • Pipe onto cooled cupcakes and enjoy!!

March 2014 By i sugar coat it! Leave a Comment

Matcha Mango Coconut Pancakes {St. Patrick's Day}

Happy St. Patrick's Day! Green eggs and ham? No, just a few coco-nutty green pancakes, Sam-I-Am!
Matcha Mango Coconut Pancakes
Right on the heels of last week's Breakfast Cookies, yet another departure from muffins on this ninth instalment of Muffin Monday. I may need to revise the series to Breakfast Club, but that does not have as nice a ring.
Well, it's St.Paddy's Day and a lot of green beer generally leads to a little rule breaking and so should green pancakes!
Matcha Mango Coconut Pancakes
These Matcha Mango Coconut Pancakes are not only a pretty colour (look around - you should know by now I love green), they are packed with flavour. The coconut and mango are pronounced, providing a much needed taste of the tropics. And for all of us suffering through these harsh winter conditions, anything tropical is welcome. Yes?
Matcha Mango Coconut Pancakes
And great news! Since my Coconut Cornmeal Mini Muffins, my relationship with coconut flour has improved immensely. We're not at BFF status, but we're getting there - it now has a dedicated spot in my pantry. That's BIG!

Coconut flour has a distinct taste and texture that is quite different from regular flour. It also requires a great deal of moisture. After a few flops - I have found an extra egg for about every 30 grams of coconut flour works for me. I'll continue to experiment and share what I learn.

Matcha Mango Coconut Pancakes
In the meantime, after what I imagine was a green-binge weekend of partying, bring the St. Paddy's celebration to a healthy end with a stack of green - Matcha Mango Coconut Pancakes!
 
Eat More Greens:
Matcha Cheesecake
Matcha Mojito Macarons
Matcha Mojito Popsicles
See you back here in a few days to celebrate the arrival of Spring!
 [Opening reference from Dr. Seuss' book 'Green Eggs & Ham']

Print Recipe

Matcha Mango Coconut Pancakes {St. Patrick's Day}

A taste of the tropics in a warm green stack of Matcha, coconut, mango, cinnamon and maple syrup.
Prep Time10 minutes mins
Cook Time10 minutes mins
Total Time20 minutes mins
Course: Breakfast
Servings: 8
Author: I Sugar Coat It

Ingredients

  • 44 g organic oat bran ⅓ cup
  • 30 g organic coconut flour ⅓ cup
  • 2 g baking powder ½ tsp
  • 11 g Matcha powder 1 tbsp
  • 3 large eggs room temperature
  • 165 g coconut milk ¾ cup
  • 12 g coconut oil 1 tbsp, liquid state
  • 7 g mango compound 1tsp
  • Maple syrup ground cinnamon and mango cubes to garnish

Instructions

  • Sift together the oat bran, coconut flour, baking powder and Matcha in a bowl.
  • In a separate bowl, whisk together eggs, coconut milk, coconut oil and mango flavour.
  • Add liquid mixture to dry mixture, mix until well combined. It will appear a little lumpy because of the oat bran.
  • Coat a non-stick skillet with coconut oil over medium heat. Pour batter into well heated skillet and cook until the edges begin to brown and the batter bubbles. Flip to cook the other side.
  • Sprinkle plates with maple syrup and cinnamon and place cooked pancakes on plate.
  • Garnish pancakes with mango cubes, syrup and cinnamon and enjoy while still warm.
  • See you back here in a few days to celebrate the arrival of Spring!

I-Sugar-Coat-It-Blog-Signature-Green


March 2014 By i sugar coat it! Leave a Comment

Breakfast Cookies & Brain Awareness Week Kick-Off

Gluten and Dairy Free Breakfast Cookies
 
 
Happy Muffin Monday! It's Brain Awareness Week and to kick things off, we're turning our tastebuds from muffins to cookies. Yes, cookies for breakfast and your brain!
 
We have all been told how important it is to eat breakfast. Whether in the form of hot cereal, coffee and toast, muffin and juice, eggs and veggies, or my favourite, smoothies - breakfast has been shown to be good for both body and brain health.

And where would we be without our brain? Think about it...of course you're using your brain to do that, so a little bias is expected. Our every thought and action - all controlled by this complex, powerful, sexy mass. A bit of a control freak, ain't it? The only one of its kind that has my affection.

Gluten and Dairy Free Breakfast Cookies
I Heart Brain! And so should you. So to do my small part to help kick-off Brain Awareness Week, I've dedicated this Monday Muffin post to Brain (not to be confused with Brian - a trick my brain often plays on me). And every good trick deserves a treat!
Enter Breakfast Cookies packed with sunflower, pumpkin and flax seeds, oats, dates, cinnamon and chocolate. All rich in nutrients and each boasting a number of impressive health benefits in its own right. Like Vitamin E, which is said to neutralize free radicals that damage fat-containing structures and molecules, such as cell membranes and brain cells. It may even help to relieve symptoms of Alzheimer's.
 
So what do you do to keep your brain on its toes, or more appropriately, its cord? In addition to regular physical activity, feeding your brain well shows it how much you heart it. These Breakfast Cookies are a good start!
Gluten and Dairy Free Breakfast Cookies
These Breakfast Cookies were adapted from Planet Organic's Cosmic Cookies. After recently sampling Cosmic Cookies (and spending way too much time removing the raisins) I knew I needed to make them at home, sans raisins.
 
I halved the recipe to make a test batch, which turned out way better than I expected. I substituted dates for raisins, coconut oil for olive oil and almond milk for soy milk. Next time I'll make a full batch - twelve didn't last very long around here.
 
 
Muffin Mondays Past:
Gluten-Free Sweet Potato Cinnamon Muffins
Oat Date Muffins
Vanilla Bean Malted Mini Muffins
 
Print Recipe

Breakfast Cookies

Gluten and dairy free Breakfast Cookies packed with sunflower, pumpkin and flax seeds, oats, dates, cinnamon and chocolate.
Prep Time15 minutes mins
Cook Time25 minutes mins
Total Time40 minutes mins
Course: Breakfast
Servings: 12
Author: I Sugar Coat It

Ingredients

  • 90 g organic gluten-free rolled oats 1 cup
  • 100 g spelt flour 1 cup
  • 85 g sunflower seeds ½ cup
  • 75 g pumpkin seeds ½ cup
  • 20 g unsweetened ¼ cup, shredded coconut
  • 20 g flax seeds 2 tbsp
  • 100 g granulated cane sugar ½ cup
  • 4 g ground cinnamon 1 ½ tsp
  • 5 g sea salt 1 tsp
  • 160 g chocolate chips 1 cup
  • 95 g chopped dates ¾ cup
  • 30 g water 2 tbsp
  • 45 g blackstrap molasses 2 tbsp
  • 80 g coconut oil ⅓ cup
  • 122 g almond milk ½ cup

Instructions

  • Preheat oven to 350˚F. Line baking trays with silpat mats.
  • Combine all the dry ingredients in a large bowl.
  • In a smaller bowl, lightly whisk together water, molasses, oil and milk.
  • Pour milk mixture into the bowl with the dry ingredients and mix with a wooden spoon or spatula until just combined.
  • Using a medium ice-cream scoop, portion cookie dough and place onto lined baking trays. Gently flatten cookies before baking. I used a medium scone cutter to give them a round shape. I also used a pastry brush to brush the dough with a little almond milk before baking.
  • Bake for 20-25 minutes or until lightly browned. Remove from oven and allow to cool on tray, placed on a cooling rack.
  • Enjoy for breakfast or as a mid-afternoon snack with tea. Your brain will thank you!

Notes

adapted from Planet Organic

March 2014 By i sugar coat it! 4 Comments

Pomegranate Pecan Tofu Chocolate Mousse Tart {No Bake}

 It's the weekend, ya'll! And what better way to spend a cold winter Saturday, than indulging in a little chocolate, or a lot...
Pomegranate Pecan Tofu Chocolate Mousse Tart

So, how was your week? If you are experiencing winter like we are, then I imagine miserably COLD will be a part of your response. Oh, and let's not forget stark! Yes, we have had some sunny days, but without the warmth one would expect to accompany all the shine. For the most part, it's been grey, frigid, damp and just downright dismal at times. Well, only eleven more sleeps before the Vernal Equinox!

While Spring makes her torturously slow advance, I thought we would colour things up a little around here.
Pomegranate Pecan Tofu Chocolate Mousse Tart
Yup, with this no-bake Pomegranate Pecan Tofu Chocolate Mousse Tart. What a mouthful! A rich, smooth, chocolaty, delicious, vegan mouthful...and sexy! Yes, tofu can be sexy when dressed in the right attire.
It blended beautifully with the melted chocolate and look how the pomegranate arils pop stunningly against the dark tones of the chocolate mousse and oreo base. The touches of caramel the pecans lend, complete what K called a masterpiece. Who am I to argue with that?
Pomegranate Pecan Tofu Chocolate Mousse Tart
What makes this special is the Pomegranate Molasses I added to both the base and mousse. I received a gift basket from a business associate over the holidays and was intrigued by the bottle of Pomegranate Molasses that was included. I like plain molasses, but had not ever tried flavoured molasses. So. Freaking. Good!
I actually made this treat two months ago and shared a teaser on Instagram. I can't believe it has taken me so long to blog about it. Where does the time go?
Pomegranate Pecan Tofu Chocolate Mousse Tart
 
This Pomegranate Pecan Tofu Chocolate Mousse Tart is quick to whip up, easy on the eyes and positively sensual on the palate. I suggest you run to the kitchen. NOW!
More No-Bake Treats:
No-Bake Maple Berry Vegan Cheesecake
Berry Pistachio Cream Pops
Breakfast Smoothie Popsicles
I'll see you back here on Monday for a special Muffin Monday!!

Print Recipe

No-Bake Pomegranate Pecan Tofu Chocolate Mousse Tart

A smooth, rich blend of dark chocolate, tofu and pomegranate that is quick to whip up, easy on the eyes and positively sensual on the palate.
Prep Time20 minutes mins
Total Time20 minutes mins
Course: Dessert
Servings: 1 tart
Author: I Sugar Coat It

Ingredients

Crust

  • 200 g Oreo baking crumbs
  • 44 g pomegranate molasses or syrup

Filling

  • 250 g dark 1 cup, I used Callebaut Dark Callets 70.4%, bittersweet chocolate
  • 250 g tofu 1 cup, I used organic Silken tofu, you should be able to find this at your grocer
  • 22 g pomegranate molasses or syrup 1 tablespoon

Toppings

  • 53 g Pomegranate arils ¼ cup
  • 30 g pecans ¼ cup, chopped
  • 3 Oreo cookies halved

Instructions

You will also need:

  • a tart pan - for best results, use a pan with a removable base. I used the Fat Daddio's Removable Bottom Tart Pan.
  • a tart tamper - a glass or cup will do.

Crust

  • Place the Oreo crumbs and molasses in a bowl and mix with a spoon or gloved hand until well combined.
  • Press firmly into the tart pan using a tart tamper, or the base of a clean glass or cup. Use your fingers to press into the sides of the pan.
  • Place in the refrigerator.

Filling

  • In a food processor, blend the tofu and pomegranate molasses until just combined. Set aside.
  • This will allow the tofu to take on the flavour of the pomegranate.
  • In the meantime, using a double boiler or a pot and bowl, melt the chocolate over simmering water. Remove from heat once fully melted and allow to cool for about a minute.
  • Pour into the tofu mixture and pulse in the food processor until smooth and fully incorporated.
  • Remove the crust from the fridge and pour the chocolate mousse into the crust.
  • Place in the fridge for 15 minutes to allow to set a little, before adding toppings.
  • Top with arils, chopped pecans and halved Oreo cookies. Return to the fridge and allow to set for a couple hours, or overnight.
  • To serve, lift the base out of the tart pan, cut and enjoy!

  • « Go to Previous Page
  • Page 1
  • Interim pages omitted …
  • Page 34
  • Page 35
  • Page 36
  • Page 37
  • Page 38
  • Interim pages omitted …
  • Page 51
  • Go to Next Page »

Primary Sidebar

Never Miss A Happy Ending...

Previous Sweetness...

Search

Filter by Category

Filter by Date

SWEETEN YOUR INBOX!

All Content Including Images Copyright Jacqueline | I Sugar Coat It© 2026