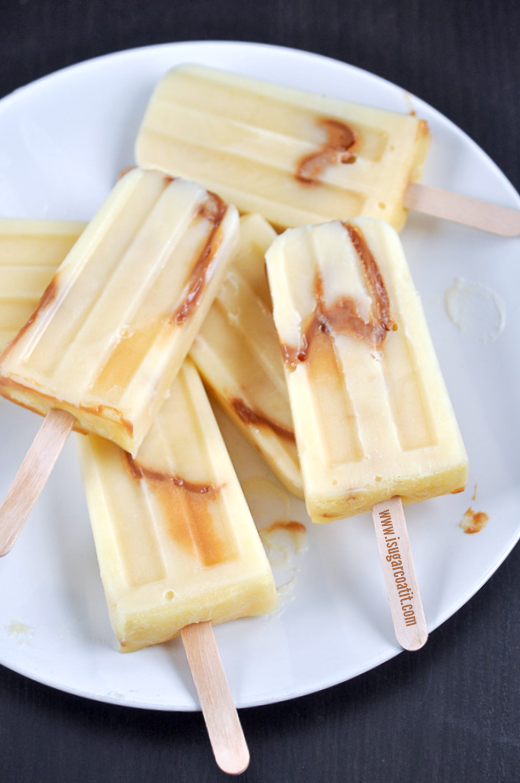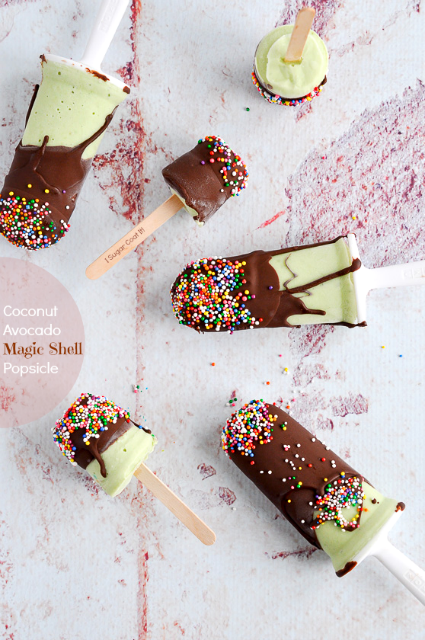
A velvety, dark chocolate shell addition lends another layer of flavour to an already deliciously rich, smooth avocado and coconut citrus popsicle in these Coconut Avocado Magic Shell Popsicles.

It hasn't felt much like summer in these parts, save for the constant supply of popsicles taking form in my freezer. To date, these Coconut Avocado Magic Shell Popsicles are definitely one of my faves!
These popsicles are a slight variation of this Avocado Lime Sorbet, with a velvety, dark chocolate shell addition to lend another layer of flavour to an already deliciously rich, smooth popsicle. And of course copious amounts of pretty sprinkles for good measure!

Summer for us usually includes a number of weekend road trips and we recently brought these along in a cooler, so that we might enjoy them on our travels. They held up beautifully in a cooler in the backseat and one may have even gotten us out of a ticket, but you didn't hear that from me... They're just that good!

I love how the crisp, rich, dark shell gives way to the flavourful, citrus-laced coconut and avocado blend. They just work so well together and that shell transports me back to childhood every time.
Go make a batch of your own, you and your kiddos will thank me! 😉
Deliciously Green:

Coconut Avocado Magic Shell Popsicles
A velvety, dark chocolate shell addition lends another layer of flavour to an already deliciously rich, smooth avocado and coconut citrus popsicle.
Servings: 6 popsicles
Ingredients
For the popsicle:
- 2 avocados peeled, stone removed
- 220 grams coconut milk 1 cup
- 65 grams raw honey or maple syrup 3 tbsps
- 1 lime zest and juice
For the magic shell:
- 180 grams dark 1 cup
- 27 grams coconut oil 2 tbsp
- sprinkles optional
Instructions
Make the popsicles:
- Place all the ingredients in a blender and mix until fully incorporated. Adjust amount of honey or maple syrup to your liking.
- Pour into popsicle molds, add sticks and transfer to the freezer. Allow to freeze for 6-24 hours.
Make the magic shell:
- Place the chocolate in a microwave safe dish. I used a flexible silicone measuring cup, which made it easier to dip the popsicles.
- Melt chocolate in a microwave in 30-second intervals, stirring every 30 seconds. Once melted and smooth, add the coconut oil and stir until fully incorporated. Let cool slightly.
- Remove the popsicles from the freeze and unmold. One at a time, quickly dip popsicles into the chocolate mixture.
- Immediately garnish with sprinkles. The shell forms almost immediately, so you will need to move quickly.
- Place the chocolate covered popsicles on a plate, cover with plastic wrap and return to the freezer until ready to eat.
Notes
Sweet Tips: Place popsicles molds under warm running water for a few seconds to allow them to easily slide out.
I find these popsicles taste best when enjoyed within two days of being made.
I find these popsicles taste best when enjoyed within two days of being made.