• Skip to primary navigation
  • Skip to main content
  • Skip to primary sidebar
  • Home
  • About
    • About I Sugar Coat It
    • Features & Press
    • Copyright
    • Disclosure
    • Privacy Policy
  • Recipes
  • How-To
  • Contact
  • sous vide sista

I Sugar Coat It

Home

All Posts

Blueberry Hazelnut Milk Popsicles

June 2015 By i sugar coat it! 14 Comments

Blueberry Roasted Hazelnut Milk Popsicles

Blueberry Roasted Hazelnut Milk Popsicles
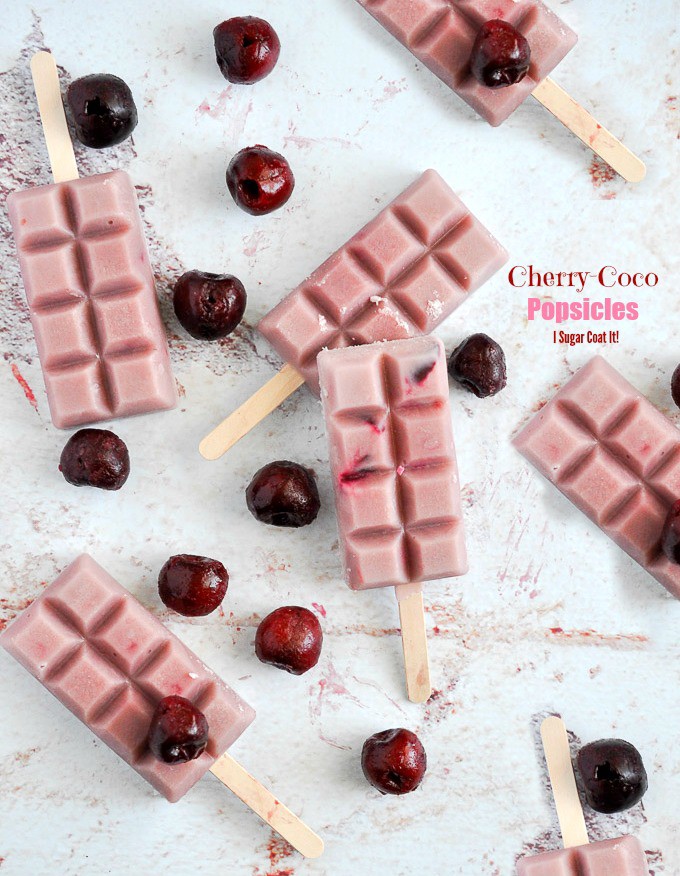
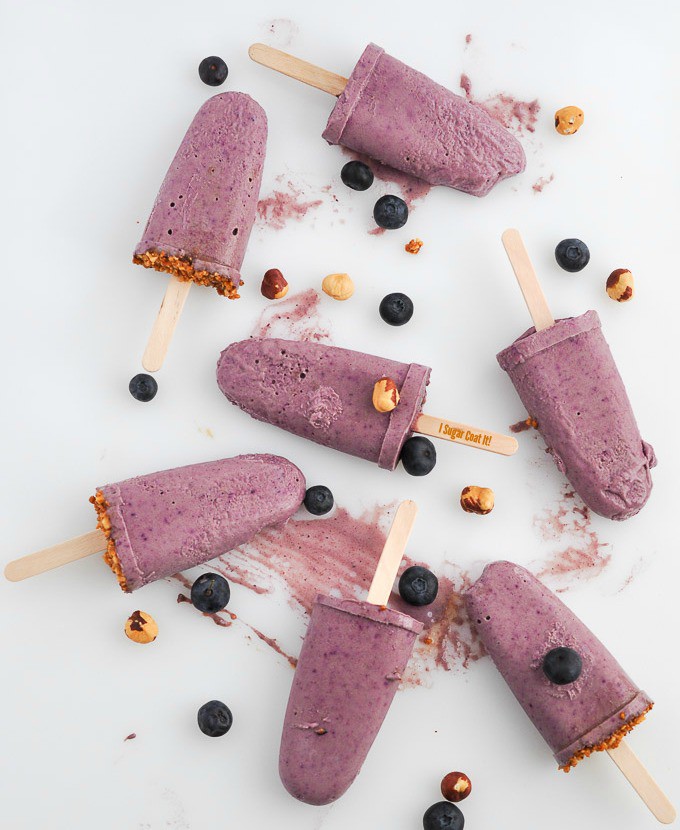
I am having a serious, rekindled love affair with hazelnuts. That they pair so well with chocolate, could be the reason. Purely by accident (I poured the wrong milk into my smoothie), I discovered I adore them with blueberries, as well. Enter Blueberry Roasted Hazelnut Milk Popsicles!

Nut milks and butters are commonplace in our home, mainly because of the Dude's decade-long affliction, or shall we call it vegetarianism. His worse flare-ups throw him into a state of veganism and everything goes to ish. I kid, I kid! I admire his commitment and passion and he prepares some kick-ass meatless meals, so no complaints here. Plus, I partake in nut milks because I've enjoyed them even as a child. I'll have to share with you the peanut milk my grandmother made when we were little. YUMMO!

Blueberry Roasted Hazelnut Milk PopsiclesBut back to hazelnuts and blueberries and these dreamy, creamy, crunchy pops. They are so decadent, it's easy to forget they're only three main ingredients - hazelnut milk, blueberries and date syrup. Even better, the milk and syrup are homemade!

Date syrup is made by blending equal parts water and dates in a high-powered blender and BOOM! The tastiest, creamiest natural sweetener one could have. Here's a quick video how-to from my Instagram feed.

The hazelnut milk is just as easy and an absolute treat, not only in these pops, but in tea, coffee, cookies, ice cream and just straight up. All you need are hazelnuts and water and a high-powered blender. My next scheduled Sweet Tip post will delve into some delicious hazelnuttyness.

Blueberry Roasted Hazelnut Milk PopsiclesIn the meantime, feel free to give these Blueberry Roasted Hazelnut Milk Popsicles a try. If not with hazelnut milk, almond or coconut make delicious substitutes. For a super cream, thicker popsicle, add frozen banana, or plain Greek yogurt. Be sure to finish them off with some hazelnut pralines to add a little crunch.

Blueberry Hazelnut Milk Popsicles
Print Recipe

Blueberry Roasted Hazelnut Milk Popsicles

Blueberry Roasted Hazelnut Milk Popsicles are a blend of blueberries and homemade roasted hazelnut milk and date syrup.
Prep Time6 hours hrs
Total Time6 hours hrs
Course: Dessert
Servings: 7
Author: I Sugar Coat It

Ingredients

  • 2 cups frozen blueberries fresh works as well, but frozen makes it thicker/creamier
  • 1 cup hazelnut milk almond or coconut may be substituted
  • 1 tablespoon date syrup
  • ½ frozen banana or ¼ cup plain Greek yogurt may be added for creamier results.

Instructions

  • Place all ingredients in a blender and blend until smooth.
  • Pour into popsicle molds, add sticks and top with hazelnut praline.
  • Freeze for 6 hours, or overnight.
  • Place mold under warm running water to aid in the release of the popsicles.
  • Enjoy!

Notes

I used a small mold, which yielded seven popsicles.

I-Sugar-Coat-It-Blog-Signature-Green


2 Ways To Keep Pastry Crust Crisp

June 2015 By i sugar coat it! 6 Comments

2 Ways To Keep Pastry Crust Crisp: Sweet Tip Tuesday

2 Ways To Keep Pastry Crust Crisp
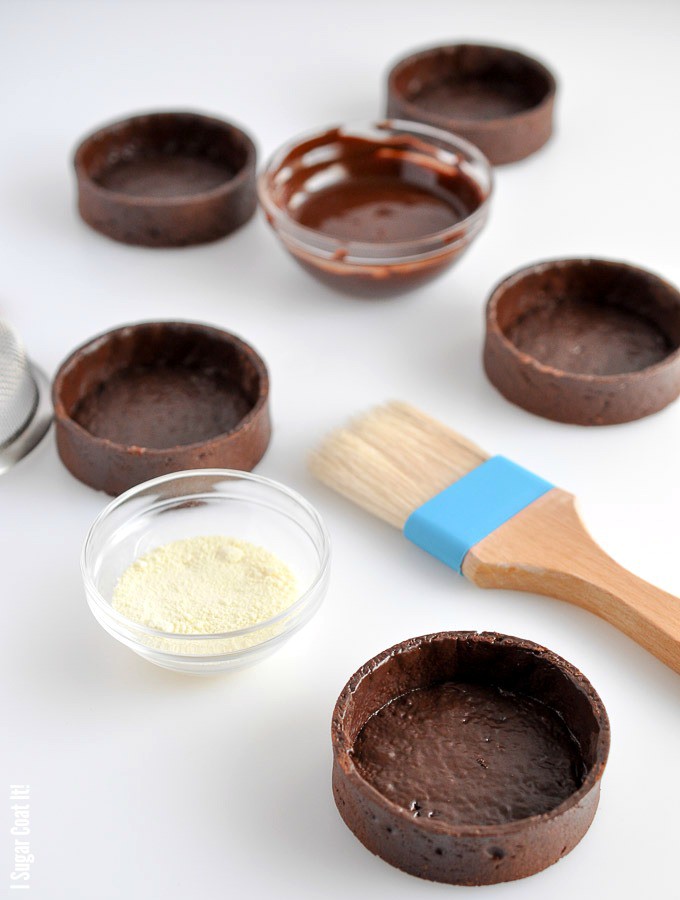
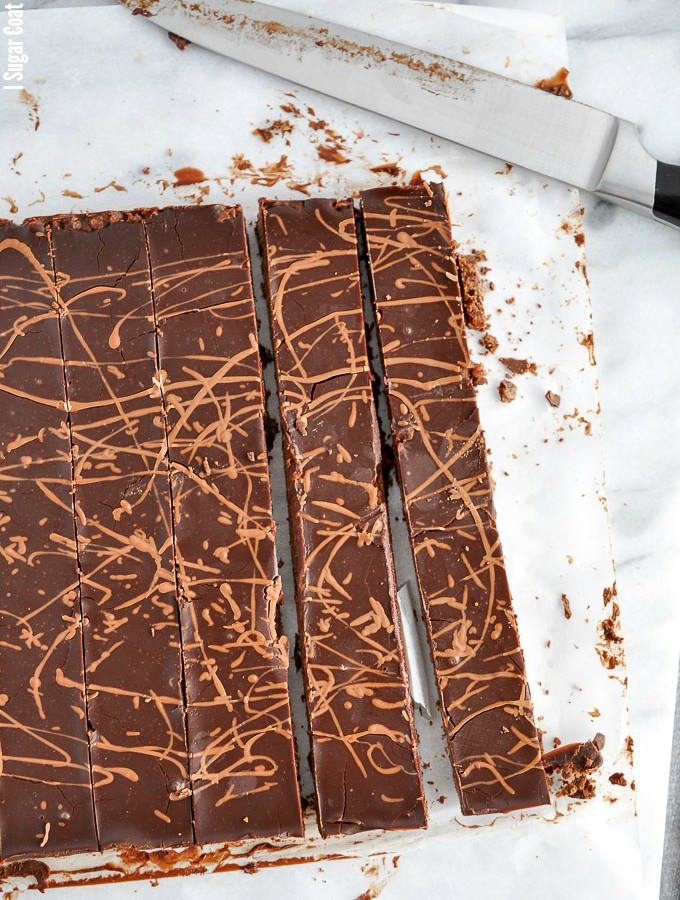
2 Ways To Keep Pastry Crust Crisp: Sweet Tip Tuesday.

For this instalment of Sweet Tip Tuesday, I am sharing two simple and delicious ways to keep your pastry game tight. How, you ask? With a little chocolate and cocoa butter love!

You may remember at least one of these tips from my Pate Sucree post a couple years ago. I recently shared it again on my Instagram feed and received a few inquiries, which prompted this post. So here we go, short and sweet! 😉

2 Ways To Keep Pastry Crust Crisp2 Ways To Keep Pastry Crust Crisp:

Everything is better with chocolate and as I have said many times before, chocolate is EVERYTHANG! So, when I learned this little trick in Baking Arts, one of my very first culinary courses a few years ago, it stuck. One, because it's such a simple step and two, well...it's CHOCOLATE!!

Simply temper some dark chocolate and use a pastry brush to paint a thin layer onto the sides and bottom of the freshly baked crust, while still warm. Once the thin layer of chocolate sets, it creates a tasty barrier that helps to keep the crust from getting soggy when it is filled with pastry cream, mousse or another filling of your choice. Chocolatey. Crunchy. WIN-WIN.

The amount of chocolate needed will depend on what/how much you are making. For these twelve pâte sucrée shells, I tempered about 50g of dark chocolate. You only need a thin layer, so a little goes a long way and any leftover chocolate can be used to drizzle onto the finished dessert, or simply licked from the bowl. Nothing goes to waste.

2 Ways To Keep Pastry Crust CrispThe Cocoa Butter Trick:

Last year, I became heavily involved in the art of chocolate making and came across Mycryo on one of my chocolate supplies shopping sprees for class. It is 100% pure cocoa butter in powdered form and is amazingly versatile. It is made by Callebaut through a natural process of freezing the cocoa butter at very low temperature (cryogenisation). I was so fascinated, I added it to my purchase.

Most of what I'd read, or had seen about it was related to savoury dishes and man is it ever good in that application. It imparts a natural taste and delicate crisp texture and doesn't burn while frying. I love using it to sauté mushrooms and for grilling fish and I also use it in my chocolate making in a number of ways - crystallizing, colouring, etc - some of which I'll share with you in future posts.

All the while I was using it on my savoury dishes, it had not occurred to me to use it in the same way I use the chocolate above. I mentioned the product to the chef after class one day and she agreed that it would definitely work. AWESOME!

I simply sift a little onto still warm, freshly baked crusts and it forms a thin barrier as it sets. Once set, I add my filling and VOILA! It's perfect for lighter coloured crusts, where you want a uniformed appearance. Although, I sometimes use the dark chocolate technique on lighter crusts - I like the colour contrast in the cut pieces.

2 Ways To Keep Pastry Crust CrispIf you're anything like me and consider a soggy crust to be a culinary sin, you'll want to give one of these techniques a try with your next crust. You most likely have chocolate on hand, so it would be the most convenient of the two to try. Here's a link to the Mycryo Cocoa Butter , if you would like to perhaps give that a try. If not for this purpose, I highly recommend it for your savoury dishes (click to read more about Mycryo).

There you have it, 2 Ways to Keep Pastry Crust Crisp: Sweet Tip Tuesday! Whichever you choose, I'd love to hear how it works out for you. You can hashtag #isugarcoatit on Instagram and I'll share on my feed.

What are some of your tricks and tips for preventing soggy crusts?

All About That Crisp (bout that crisp):

Pate Sucree

Mini Maple Pumpkin Pies

Onion Gorgonzola Tart

I-Sugar-Coat-It-Blog-Signature-Green


{This post contains affiliate links.}

Spiralized Grilled Zucchini and Carrot Noodles

June 2015 By i sugar coat it! 14 Comments

Spiralized Grilled Zucchini And Carrot Noodles

Spiralized Grilled Zucchini and Carrot Noodles
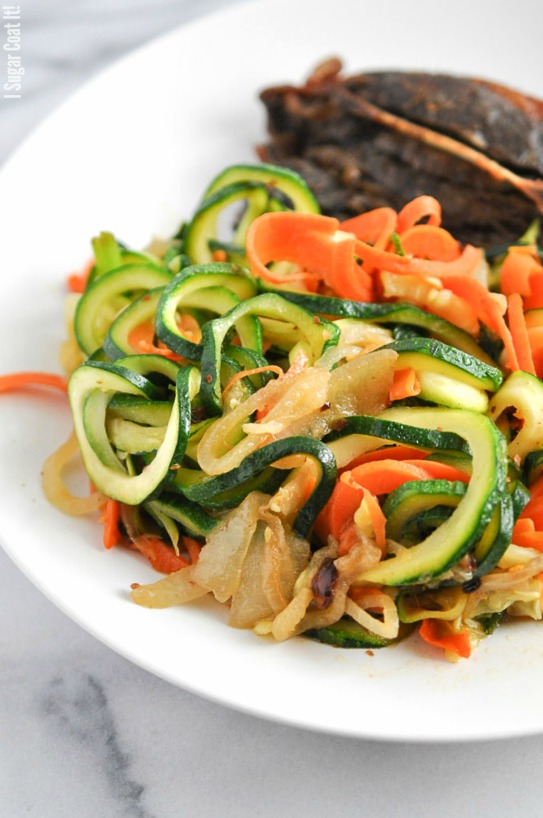
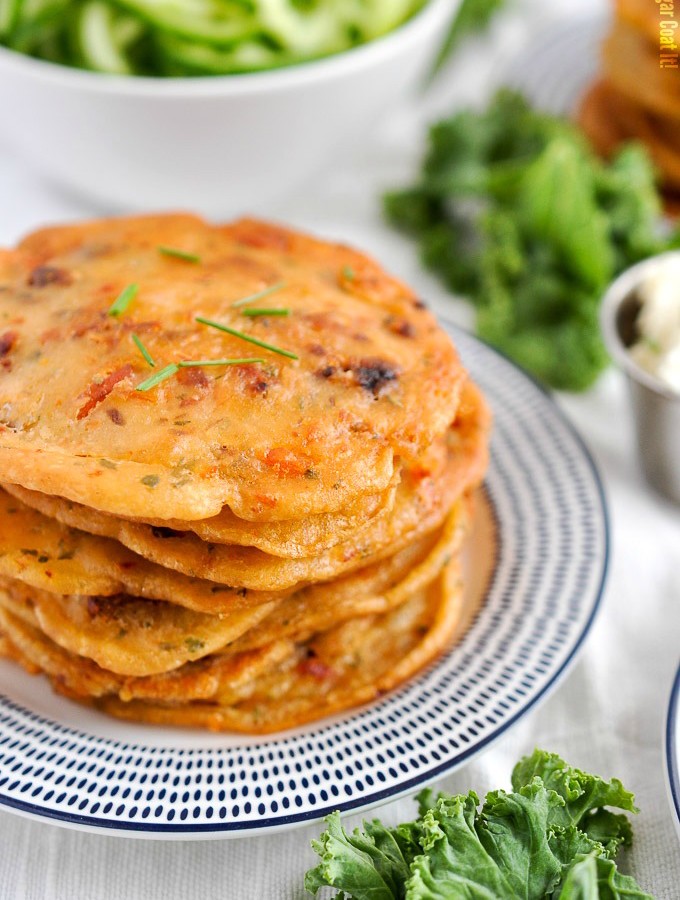
Summer is short here in the great white north, so every warm, sweltering minute spent in the outdoors counts. This Spiralized Grilled Zucchini and Carrot Noodles dish, tossed on coconut aminos, cooks up in less than fifteen minutes easily on the grill.

My blog is by no means a trend-chaser, but every once in a while, I come across something that grabs my attention and next thing you know, I'm inspiralized (we'll pretend that's a word).

Last year when I was hired to write a post for Produce Made Simple, featuring Zucchini Zoodles and a Spiralizer giveaway, I thought it would be neat to have one. I questioned how often I would likely use it and quickly abandoned that thought. Then the Dude brought one into our home this year and surprisingly, he/we have used it regularly, as you'll see on my Instagram feed.
Spiralized Grilled Zucchini and Carrot Noodles

This Spiralized Grilled Zucchini and Carrot Noodles dish has become a barbecue favourite. It takes about five minutes to prep, another five to grill and less than that to eat. All you need is a dish or pan suitable to use on your outdoor grill (I used a cast iron grill pan), lots of onions and garlic, a couple zucchinis and carrots and a touch of coconut aminos to toss.

The Dude introduced me to coconut aminos, which is a great 'nutrient-rich' substitute for traditional soy sauce. It's popular among those following paleo or primal diets and is made from the coconut nut tree sap. At first I thought it would impart a coconut flavour. As much as I love coconut flavour, I just couldn't imagine it with my sushi, among other things. You'll be pleased to know that it does not impart a coconut flavour and is perfect with sushi and really tasty in dressings, marinades, or anything to which you would normally add traditional soy sauce.
Spiralized Grilled Zucchini and Carrot Noodles

Once ready, these Spiralized Grilled Zucchini and Carrot Noodles were perfectly tender with a nice crunch and were the perfect side to the equally delicious charred lamb. A meal fit for any dad, wouldn't you say?

Products & Equipment Used: Coconut Aminos  Spiralizer

{This post contains Amazon Associate Affiliate links. Purchasing from these links will result in a small commission for I Sugar Coat It!}

Spiralized Grilled Zucchini and Carrot Noodles
Print Recipe
5 from 1 vote

Spiralized Grilled Zucchini And Carrot Noodles

Spiralized Grilled Zucchini and Carrot Noodles. A quick, easy summer dish of vegetable noodles, garlic and onions tossed in coconut aminos and served with charred lamb.
Prep Time10 minutes mins
Cook Time5 minutes mins
Total Time15 minutes mins
Course: Main
Servings: 2
Author: I Sugar Coat It

Ingredients

  • 2 regular zucchinis
  • 2 regular carrots
  • 1 sweet onion
  • ½ head of garlic
  • 1 tablespoon ghee or vegetable broth
  • coconut aminos
  • black pepper to taste

Instructions

  • Throughly wash all vegetables. You may choose to peel, if not using organic produce.
  • Run the zucchini, carrots and onion through the spiralizer. A grater might also work for the zucchini and carrot, if not using a spiralizer.
  • Use a mortar and pestle to crush the garlic.
  • Heat a heavy-duty pan for a few seconds, then add the ghee or broth and heat. Add the onions and garlic and sautee.
  • Add the zucchini and carrots and shuffle the pan over the heat to prevent from sticking.
  • Drizzle with coconut aminos and toss before removing from heat.
  • Top with pepper to taste.

Notes

Best enjoyed immediately.

I-Sugar-Coat-It-Blog-Signature-Green

Banana Hazelnut Espresso Ice Cream Popsicles

June 2015 By i sugar coat it! 12 Comments

Banana Hazelnut Espresso Ice Cream Pops

Banana Hazelnut Espresso Ice Cream PopsIf you like mini desserts or food on a stick, then you are going to LOVE these Mini Banana Hazelnut Espresso Ice Cream Pops! And you know what? They'll make the perfect post-BBQ, Father's Day treat!

From the time I first heard about the quick and easy, one-ingredient deliciousness that is banana ice cream, I pretty much shelved my KA ice cream maker attachment and started whipping up the stuff like my life depended on it. Why? Well, I do love me some bananas and um, let's see... it is the only ingredient required, it's no-churn and it's simply delicious all on its own. GENIUS! Right?? Bravo to the person who thought of this.

Banana Hazelnut Espresso Ice Cream PopsThe Dude was not only thrilled that the ice cream attachment was no longer occupying much sort after real estate in the freezer, but that it is dairy-free and he too could easily whip up a small batch on a whim. WIN-WIN! He does most of the grocery shopping and on every single trip he returns with enough bananas to keep a little village of monkeys fed. Cute AND annoying, but it means we always have frozen bananas on hand for a snack, or after-dinner treat.

I also love its versatility. Sometimes we add other frozen fruits (pineapple, berries, cherries), melted chocolate, cocoa, matcha tea, espresso, nuts etc. YUMMMMMMM!

Banana Hazelnut Espresso Ice Cream PopsYou need not look far on the interweb to find the recipe for banana ice cream, or some variation of it - probably why I hadn't blogged about it before. Yet, here I am doing just that all thanks to an ad for Magnum Ice Cream Bars. I drooled puddles and then I kept thinking about it for days. Normally I would just bite the bullet and get it, but lactose does a number on my system and with major surgery just a few days away, I don't want to risk it.

So, into the freezer I went to grab some of our never-ending supply of bananas to make my very own knock-offs. My one regret was making only four.

Banana Hazelnut Espresso Ice Cream PopsYou'll find that the banana ice cream softens quickly, so it's important to work quickly. I used the metal baking sheet that held the ice cream molds in the freezer, as my work surface to help slow melting. A little messy, but that's how I like my ice cream.

You can find the mold I used here .

Banana Hazelnut Espresso Ice Cream Popsicles
Print Recipe

Banana Hazelnut Espresso Ice Cream Pops

Easy banana ice cream flavoured with espresso and hazelnuts and dipped and sprinkled with chocolate on a stick.
Prep Time12 hours hrs
Total Time12 hours hrs
Course: Dessert
Servings: 4
Author: I Sugar Coat It

Ingredients

Ice Cream

  • 2 ripened bananas peeled, sliced and frozen
  • 1 teaspoon espresso powder
  • 1 tablespoon coconut cream makes the ice cream a little smoother/richer
  • ¼ cup hazelnuts roasted and coarsely chopped

Chocolate Shell

  • 1 cup milk chocolate I used Callebaut Milk Callets 33.6%
  • 1 tablespoon coconut oil

Garnish

  • melted chocolate for drizzling I used Valrhona Blond Dulcey 32%
  • chopped roasted hazelnuts

Instructions

Ice Cream

  • Thinly slice ripened bananas and place in the freezer overnight, or 3 hours at minimum.
  • Remove from the freezer and place in a good quality food processor or blender.
  • Pulse at first to break up the bananas, then allow to process or blend until smooth. How long will depend on your equipment. Mine was ready in about 6 minutes.
  • Once smooth, add the espresso and coconut cream and process for a few seconds until incorporated.
  • And the hazelnuts and pulse to distribute.
  • Use a spatula to transfer and press the ice cream into the molds.
  • Insert popsicle sticks, place molds on a small baking sheet and place in freezer for at least six hours. For these, overnight worked best.

Chocolate Shell

  • Place the chocolate callets in a microwave safe dish. I used a glass, which made it easier to dip the popsicles.
  • Melt chocolate in a microwave in 30-second intervals, stirring every 30 seconds. Once melted and smooth, add the coconut oil and stir until fully incorporated. Let cool slightly.
  • While cooling, melt the other chocolate for drizzling. It's a very small amount so you should not need more than 30 seconds.

Assembly

  • Remove the popsicles from the freeze and unmold. One at a time, quickly dip popsicles into the chocolate mixture and immediately place on a cold surface. I used the baking sheet on which they were frozen.
  • Use a spoon or spatula to drizzle the lighter chocolate onto the pops and garnish with any leftover hazelnuts before chocolate sets.
  • Return to the freezer until ready to serve.

I-Sugar-Coat-It-Blog-Signature-Green

Hazelnut Feuilletine Chocolate Bars

June 2015 By i sugar coat it! 8 Comments

Hazelnut Feuilletine Chocolate Bars

Triple Chocolate Hazelnut Feuilletine BarsDecadent chocolate dessert without an oven? Why, yes indeed! These Hazelnut Feuilletine Chocolate Bars are contrasting layers of crunchy and velvelty and are a breeze to whip up.

I adore chocolate, but the base takes centre stage in these bars. It is a mixture of pailette feuilletine,  roasted hazelnuts, and chocolate. It's just...BEYOND! Top it off with more chocolate and then top that off with even more chocolate and you have the perfect excuse to EAT ALL THE CHOCOLATE! GUILT FREE! ALWAYS!

Triple Chocolate Hazelnut Feuilletine Bars

These simple to prepare treats are chock-full of some of my most loved ingredients:

  • Chocolate (x3): CHOCOLATE IS EVERYTHANG! The good, dark, bittersweet stuff.  I've learned a great deal concerning the theory and practical applications of chocolate through the culinary courses I took last year. The history, the science, types of trees and regions, production - the good, bad and ugly of it all and of course the tastings. Oh, the tastings! And there is so much more to learn.
  • Roasted Hazelnuts: Not only are they super delicious, they are rich in protein and unsaturated fats and contain thiamine and B-vitamins. Roasting the nuts helps to release their flavour and adds that extra crunch factor. Best results are obtained at 300ºF for 35 - 40 minutes. Bake on the a cookie sheet lined with parchment and use the middle rack of the oven. Oven temps vary, so test your oven and keep an eye on the nuts, while baking.
  • Coconut Butter: Also called coconut manna or creamed coconut, but not to be confused with coconut oil. It is made from one ingredient - you guessed it, shredded, unsweetened coconut meat - blended until a smooth consistency is reached. The finished product is a little gritty, but oh so delicious on toast, smoothies and in baked goods.
  • Coconut Cream: Not to be confused with cream of coconut (often used in Pina Colada). Coconut cream is the thick non-liquid part that separates from coconut milk when chilled. I love whipping it up with vanilla beans to top desserts like I did with my No-Bake Maple Berry vegan Cheesecake and Strawberry Shortcake Macarons . DOUBLE YUMMMM!
  • Paillete Feuilletine: These flakes are a dream and are more commonly found in classic French recipes. I have used them to finish my Chocolate and Peanut Butter Cake, Hazelnut Rochers and a few other applications I will share with you in future posts. I basically treat them like edible currency. Oh yeah, I'm that girl in da club, ummm... kitchen making it rain feuilletine.

Hazelnut Feuilletine Chocolate BarsNow of course you may substitute the coconut cream and butter for regular cream and butter as called for in the original recipe. I at first tried it that way and wanted to create a vegetarian version for the Dude to enjoy - and boy, did he!! If you don't have hazelnuts on hand, feel free to omit them. I added them for a little extra crunch and a more pronounced hazelnutty flavour, but the feuilletine on its own is superb.

OK, enough writing/talking. You really need to make yourself and everyone you know and love a batch of these Hazelnut Feuilletine Chocolate Bars. Still need a little convincing? Here's a little process video.

{This post contains Amazon Associate Affiliate links}

Hazelnut Feuilletine Chocolate Bars
Print Recipe

Hazelnut Feuilletine Chocolate Bars

Hazelnut Feuilletine Chocolate Bars are a crunchy base of roasted hazelnuts, feuilletine and dark chocolate, topped with a delectable coconut cream ganache.
Prep Time10 minutes mins
Cook Time2 hours hrs
Total Time2 hours hrs 10 minutes mins
Course: Dessert
Servings: 20
Author: I Sugar Coat It

Ingredients

For the base:

  • 181 grams bittersweet chocolate melted
  • 250 grams gianduja chocolate or peanut butter, melted
  • 142 grams paillete feuilletine or rice cereal
  • 85 grams hazelnuts optional, roasted and coarsely chopped

For the filling:

  • 170 grams semisweet chocolate chopped
  • 57 grams bittersweet chocolate chopped
  • 236 grams coconut cream or heavy cream
  • 57 grams coconut butter or unsalted butter

For the topping:

  • 60 grams caramel or white chocolate melted

Instructions

Make the base:

  • Cut a sheet of parchment paper slightly wider than a 9 x 13 pan to allow for overhang. Line the pan with the parchment and secure the overhang with small bulldog clips. This will prevent the paper from moving when the pan is being filled. The overhang pieces will be used as handles to remove the finished slab.
  • In a large bowl, combine the melted bittersweet and giunduja chocolates. Stir using a hand whisk.
  • Fold in the feuilletine and roasted hazelnuts until evenly distributed.
  • Press the mixture evenly into the prepared pan and place in the refrigerator.

Make the filling:

  • Place the chopped chocolate in a bowl.
  • In a small saucepan over medium heat, bring the cream to a simmer. Remove from heat and immediately pour over the chocolate.
  • Shuffle the bowl gently so that the cream covers the chocolate. Allow to rest for 2-3 minutes (depending on the size of the chocolate) to allow the chocolate to soften and melt.
  • Add the butter and stir with a hand whisk until ganache is smooth. Allow to cool slightly.
  • Remove the crust from the refrigerator and pour the ganache evenly over the crust. If needed, use an offset spatula to evenly spread the ganache.

Make the topping:

  • Melt the chocolate in a small bowl in the microwave for 10-second intervals. Stir until smooth.
  • Use a spatula or spoon to drip a random pattern onto the ganache.
  • Place in the refrigerator for at least 3 hours.

Serve:

  • Use the overhang parchment to lift out the slab. Place on a flat surface and cut with a warm sharp knife.
  • Store in the refrigerator.

Notes

Adapted from these Hazelnut Crunch Bars.

I-Sugar-Coat-It-Blog-Signature-Green

Cherry Coconut Popsicles

June 2015 By i sugar coat it! 8 Comments

Cherry Coconut Popsicles

Cherry Coconut PopsiclesJune and July mark local cherry season in Ontario, so what better way to get Frozen Friday poppin' than with these simple two-ingredient Cherry Coconut Popsicles!

There is nothing like fresh, local fruits and vegetables and I think you already know that "I'm in love with the coco...". Having spent my childhood in more tropical parts, fresh fruits were always available for the picking. Coconut was a staple in my grandparents house. We drank the water to stay hydrated in the year-round heat, my grandmother used the meat and milk in cakes, tarts and other culinary creations and the oil was used not only in the kitchen, but to shine our curly tresses and moisturize our sun-kissed bodies.

Cherry Coconut PopsiclesCherries. How I love thee! Not the processed maraschino impostors, but locally grown, freshly picked with seed in tact. I tilt my head back and lower them by their stem into my mouth, where I strip the seed of its flesh one-by-one. They are indeed a sexy little fruit - the colour, the name, that slim, slightly curved stem beckoning you... I always end up purchasing way too many, but they never go to waste. I pit a bunch and freeze them for smoothies during off-season. YUM!

May has been quite warm, so I took the opportunity to create a few popsicle recipes for my 2015 Frozen Friday line-up. Starting with these jewel-speckled bars of dark, sweet cherry and rich, creamy coconut milk.

I used my Silikomart Ice Cream Bar Mold, one of my best liked molds. I have a few and they all work beautifully and clean up easily. I love that they do double duty in the freezer and the oven! I didn't add any sweetener, as I felt the cherries were perfectly sweet on their own, but feel free to add some honey if you prefer. Give these Cherry Coconut Popsicles a try - I think you will find them irresistible!

Check out some more of my delicious and simple summer treats from Frozen Fridays past and come pin all your favourite frozen desserts on our Pinterest Frozen Friday board.

Cherry Coconut Popsicles

For more of what's in season, check out Harvest Ontario, or your local harvest listing.

Cherry Coconut Popsicles
Print Recipe

Cherry Coconut Popsicle

Cherry Coconut Popsicles - a simple, delicious summer treat made with organic dark, sweet cherries and rich, creamy coconut milk.
Prep Time6 hours hrs
Total Time6 hours hrs
Course: Dessert
Servings: 4 -6
Author: I Sugar Coat It

Ingredients

  • 1 cup organic pitted and frozen, dark cherries
  • 1 cup full fat chilled, organic coconut milk
  • 8-10 pitted cherries fresh or frozen

Instructions

  • Place frozen cherries and coconut milk in a blender and blend until fully combined. I use a Vitamix, so it takes just a few seconds.
  • Place molds on small cookie sheet or baking pan.
  • Cut the remaining cherries in halves or quarters and place randomly in the mold.
  • Insert stick into mold and pour the cherry/coconut milk mixture into cavities until levelled with the edge.
  • Leave on tray and place levelled in the freezer for 6-8 hours.
  • Remove from freezer and peel away mold.
  • Enjoy!

I-Sugar-Coat-It-Blog-Signature-Green

Tropical Punch Green Smoothie. Smoothie Resolution Round Up 2017.

May 2015 By i sugar coat it! 9 Comments

Tropical Punch Green Smoothie

Tropical Punch Green SmoothieThe official start of summer is still a few weeks away, although Mother Nature has been teasing us with warm, humid days. I love it when she does that! My appetite for carb-laden food is diminished and replaced a desire for all things fruity and cool. This Tropical Punch Green Smoothie is my take on breakfast on a beach.

It is perfect for breakfast, or a cocktail, with the addition of a little vodka. I also love to freeze my smoothies and enjoy them as popsicles, as I shared in Breakfast Smoothie Popsicles post a couple years ago. Talk about the perfect on-the-go cool-down treat!

This tropical green dream is filled with the flavours of coconut water, pineapple, spinach, mango, ginger and matcha green tea. For a thicker smoothies, replace the coconut water with coconut milk and omit the ginger (it didn't quite work with the milk for my tastebuds). There was no need to add any sweetener, but if you prefer, you can't go wrong with a touch of maple syrup or raw honey.

As the warmer months approach, smoothies are a perfect way to get in a nutritious meal on-the-go. Blend one up today!

Tropical Punch Green SmoothieBefore I go enjoy another serving of this green deliciousness, please note that I am dealing with a health issue which may affect my activity on social media and I may not always respond to your lovely comments as quickly as I normally would here on the blog.

I look forward to jumping back on the blogging horse once I am feeling up to it. In the meantime, I've scheduled a number of posts to go live over the coming weeks, so that it isn't complete radio silence around here.

Hope to see you back here soon!

Tropical Punch Green Smoothie. Smoothie Resolution Round Up 2017.
Print Recipe

Tropical Punch Green Smoothie

Tropical Punch Green Smoothie is packed with coconut water, pineapple, spinach, mango, ginger and matcha green tea. A tropical treat!
Prep Time5 minutes mins
Total Time5 minutes mins
Course: Drinks
Servings: 2
Author: I Sugar Coat It

Ingredients

  • 1 cup coconut water
  • ½ cup fresh mango pulp or frozen mango chunks
  • ½ cup fresh or frozen pineapple chunks
  • 1 teaspoon matcha green tea powder
  • ¼ teaspoon ginger paste

Instructions

  • Place in blender and blend until smooth.

I-Sugar-Coat-It-Blog-Signature-Green

Brown Butter Chocolate Raspberry Madeleines

May 2015 By i sugar coat it! 6 Comments

Brown Butter Chocolate Raspberry Madeleines

Brown Butter Chocolate Raspberry MadeleinesHello, hello, HELL-OH! It's been a while, hasn't it? Let me make it up to you with these darling little Brown Butter Chocolate Raspberry Madeleines draped in raspberry dark chocolate glaze and sprinkled with raspberry crunch and well, more chocolate!

I've always been intrigued by these little sponge cakes - the shell-like shape, their one-bite size, crispy/spongy texture, but more so, their name. I like yelling it out, in the same way Rocky called out to his Adrain. MADELEINE! It just feels natural.

Their lightly crisped exterior gives way to a delicious buttery, sponge-textured interior - and when I say buttery, I mean brown buttery. The classic French method involves browning (not burning) the butter slightly, which imparts a delicate nuttiness. I have made madeleines before without this step and although they were great, I can't see myself omitting this step going forward. Good quality ingredients certainly makes all the difference, as well.

Brown Butter Chocolate Raspberry MadeleinesI recently received a package of Gourmet Vanilla Ingredients and Gourmet Baking Essentials to try out, from the good folks at Rodelle. These Brown Butter Chocolate Raspberry Madeleines were the perfect opportunity to put the baking cocoa and vanilla bean paste to work. Superb! The cocoa imparted such a rich chocolate flavour, I likely could have omitted the chocolate from the recipe. What can I say about the vanilla bean paste? A quick search through my site will quickly reveal that this one of my most loved recipe staples. I prefer the scraped beans and paste to extract, as they each impart a more pronounced flavour.

Not only was I super pleased to try out all the yummy products I received,I was equally pleased to learn about Rodelle's efforts to create their products in a sustainable, environmentally-conscious manner.

Brown Butter Chocolate Raspberry Madeleines

Having served as Proust's muse in Remembrance of Things Past, these madeleines would be just perfect as-is, alongside a tall glass of bubbly, or a cup of tea/coffee.  I decided to coat them in a dark chocolate, raspberry flavoured glaze and borrowed the idea to garnish with dehydrated raspberries from Regina at Leelalicious. They lend such a pop of colour and unexpected crunch and flavour to these already delectable Brown Butter Chocolate Raspberry Madeleines.

Madeleine's sea-shell shape sure seems to bring all the boys to the yard - from Proust to the Pet Shop Boys. And so, we'll end on their British, pop note... "Over and over again I keep tasting that sweet madeleine. Looking back at my life now and then asking: if not later then when?" ("Memory of the Future" from their 2012 album "Elysium")

More Chocolatey Raspberry- liciousness:

Chocolate Oreo Cake with Raspberry Ganache

Chocolate Raspberry Espresso Cake

Raspberry Sprinkle Chocolate Bark

Tools & Ingredients Used:

Madeleine Mold     Whisks    Gourmet Baking Cocoa     Vanilla Paste

{DISCLAIMER: I received free products from Rodelle to try. This post contains affiliate links.} 

Brown Butter Chocolate Raspberry Madeleines
Print Recipe

Brown Butter Chocolate Raspberry Madeleines

Brown Butter Chocolate Raspberry Madeleines draped in raspberry dark chocolate glaze and sprinkled with raspberry crunch!
Prep Time2 hours hrs 20 minutes mins
Cook Time12 minutes mins
Total Time2 hours hrs 32 minutes mins
Course: Dessert
Servings: 16
Author: I Sugar Coat It

Ingredients

Madeleines

  • 140 g browned butter ⅔ cup
  • 40 g bittersweet chocolate ¼ cup, 70% cocoa
  • 2 eggs
  • 3 g vanilla bean paste 1tsp
  • 90 g coconut sugar ½ cup
  • 65 g raspberry puree 3 tbsp
  • 140 g all-purpose flour 1 ⅔
  • 3 g baking powder 1 tsp
  • 20 g unsweetened cocoa powder 3 tbsps

Glaze

  • 100 g bittersweet chocolate ½ cup
  • 1 g tsp raspberry flavour ¼

Instructions

Madeleines

  • Chop chocolate into small pieces. Set aside.
  • Cut butter into cubes and cook butter over medium heat until it browns.
  • Pour through a fine sieve into a medium bowl and allow to cool.
  • Break eggs into a medium bowl. Add the vanilla paste and raspberry puree. Whisk in the sugar until smooth.
  • Sift the flour, baking powder and cocoa powder onto a sheet of parchment. Add to the egg mixture and whisk until smooth.
  • Pour in the warm butter and stir in the chopped chocolate pieces until evenly distributed.
  • Cover the batter by pressing a sheet of plastic wrap directly onto the surface of the batter. Allow to rest at room temperature for a couple hours.
  • Preheat the oven to 425ºF. Generously butter the madeleine molds and sift with generous amount of cocoa powder onto the mold using a sieve. Invert the pan and tap out the excess cocoa powder.
  • Pipe or spoon the batter into the molds.
  • Bake on the middle rack for approximately 10-12 minutes.
  • Immediately turn the madeleines out onto a wire rack and allow to cool.

Glaze

  • Roughly chop the chocolate and place in a bowl.
  • Fill a saucepan with about an inch of water and place on medium-low heat. Place the bowl of chocolate over the saucepan of simmering water and to melt the chocolate. Do not allow the water to touch the bottom of the bowl or moisture form any steam to get into the bowl. Remove bowl and stir chocolate until smooth.
  • Dip madeleines into the melted chocolate, sprinkle with raspberry crunch and chocolate shavings and allow to set before serving.

Notes

Best enjoyed freshly baked, or within a day.
Recipe adapted from French Pastry Fundamentals

I-Sugar-Coat-It-Blog-Signature-Green

Spicy Fish Cakes and Plantains with a side of greens for a Sunday morning breakfast that takes me right back to my Caribbean roots.

May 2015 By i sugar coat it! 8 Comments

Spicy Fish Cakes and Plantains

Spicy Fish Cakes and Plantains with a side of greens for a Sunday morning breakfast that takes me right back to my Caribbean roots.

Spicy Fish Cakes and Plantains with a side of greens for a Sunday morning breakfast that takes me right back to my Caribbean roots.Let me transport you to the Caribbean for brunch with a stack of Spicy Fish Cakes and Plantains. They are quick to whip up and a palate pleasing mix of spicy, crispy, sweet, hot deliciousness.

When I was little, my grandmother, and often time my grandfather, would fry up some plantains as a side with breakfast. They were one of my absolute favourite alongside saltfish and johnny cakes. They were rarely cut in this fashion, more often, lengthwise and I always went straight for the outer pieces. They showed less of the spine and tasted sweeter, somehow. I still believe that to this day.

Spicy Fish Cakes and Plantains with a side of greens for a Sunday morning breakfast that takes me right back to my Caribbean roots.Saltfish cakes, as they're called, were also a fave - they too were fried. I love the thin layer of crisp that forms on the outside, giving way to a soft, deliciously spicy core. To achieve that crispy texture without having the pancakes soak up too much oil, a quick fry on medium-high heat is ideal. Baking is also an option, but I imagine turning on an oven in such hot climate doesn't appeal to most islanders - even with AC. Plus, I found them a little too chewy using that method, so I opted for the authentic experience.

Well, as close to the experience as I could get. My grandparents don't measure or weigh when they cook, so a pinch of this and a dollop of that will never yield an identical dish. I have accepted that I'll never get my food to taste exactly like that of my grandparents, but these weren't too far off.

Spicy Fish Cakes and Plantains with a side of greens for a Sunday morning breakfast that takes me right back to my Caribbean roots.I often make plantains and plantain chips, but I've only made saltfish cakes a few times. This has been the only share-worthy batch. Alongside some cool, curly cucumbers and a little homemade yogurt to counter the spice. Sunday brunch, island style!

What are some of your favourite childhood dishes?

Spicy Fish Cakes and Plantains with a side of greens for a Sunday morning breakfast that takes me right back to my Caribbean roots.
Print Recipe

Fish Cakes and Plantains

Saltfish cakes and plantains are quick to whip up and a palate pleasing mix of spicy, crispy, sweet, hot deliciousness!
Prep Time6 hours hrs
Cook Time15 minutes mins
Total Time6 hours hrs 15 minutes mins
Course: Brunch
Servings: 4 -6
Author: I Sugar Coat It

Ingredients

Fish Cakes

  • 1 cup boneless if more readily available, fresh or canned salmon would also work, skinless salted cod
  • 1 stalk green onion chopped
  • 2 pieces of sundried tomato I made my own with the dehydrator, but store bought is just fine, finely chopped
  • couple sprigs fresh thyme leaves only
  • 1 teaspoon tomato paste
  • ½ large red bell pepper chopped
  • 1 small scotch bonnet pepper finely chopped
  • 1 cup water
  • 1 ⅓ cups unbleached AP flour
  • pinch of salt and pepper to taste I like to go light on the salt, so I omitted extra salt, if needed
  • vegetable or olive oil for frying

Plantains

  • 1 large ripe plantain
  • coconut oil for frying

Instructions

  • Soak the cod in cold water overnight, or 4-6 hours, at minimum. This helps remove some of the salt.
  • Drain the water and break into pieces, or pulse lightly in a food processor for finer pieces.
  • In a medium bowl, mix together the fish, green onion, tomato, thyme, peppers and paste.
  • Stir in the water until evenly combined. The batter will be lumpy.
  • Sift flour into the fish mixture to form the batter.
  • Heat the oil in a large frying pan and use an ice cream scoop to add the batter to the oil.
  • Flip batter when the edges begin to crisp and cook for a few more seconds.
  • Remove and place on paper towels or brown paper bag to remove any excess oil.
  • Best enjoyed hot!

Plantains

  • Heat the oil in a shallow pan on medium heat.
  • Peel and slice the plantain and fry until golden, flipping once.
  • Place on sheets of paper towel, or brown paper to remove any excess oil.
  • Enjoy warm or cold!

Notes

Any leftover fish cakes are best heated in a toaster oven, never the microwave.
  • « Go to Previous Page
  • Page 1
  • Interim pages omitted …
  • Page 23
  • Page 24
  • Page 25
  • Page 26
  • Page 27
  • Interim pages omitted …
  • Page 51
  • Go to Next Page »

Primary Sidebar

Never Miss A Happy Ending...

Previous Sweetness...

Search

Filter by Category

Filter by Date

SWEETEN YOUR INBOX!

All Content Including Images Copyright Jacqueline | I Sugar Coat It© 2026