• Skip to primary navigation
  • Skip to main content
  • Skip to primary sidebar
  • Home
  • About
    • About I Sugar Coat It
    • Features & Press
    • Copyright
    • Disclosure
    • Privacy Policy
  • Recipes
  • How-To
  • Contact
  • sous vide sista

I Sugar Coat It

Home

All Posts

silky, dark hazelnut cacao nibs praline paste being poured into a jar | i sugar coat it

February 2021 By i sugar coat it! Leave a Comment

Hazelnut Cacao Nibs Praline Paste

Roasted, deeply caramelized hazelnuts, with a hint of cacao, blended into a sinfully, sumptuous Hazelnut Cacao Nibs Praline Paste.

silky, dark hazelnut cacao nibs praline paste being poured into a jar | i sugar coat it

Praline Pleasures

Make a caramel, stir in some well-roasted nuts, a handful of nibs, a touch of salt and deliver your tastebuds a taste of heaven. No lie... Hazelnut Cacao Nibs Praline Paste is undoubtedly that.

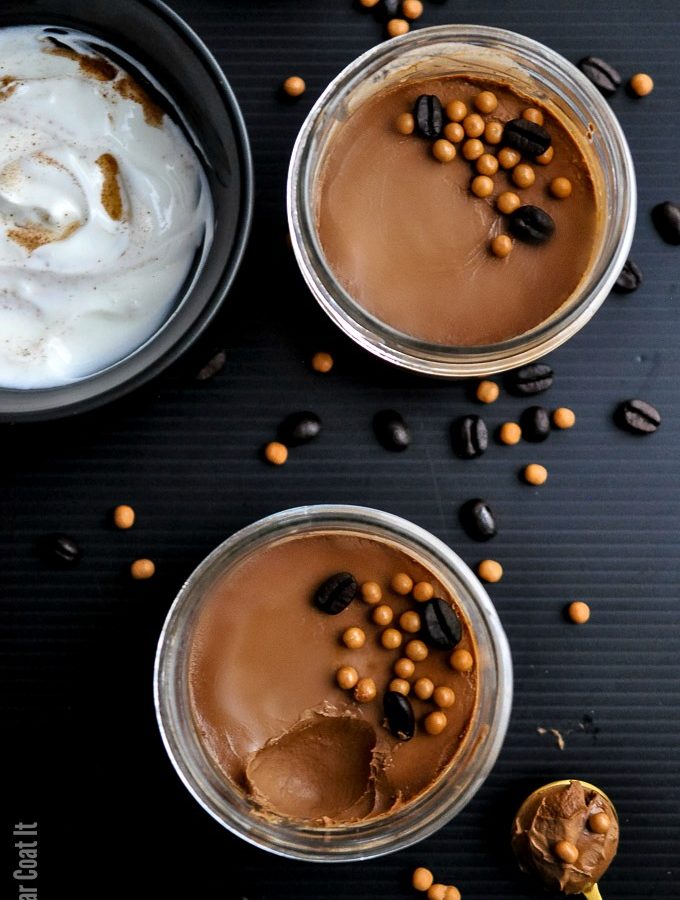
To be fair, I feel the same about praline in general, but that hit of cacao really elevates. I've also made a batch with coffee beans in place of the nibs and that too is a winner.

mise en place - sugar, hazelnuts, cacao nibs and salt to make praline paste | i sugar coat it

Kicking It Old School

There are a few ways to make praline, which can then be ground into a paste. For this batch of Hazelnut Cacao Nibs Praline Paste, I used the labour-intensive way I was taught back in the pastry school. The technique involves:

  • making a light caramel with sugar and water
  • adding roasted nuts and continually stirring, off-heat, to crystallize
  • returning to the heat to caramelize
  • cooling, crushing and grinding

Tired yet? It really isn't that much work, but there are ways that don't require constantly stirring a pot of piping hot sugar and nuts. I learned a far simpler way a few years back, when I attended a Melissa Coppel course, that has become my go-to. We'll get into it in a future post.

  • crystallized hazelnuts in a copper pot | i sugar coat it
  • hazelnut cacao nibs praline spread onto a silicone mat to cool | i sugar coat it
  • hazelnut cacao nibs praline broken into pieces for processing into powder | i sugar coat it
  • hazelnut cacao nibs praline ground to a coarse powder in a food processor | i sugar coat it

Praline To Paste

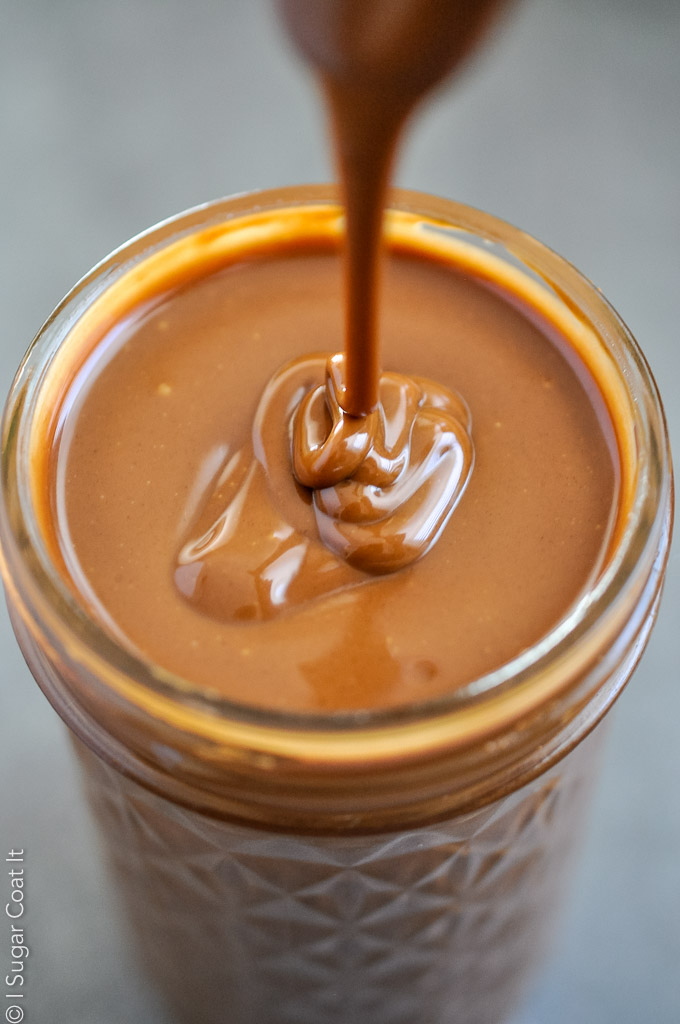
You may choose to enjoy your praline, as is, or transform it into a paste for a number of purposes - high on the list... eating it straight from the jar. No judgement.

Getting it from hard candy to a paste requires a food processor or a melanger/stone grinder. Although a food processor does a decent job, a stone grinder will get your paste to silky, smooth, big-brand quality in under 2 hours. You can see some of the ways I like to use my melanger/stone grinder here.

I've included a video for visual learners. 😉

hazelnut cacao nibs praline paste in a jar | i sugar coat it
Print Recipe

Hazelnut Cacao Nibs Praline Paste

Roasted, deeply caramelized hazelnuts, with a hint of cacao, blended into a sinfully, sumptuous praline paste.
Prep Time5 minutes mins
Cook Time35 minutes mins
Processing2 hours hrs
Course: Dessert
Keyword: cacao nibs, hazelnuts, melanger, praline paste
Author: i sugar coat it!

Ingredients

  • 250 grams sugar I used organic cane sugar
  • 60 grams water
  • 250 grams hazelnuts dry roasted
  • 30 grams cacao nibs I used Valrhona cacao nibs (roasted coffee beans work great, as well)
  • 2.5 grams salt I used fleur de sel

Instructions

roast the nuts:

  • Heat oven to 300ºF. Spread nuts in a single layer on a silicone-lined baking sheet and bake for 8-10 minutes until fragrant and light brown. Remove from oven and set aside to cool. If the skins are on, use a clean towel to rub off the skins, while still warm.

make a caramel:

  • Add the water and sugar to a heavy duty saucepan, stir to combine and cook over medium heat until it begins to bubble. If using a thermometer, around 120ºC.

make the praline:

  • Remove caramel from heat and stir in the warm nuts. Keep stirring vigorously until nuts are coated and sugar crystallized. It will look sandy white.
    crystallized hazelnuts in a copper pot | i sugar coat it
  • Return to heat and stir until it begins to caramelize. Add in the cacao nibs and continue to cook and stir to achieve a dark caramel colour. Remove from heat and spread on a silicone mat to cool completely.
    hazelnut cacao nibs praline spread onto a silicone mat to cool | i sugar coat it

make the paste:

  • Once cooled, break into small chunks, using hands or rolling pin and place in a food processor.
    hazelnut cacao nibs praline broken into pieces for processing into powder | i sugar coat it
  • Process to a coarse powder. If you don't own a melanger, continue processing to a smooth paste - you may need to add a little hazelnut oil.
    hazelnut cacao nibs praline ground to a coarse powder in a food processor | i sugar coat it
  • If using a melanger, turn it on, add the powdered praline, the salt and process until smooth - approximately 2 hours, depending on your desired texture. Strain and store in a clean jar.
bright yellow cracker sticks arranged in a glass container against black backdrop | i sugar coat it

February 2021 By i sugar coat it! Leave a Comment

Tumeric Nigella Seeds Sourdough Discard Crackers

Use your sourdough discard to make my colourful, flavourful, whole wheat tumeric and nigella seeds crackers for your snacking pleasure.

mound of bright yellow turmeric nigella seeds sourdough discard crackers baked baked topped flaked salt | i sugar coat it

Tumeric Nigella Seeds Sourdough Discard Crackers

I am about one month shy of one year working from home, due to the pandemic - it feels like yesterday, but also like forever ago.

Like a number of folks stuck at home, in the early days of the pandemic, I revived my sourdough starter and baked up batards, boules and baguettes of pure carb pleasure. In an instant, I went from baking the occasional sourdough, to sourdough supplier for family, friends and neighbours.

All that sourdough-ing meant lots of sourdough starter feedings and resulting discard. Discard serves as a great addition to our compost, but we also like it in waffles/pancakes, cookies, banana bread, muffins, cakes... Well, you get the picture, just about any baked goods, including the star of today's post, crackers!

collage of some steps in the turmeric nigella seeds sourdough discard crackers making process | i sugar coat it

Name Your Flavour

I'll share some of the countless sourdough bread I have baked throughout the pandemic, but have only shared on Instagram. First, I want to ease back into blogging with what I think may be my 100th batch of sourdough discard crackers. The sourdough discard crackers I make at any given feeding, tend to mirror the flavour of the bread I making at that time. This batch, fashioned after one of my most requested sourdough, is flavoured with tumeric powder and nigella seeds - flavours that remind me of a number of dishes from my childhood.

Tumeric, with its wealth of health benefits, adds a warm, earthy flavour and bright, cheery yellow. It pairs perfectly with nigella seeds, which lend distinct herbaceous notes, toasted onion flavour and a speckled effect to the crackers. Also known as kalonji and charnushka, nigella seeds are a spice often incorrectly referred to as black caraway, black cumin and black onion seeds.

If this turmeric and nigella combo doesn't suit your taste, switch it up. The possibilities are only limited by your imagination. But if you need more inspiration, I'll share a few others in future posts.

bright yellow turmeric nigella seeds sourdough discard cracker sticks arranged in a glass container against black backdrop | i sugar coat it

Shape Things Up

Your standard square or rectangle shapes are a great place to start, or you can mix things up with whatever cookie cutter shapes you have on hand. I love to cut them into long strips and package them in tubes for gifting. I once forgot to poke holes in the dough and the strips puffed up while baking to resemble straws. Now I do it on purpose from time to time.

If you just can't be botherd with shaping and cutting, roll the dough out, brush with a flavoured or plain oil, sprinkle with sea salt flakes and bake as one sheet. Once baked, break into shards and snack away. They make a great addition to cheeseboards.

Here's the recipe and video, if you would like to give them a try. Look forward to hearing from you after you have tried them!

Tips For Success

This recipe is rather simple, but here a few things I do and recommend for success:

  • I mix the dough by hand, much like I do when making sourdough bread - without the technical steps.
  • chill the dough - I refrigerate for a minimum of 1 hour and sometimes overnight, if I am not in the mood to bake them that night. The flavour seems to develop more when I leave it overnight.
  • roll dough to an even thickness - I use dough thickness guides/rails. They come in a set of three sizes for cookies, galettes and pies/tarts. I like the 2mm size for these crackers.
  • use freeze-dried powders, herbs and spices to add flavour and colour.
mound of bright yellow baked crackers topped flaked salt | i sugar coat it
Print Recipe

Tumeric Nigella Seeds Sourdough Discard Crackers

Use your sourdough discard to make my colourful, flavourful, whole wheat tumeric and nigella seeds crackers for your snacking pleasure.
Prep Time10 minutes mins
Cook Time25 minutes mins
chill time1 hour hr
Course: Snack
Keyword: crackers, nigella seeds, sourdough, sourdough discard
Servings: 50 crackers
Author: i sugar coat it!

Ingredients

  • 113 grams spelt or whole wheat flour organic, stone-ground
  • 227 grams sourdough starter discard
  • 2.5 grams salt kosher
  • 57 grams unsalted butter softened at room temperature
  • 7 grams turmeric powder
  • 10 grams nigella seeds
  • oil for brushing
  • flaked salt for topping

Instructions

  • Scale all ingredients into a bowl.
    stainless steel bowl with ingredients for tumeric nigella seeds sourdough discard crackers | i sugar coat it
  • Mix by hand until the dough comes together and is smooth.
    kneading the tumeric nigella seeds sourdough discard crackers dough | i sugar coat it
  • Divide the dough in half, wrap in plastic and chill for at least 1 hour. I usually leave it overnight.
    tumeric nigella seeds sourdough discard crackers dough shaped before chilling | i sugar coat it
  • Heat the oven to 350ºF.
  • Remove chilled dough from fridge. Lightly flour your silicone mat or parchment sheet and rolling pin and roll out the dough to a uniformed thickness of about 2mm.
    bright yellow tumeric cracker dough being rolled out on baking sheet | i sugar coat it
  • Place the sheet with the dough onto a baking sheet pan, brush dough with oil and use a fork to pierce holes randomly throughout the dough.
    unbaked crackers cut into squares on a mat with rolling pin and cutter | i sugar coat it
  • Cut desired shapes with a pastry wheel or cookie cutters and space out on the same sheet. Sprinkle with salt.
    bright yellow cracker dough cut into strips before baking | i sugar coat it
  • Bake for 25 minutes, rotating the baking sheet at the halfway point.
  • When ready, remove from the oven and place on a wire rack to cool.
    bright yellow cracker dough cut into strips before baking | i sugar coat it
  • Enjoy or store in an airtight container at room temperature. They also freeze well.
gold spoon with a scoop of polenta, with bowl in background | i sugar coat it

October 2020 By i sugar coat it! Leave a Comment

How To Cook Polenta Sous Vide

How to cook smooth, creamy, fool-proof polenta sous vide, without the stress or constant stirring.

top view of black bowl with polenta topped with cheese and parsley | i sugar coat it

Although celebrations may look a little different this year, Thanksgiving meals are being planned and executed to grace tables big and small for gatherings, real and virtual.

If you want to skip the usual mound of white mash - don't get me wrong, I love a good mash any day - for something with a little more colour, pop in polenta (pun intended). Let me show you How To Cook Polenta Sous Vide!

vacuum bag with polenta cook sous vide | i sugar coat it

Why Sous Vide?

In the Caribbean, polenta is referred to simply as corn, which can be confusing. It is also cooked to a slightly thicker consistency, so that it holds its shape, but still smooth and creamy in texture. My grandmother still serves a generous scoop, alongside okra and steamed or fried fish.

Traditionally, this dish requires one to stand over a pot, stirring constantly. The Dude is normally in charge of this dish, when we cook it the traditional way. Me... I am always looking for less labour-intensive ways to prepare meals and opportunities to continually experiment with sous vide. And I have certainly done a good deal of experimenting in the last seven years of sous vide-ing.

So, why sous vide polenta? No constant stirring! No pot to scrub! Most importantly, consistent results! So, why not?

gold spoon with a scoop of polenta, with bowl in background | i sugar coat it

Sous Vide Polenta Success

The first time I experimented with the idea of sous vide polenta, it did not yield the smooth, creamy texture I've come to expect when we make it stove-top. I immediately knew what I'd done wrong and in hindsight, knew while I was making it, but ignored the voice in my head. That voice was my grandma's voice reminding me to always add the cornmeal to cold liquid to avoid lumps; I have followed that piece of advice throughout my adult life, each time I make a pot of corn porridge, a childhood fave.

So, I bagged some cold broth/water + cornmeal + butter + seasoning, gave it a two-hour bath, stirred in some freshly grated cheese and served it all rich and creamy, straight from the bag. BOOM!

Serve or Save

Another upside to preparing polenta sous vide is that you don't have to serve it immediately, as you would when cooked traditionally. If all the other components of your meal aren't ready, or a guest is running late, the polenta can sit in the water bath, until you decide it's time to serve.

Simply reduce the water bath temperature to between 60-65º C and your polenta will remain smooth, creamy and the perfect temperature for serving. I've also reheated leftover polenta at this temperature, with good results. But let's be honest, leftover polenta is so much better baked or fried. Oh, how that reminds me of my grandpa.

top view of black bowl with polenta topped with cheese and parsley | i sugar coat it
Print Recipe
4.75 from 4 votes

How To Make Polenta Sous Vide

How to cook smooth, creamy, fool-proof polenta sous vide, without the stress or constant stirring.
Prep Time5 minutes mins
Cook Time2 hours hrs
Course: Side Dish
Cuisine: Italian
Keyword: polenta, savoury, sous vide
Servings: 4 servings
Author: i sugar coat it!

Equipment

  • Sous Vide Immersion Cooker
  • Resealable Sous Vide Bag
  • Water Bath Container

Ingredients

  • 170 grams cornmeal coarse
  • 946 grams 50/50 broth and water
  • 57 grams butter unsalted
  • sea salt to taste
  • 90 grams grana padano, or a cheese of your preference optional
  • parsley or other fresh herb and cheese to garnish

Instructions

  • Prepare the water bath by filling a heat-safe container or heavy-duty pot with water. Attach the immersion cooker and heat water to 85ºC/185ºF.
  • Add the cornmeal to the bag.
    prep shot showing corn being added to vacuum bag for sous vide polenta | i sugar coat it
  • Add the cold liquids.
    prep shot showing liquids being added to vacuum bag for sous vide polenta | i sugar coat it
  • Add the butter and salt.
    prep shot showing butter being added to vacuum bag for sous vide polenta | i sugar coat it
  • Stir to combine. Remove air and seal before submerging in prepared water bath. Cook for 2 hours.
    vacuum bag with polenta before cooking sous vide | i sugar coat it
  • Remove bag from water and spoon or pour into warm bowls. Serve while still warm.
top view of creme caramel in a puddle of caramel topped with lace tuile accent | i sugar coat it

October 2020 By i sugar coat it! Leave a Comment

Sous Vide Crème Caramel

A basic custard, topped with a thin layer of caramel, this Crème Caramel is cooked to rich, silky perfection using sous vide.

top view of creme caramel in a puddle of caramel topped with lace tuile accent | i sugar coat it

Soooo, it's been a few months since I last pressed the publish button here. And what a wild few months it has been - a pandemic that has halted life as we knew it, a much needed global uprising against racial injustice and systemic racism, and the pre and post-election debacle of our neighbours to the south.

No shortage of drama. It's all so exhausting and mainly why I haven't been around these parts. Although it's been a while since the publish button has yielded to my index finger, I haven't stopped creating, it is what has helped keep me sane-ish.

  • bird's eye view of cooked creme caramel  still in jar | i sugar coat it
  • creme caramel while still in jar | i sugar coat it
  • jar inverted on a plate to unmold the creme caramel | i sugar coat it

a custard by many names

The first time I made crème caramel was back in Baking Arts. They were simple enough and we got to play around with sugar accents. However, the real star of that class was the Chocolate Orange Coffee Baravian Cream. But, I digress...

Crème caramel, or flan (which has different meanings depending on region), is a variation of one of many custard desserts. The French call it crème caramel. In the Catalan region of Spain, it goes by crema catalana. Pudim in Brazil and Portugal. The list goes on, but you get the picture. Then there is Flan Parisien, which I'll leave for another post.

traditional crème caramel

Traditionally, a caramel is cooked and poured to coat the mold, usually a ramekin or other heat-proof dish - I've even seen pop and beer cans used in the Caribbean. The caramel is topped with a simple egg custard, cooked stove-top using a double-boiler and then baked in a water bath (bain marie) in the oven. The water bath provides a layer of insulation for the custard to cook slowly and evenly. When ready, the custard is removed from the oven, cooled at room temperature and then chilled. To serve, the custard is loosened and the mold is inverted onto a plate to enjoy.

Temperature is key to a successful custard. As a general rule, the custard should not exceed 82ºC. This makes custard-based desserts perfect candidates for cooking sous vide.

sous vide creme caramel plated with a green lace leaf accent | i sugar coat it

sous vide crème caramel

Unlike starch-thickened or gelatin-set custards, custards thickened by eggs are the most delicate of the bunch.

Cooking crème caramel custard sous vide, has a number of benefits. In addition to less steps, it gives you more control over temperature, more hands-off time and is essentially foolproof (translation - no overcooked eggs).

Instead of cooking stovetop, I simply blend the custard ingredients and add them to my caramel lined jars. The jars are then carefully capped and placed in the preheated water bath that cooks the custard at a consistent temperature. Once ready, the same steps as above apply - cooling at room temperature, chilling and serving.

taking a bite out of the creme caramel | i sugar coat it

memories of flan

My memory of flan as a child, was the one my grandma made, rich and sweet with coconut cream, condensed and evaporated milk. How is it made in your culture?

top view of creme caramel in a puddle of caramel topped with lace tuile accent | i sugar coat it
Print Recipe
5 from 1 vote

Sous Vide Crème Caramel

A basic custard, topped with a thin layer of caramel, this Crème Caramel is cooked to rich, silky perfection using sous vide.
Prep Time15 minutes mins
Cook Time1 hour hr
Course: Dessert
Cuisine: Mexican
Keyword: creme caramel, desserts, flan, sous vide
Servings: 6 servings
Author: i sugar coat it!

Ingredients

for the caramel:

  • 192 grams granulated sugar

for the custard:

  • 76.5 grams condensed milk
  • 426.5 grams whole milk
  • 144 grams granulated sugar
  • 3 eggs
  • 1 egg yolk
  • ½ vanilla bean scraped

Instructions

Mise en place:

  • Scale your ingredients.
  • Prepare your jars by ensuring they are clean and lids are defect-free.
  • Set up your water bath, add the empty, covered jars to the bath and heat along with the water to 82ºC.

Make a caramel:

  • Add sugar to a clean saucepan and cook until you achieve a deep amber colour.
  • Remove jars from water bath and place on a towel. Remove lids and carefully pour in enough caramel to coat the bottom of each jar. Swirl the jar to coat the sides. Allow to set.

Make the custard:

  • Mix together, all the custard ingredients with an immersion blender, whisk or hand mixer. Pour evenly into each caramel-coated jar.
  • Cook the custard:
  • Attach lids, finger-tip tight and add to heated water bath. Cook for 1 hour.
  • Remove from water bath, and place on a towel-lined counter to cool at room temperature. Then transfer to the refrigerator to set for at least four hours, preferably overnight.
  • Plate and serve:
  • When ready to serve, remove from the refrigerator and allow to warm at room temperature for about 15 minutes.
  • Slide a thin palette knife around the sides of the custard to loosen from the jar. Invert the jar onto a plate to remove the flan from the jar. If it doesn’t slide out of the jar, apply a little heat to the bottom and sides of the jar, using a kitchen torch or heat gun on low setting.
  • Optional: finish off with a tuile or other topping of your choice, or simply enjoy, as -is.
sous vide rice being poured from a vacuum bag into a black bowl | i sugar coat it

May 2020 By i sugar coat it! Leave a Comment

How To Cook Rice Sous Vide

A fuss-free, foolproof way to cook light, fluffy, delicious rice sous vide, using water, coconut water, coconut milk or stock.

black bowl on a stone counter filled with rice cooked in coconut water, sous vide | i sugar coat it

The Rice Conundrum

I often hear people complain about how difficult it is to cook rice. Too mushy. Undercooked. Soupy. Clumpy. Slimy. A slew of adjectives that should never be used to describe food.

Once I started living on my own and cooking, I tried cooking rice, in what is said to be the standard way, 2:1 water to rice. That's never worked for me. Then one year when my grandma visited, I was in the kitchen and watched as she effortlessly cooked a perfect pot of rice. This brought back some good rice memories.

collage of how to make rice sous vide | I Sugar Coat It

Grandma's Perfect Pot of Rice

My grandmother has cooked countless perfect pots of rice in this manner:

  • soak and wash rice
  • add to a pot with equal amount of liquid - one, or a combination of coconut milk, coconut water, chicken broth/stock, or water (usually with bouillon cube)
  • bring both to a boil
  • turn heat down, cover and simmer
  • test for doneness, adding more water, as needed
  • cool, fluff, serve

Grandma has her own life, so I can't depend on her to cook me rice on a whim. Plus, there is the issue of her being a couple plane flights away. Luckily, I snagged myself a man who cooks a real decent pot of rice. 🙂

coconut milk rice, cooked sous vide and served in a coconut shell | i sugar coat It

Grandma's Rice, The Remix

I have been cooking sous vide for a little over seven years and have had a whole lot of hits and some misses. By applying that 1:1 ratio my grandma has used successfully all her life, sous vide rice is a definite hit! Here's why:

  • because the contents are vacuumed sealed, there is no liquid lost through steam, as one would when cooking stove-top. So, there is never a need to top up the liquids.
  • flavour and nutrition are maintained, as they are sealed in the bag.
  • it's hands-off cooking for 25 minutes and perfect every batch.
  • for a more flavourful rice, skip the plain water and sub in broth, coconut water, coconut milk, or a combination. Note that cooking your rice in coconut milk alone will produce less free-flowing grains (see batch above in coconut shell).
  • with an adjustment to cook time (and some cases, temperature), the same technique can be applied for other types of rice and grains. More to come...
sous vide rice being poured from a vacuum bag into a black bowl | i sugar coat it

Sealing In The Flavour, Mess-Free

This method produces perfectly cooked rice without fail. I have been cooking rice this way for a few years, so this is tried and true. My only regret, not sharing it with you sooner.

Before I received my Chamber Vacuum Sealer, I used resealable freezer bags to cook my rice sous vide, because my regular sealer would suck out the water, while sealing. The chamber vacuum sealer allows me to vacuum seal liquids easily and without a mess.

It also has a marinate function, to which I have become slightly addicted - us island girls are taught to always marinate meat for maximum flavour. If you are serious about sous vide, a chamber vacuum sealer should be high on your wish list.

rice and liquids being vacuum sealed

If you give this a try, be sure to tag me @sousvidesista, #sousvidesista, @isugarcoatit

close-up of rice grains cooked sous vide | i sugar coat it
Print Recipe
5 from 1 vote

How To Cook Rice Sous Vide

A fuss-free, foolproof way to cook light, fluffy, delicious rice sous vide, using water, coconut water, coconut milk or stock.
Prep Time10 minutes mins
Cook Time25 minutes mins
Course: Side Dish
Cuisine: Caribbean
Keyword: how-to, rice, sous vide
Servings: 2 servings
Author: i sugar coat it!

Equipment

  • polycarbonate container
  • Sous Vide Immersion Cooker
  • chamber vacuum sealer (optional)
  • vacuum bag or resealable freezer bag

Ingredients

  • rice
  • coconut water or broth, water, coconut and water blend

Instructions

  • prepare the water bath by filling the container, attaching your immersion cooker and setting the temperature to 93ºC. cover and allow to heat.
  • rinse rice to remove impurities and excess starch. add rice and chosen liquids to bag.
    pre-cooked rice in vacuum bag | i sugar coat it
  • vacuum seal the bag. if you do not own a chamber vacuum sealer, place in a resealable freezer bag and remove as much air as possible by sliding the bag down the edge of a counter before sealing.
    rice and liquids being vacuum sealed
  • when the water reaches temperature, submerge the vacuum sealed bag and cook for 25 minutes. if using a resealable freeze bag, open one end of the just zip seal just a crack and add the bag to the heated water. the water pressure will push out any extra air, as you submerge the contents. seal and allow to cook.
    vacuum sealed bag of rice being placed in a sous vide water bath | i sugar coat it
  • when finished, remove bag (use tongs, as the water will be hot) and let sit for about 10 minutes. open bag, fluff and serve!
    sous vide rice, post cook, in an opened vacuum bag | i sugar coat it
sous vide chocolate coffee pots de creme with chocolate coffee beans and crunch pearls on a black background. | i sugar coat it

April 2020 By i sugar coat it! Leave a Comment

Sous Vide Chocolate Coffee Pots De Creme with Vesta Precision Imersa Elite

Silky, decadent Sous Vide Chocolate Coffee Pots De Creme infused with tonka bean and topped with salted caramel crisp pearls and chocolate coffee beans.

Jars of sous vide chocolate coffee pots de creme, with chocolate coffee beans and crisp pearls on a black background. | i sugar coat it

Disclosure: This post for Chocolate Coffee Pots de Creme was made in partnership with Vesta Precision, using their Imersa Elite Sous Vide Immersion Circulator. All opinions and content are my own.

I am not much of a coffee drinker, but I love coffee-infused/flavoured desserts, particularly when rich, creamy and paired with chocolate. My newest batch of Sous Vide Chocolate Coffee Pots de Creme checks all those boxes.

To get that silky, smooth texture without the constant watching, stirring and possibly curdling the eggs, I like to make these babies sous vide style. And today we're using Vesta Precision Imersa Elite to help us do the job!

Jars of chocolate coffee pots de creme  being placed in  a sous vide water bath to cook | I Sugar Coat It

Vesta Precision Imersa Elite Immersion Circulator

What's more important to you - form or function? For me, it really depends. If we are talking purely decorative, then form. Anything else, I aim for a balance of the two. When that balance isn't achievable, I always opt for function.

What I love about the Imersa Elite is its simple balance of both. While most sous vide brands have stuck to a tube-shaped design, here comes their flat, square, flip me over and watch me work from across the room design. The clean, stylish design is what drew me to the brand. So, when I was offered the opportunity to work with them, I did not hesitate.

While I was first drawn to their brand solely by its form, having now used the Imersa Elite to prepare a number of meals over the last few weeks, it definitely delivers in the function department.

Jar of chocolate coffee pots de creme, topped with whipped cream and crisp pearls, nestled on a bed of chocolate and coffee, featuring Vesta Precision Imersa Elite sous vide cooker | I Sugar Coat It

We own three other circulator brands and have been cooking sous vide for around seven years. Although I don't fashion myself a sous vide expert, I can speak from my personal experience using all four.

I have really enjoyed using the Imersa Elite. In terms of performance:

  • operating sound level is comparable to at least three out of my other four circulators. It's definitely audible, but without being annoying. Because I am currently working from home full-time, I have not yet enabled its Wi-Fi capabilities. Instead, I use the manual settings and the heated and ready alarms are loud enough that we can hear them throughout most of our home. Once quarantine ends I'll be relying on the wi-fi function while away from home.
  • temperature accuracy is also pretty much on par with some of the other circulators we own and in general - within 0.2ºF at both low and high variation.
  • storage-wise, it fits nicely in my kitchen drawer, but is rarely ever there, as we cook sous vide almost daily.
  • controls and display are top notch. The large, clutter-free LED display is legible from a distance. The ease of use and overall design, I think takes into account those with accessibility issues.
  • it works well with my cast iron pots, as well as my polycarbonate water bath. What I would really like to see is a cover that fits with the design. In the meantime, I have fashioned one out of a flexible cutting board for longer cooks.

There are a number of technical considerations, when purchasing an immersion circulator - wattage, GPM (flow rate), water capacity, maximum temperature, warranty, etc. - I won't address those here. That information is available in the product specs at Vesta Precision.

Spoonful of chocolate coffee pots de creme, topped with whipped cream and crisp pearls being scooped from a jar | I Sugar Coat It

Chocolate Coffee Pots de Creme

So, with the water bath all heated with our sleek and trusty Imersa Elite, let's bathe up a batch of rich, silky smooth pots de creme. This batch is flavoured with coffee, a great complement to the 70% dark chocolate I used in this recipe. If coffee isn't your flavour, you can just as easily omit infusing the cream with the coffee beans, or check out these other flavour variations.

Tips For Using Glass Jars

I shared some tips for working with glass jars when cooking sous vide, in this post. Basically, you want to prevent your jars from cracks or breaks and water from leaking into the jars. Here are a couple tips:

  • to prevent cracks and breakage from thermal shock, heat the jars and lids as you are heating the water bath. Once the bath reaches temperature, remove them and place them on a towel, so that they don't come into contact with a cool counter, fill, cover and return to the bath to cook.
  • to prevent cracks and breakage from pressure build-up, close your jars only 'finger tip' tight - meaning you should be able to unscrew the lid easily, using only your finger tips. This helps prevent any trapped air in the jar to release, without allowing any water in. Also, ensure your lids are in pristine condition - dent and rust-free.

A number of you have expressed your discomfort and even nightmares cooking sous vide with jars. The custard can be cooked in a sous vide suitable resealable bag, then transferred to a dish for chilling and serving.

If you are serious about sous vide, then a chamber vacuum sealer may be just the thing to add to your culinary arsenal. I'll be sharing with you how I use Vesta Precision Vertical Vac Elite in an upcoming post.

sous vide chocolate coffee pots de creme with chocolate coffee beans and crunch pearls on a black background. | i sugar coat it
Print Recipe
5 from 1 vote

Sous Vide Chocolate Coffee Pots De Creme

Silky, decadent Sous Vide Chocolate Coffee Pots De Creme infused with tonka bean and topped with salted caramel crisp pearls and chocolate coffee beans.
Prep Time45 minutes mins
Cook Time1 hour hr
Chill Time3 hours hrs
Course: Dessert
Cuisine: French
Keyword: chocolate, pots de creme, sous vide
Author: i sugar coat it!

Ingredients

For the custard:

  • 353 grams whipping cream, 35% or coconut cream
  • 40 grams coffee beans, roughly cracked optional
  • 113 grams dark chocolate I used 70% Ecuador + Peru blend
  • 36 grams sugar I used panela
  • 6 grams pure vanilla extract optional, if using coffee beans
  • pinch kosher salt
  • 4 egg yolks

For garnishing:

  • whipped cream
  • salted caramel crisp pearls

Instructions

Make the custard:

  • Fill a deep and sturdy enough pot, or suitable sous vide container, with water and set your circulator to 80ºC/176ºF. Allow the jars to warm along with the water (see tip in post above). While the water heats, scale all your ingredients.
  • Place the chocolate in a tall, heat-proof container, like a measuring cup and set aside. Heat the cream to a simmer, remove from the heat, add the coffee beans, cover and allow to infuse for about 15 minutes. Alternatively, you may infuse the cream with the beans in the refrigerator overnight, then heat as above. Strain out the beans and while still warm, pour over the chocolate and stir to melt (the cream may require a slight reheating before adding to chocolate to ensure the chocolate melts.
  • Add the sugar, vanilla, salt and combine well. Add the yolks and use an immersion blender, or other blender to combine well. A whisk will work, if you don't have a blender.
  • The water bath should be at temperature, so remove the jars and place on a towel (see tip in post above) - the water will be hot, so use tongs to prevent burning your hands. Remove the lids and pour in the contents slow and low to prevent air bubbles. Fill to just below the neck/threads. Remove any air bubbles with a torch, or tap the jars firmly on the towel. Seal with the lids, finger tip tight, and carefully place in the water bath to cook for 1 hour.
  • When ready, remove jars from water bath with tongs and place on a towel, so they don't crack or shatter if your counter is too cool. Allow to cool at room temperature, then chill in the refrigerator for a few hours.
  • Add a dollop of freshly whipped cream and a sprinkle of crisp pearls for texture contract. Enjoy!
one side of dark chocolate egg before assembly | i sugar coat it

April 2020 By i sugar coat it! Leave a Comment

How to Make Hollow Chocolate Eggs + Video

How to make hollow chocolate eggs using two silicone mold designs, filled with messages of hope, sealed and decorated for a beautiful 3-D finish.

large dark chocolate hollow eggs standing on a base | i sugar coat it

With Easter just around the corner, I thought it was high time I shared some of my egglicious treats from my IG feed. I've also included a video below showing how to make hollow chocolate eggs.

I made these eggs last year for a colleague headed on sick leave. The team all wrote personal notes and I included them in the egg. Can you think of a better pick-me-up than an oversized, dark chocolate egg filled with hope?

Large chocolate egg molds | i sugar coat it

I found these really cool molds and bought them without fully knowing what I was getting into. They aren't like my other polycarbonate molds. Happy to report I was quite pleased with the ease of use and the results - well, for one of the designs, at least.

The 3-D egg set consists of two pieces - an injected hard plastic outer case that houses a removable silicone mold. I chose the Lillois and Propolis designs. They come in at 210 x 110mm (8 x 4 inches).

one side of dark chocolate egg before assembly | i sugar coat it

I love both designs, but Lillois (above) yielded better results. Propolis (below) was riddled with air pockets no matter how many taps, slaps and swirls I employed. So, I went with the Lillois in the end.

I love how easily they both released from the silicone. The hard plastic case provided the stability and structure that is missing from a silicone mold on its own.

one side of dark chocolate egg before assembly | i sugar coat it

They are fairly simple to use:

  • wipe with a lint-free cloth
  • temper and pour your chocolate into the silicone mold, tap and swirl to cover the surface
  • invert and tap out excess chocolate
  • allow to set for a few minutes, then refrigerate for about 10 minutes
  • loosen the edges of the silicone from the chocolate
  • place the mold face-down on a clean, flat surface and remove the plastic shell
  • carefully peel the silicone from the chocolate
  • repeat for the other half of the egg
  • with both side prepared, place a cookie sheet pan over a pot of simmering water
  • when pan is warmed, place both sides of the chocolate eggs, open side down on the sheet pan
  • slide around a bit to heat the edges, then lift and add the filling (in my case, I added notes, you can add mini eggs etc.) press the sides gently, but firmly together to seal
  • you can leave the chocolate natural, or airbrush/paint/decorate

Check out my video below to see the steps above in action.

March 2020 By i sugar coat it! Leave a Comment

Cajeta Bubbles Chocolate Bar

A thin layer of silky homemade cajeta, wrapped in Ecuador + Peru blend dark chocolate.

unmolded dark chocolate bar with splashed of copper cocoa butter, sitting on mold | i sugar coat it

Reflections

It's hard to believe this is only my second post, but 2020 has been all kinds of surreal. I felt a little silly drafting this post, but I desperately needed a break from the 24-hour, doomsday news cycle. I am sure you do too.

Our whole office has moved to working from home full-time to do our part to help slow/stop the spread of COVID-19. We normally have the flexibility to work remotely, as needed, but being away all week has taken some adjustment. I am an introvert by nature; however, choosing to avoid people and being forced to, are very different beasts.

Let's just say that I'll never again take for granted in-person, social interactions - preferably, in small doses :).

cajeta filling piped into dark chocolate bars | i sugar coat it

A Sweet Interlude

Let's, for a few minutes, shed the weight of the world from our shoulders and mind and venture into a dark, sticky, bitter-sweet wonderland I like to call Cajeta Bubbles. I'll keep this post short, but you can remain in wonderland for as long as you need.

The moment I saw the new line of bar molds from Pavoni, I knew I not only wanted them, but that I would be filling them, instead of making solid bars. Both solid choices, IMHO.

dark chocolate bar broken to reveal the cajeta filling | i sugar coat it

Wrap It Up

My Cajeta Bubbles Chocolate Bar is shelled with deliciously complex 70% Ecuador + Peru blend. Stuffed inside is a goat's milk version of dulce de leche - but forgive me, I let it cool a little too much before I piped it, hence the thicker texture. Although, once I used a spatula to spread it out, it was a lot easier to cap the bars than it would have been, had I piped it in a more fluid state. You can see the difference in this batch.

The bars aren't very deep, which can make them tricky to fill and cap. This design was a little more forgiving than some of the others, as the bubble shapes acted as little pockets for the cajeta to settle.

Take the #stayhomechallenge and make a few Cajeta Bubbles Chocolate Bars to sweeten up your isolation/quarantine. I've included a video below, if you need a little visual assistance.

Please stay safe and know that this too shall pass.

dark chocolate bar broken to reveal the cajeta filling | i sugar coat it
Print Recipe

Cajeta Bubbles Chocolate Bar

A thin layer of silky homemade cajeta, wrapped in Ecuador + Peru blend dark chocolate.
Prep Time30 minutes mins
Cook Time25 minutes mins
Course: Dessert
Keyword: cajeta, caramelized white chocolate, chocolate, chocolate bar, confections
Servings: 3 bars
Author: i sugar coat it!

Ingredients

For chocolate shells:

  • 300 grams dark chocolate I used 70% Republica del Cacao Ecuador + Peru Blend
  • cocoa butter caramel satin

For the cajeta:

  • 500 grams goat's milk
  • 250 grams sugar
  • 5 grams baking soda
  • pinch kosher salt
  • 1 vanilla bean scraped

Instructions

Cast your molds:

  • Clean and buff your molds - see here.
  • Temper your cocoa butter and splash randomly across the prepared mold. Wipe your mold along a towel to remove any excess cocoa butter from the surface edges.
  • Temper your chocolate and cast your molds, tapping to release any air bubbles. Invert the mold and use your scraper to tap out excess chocolate. Use the scraper to scrape away excess chocolate. Allow to set slightly, then transfer to refrigerator for 10-15 minutes. Remove from fridge and set aside until ready to fill.

Make the caramel:

  • In a deep, heavy-duty pot combine the milk, sugar, baking soda, salt and vanilla pod. Cook over medium heat, stirring occasionally, until sugar melts and the mixture is foamy in appearance. Keep a close eye on it, as it can foam up and overflow rather quickly.
  • Continue to cook, stirring constantly, until it changes to a golden brown and is thick enough to coat the back of a spoon. Be patient, it takes a while for the mixture to reduce and thicken.
  • Remove from heat, remove the vanilla pod and stir in the vanilla beans. Allow to cool then transfer to a piping bag. Pipe a thin layer into the molded bars and allow to set - leave enough space to cap the bars.
  • Use some of the remaining tempered chocolate to close the bars - pipe or pour a bit of chocolate over the bars and use a scraper to smooth and scrape away excess. Enjoy!
heart-shaped bonbon painted in shiny red with green polka dots | i sugar coat it

February 2020 By i sugar coat it! Leave a Comment

Yuzu Berry Chocolate Hearts

Yuzu Berry Chocolate Hearts with layers of silky strawberry ganache and yuzu caramel in a dark chocolate shell.

A platter of shiny red and green heart-shaped chocolate bonbons | i sugar coat it

Inspiration

As I was making these Yuzu Berry Chocolate Hearts, the Strawberry Shortcake cartoon theme song popped into my head, and remained there on repeat! I've never liked dolls and I don't remember that show being a part of my childhood. Yet, as I painstakingly decorated, sprayed and peeled away polka dots and flowers from each mold cavity, I found myself belting out

STRAW-BUH-BUH-BUH-BUH-BERRY

STRAW-BUH-BUH-BUH-BUH-BERRY

STRAW-BUH-BUH-BUH-BUH-BERRY SHORTCAKE

heart-shaped chocolate molds painted in red and green cocoa butter | i sugar coat it

Let's Get Crafty

Moving on from cartoons to crafting...

I made and shared these Yuzu Berry Chocolate Hearts on my Instagram feed back in 2018. I was using craft tape at the time. While the flower motif was easy to remove (because I left an overhang at the edge of the cavity), the circles in the middle of the cavity were a little trickier, and involved tiny tweezers. I later thought to use a light flexible acetate, which worked better. Or, you can skip both and paint to stamp the polka dot design.

Disclosure: The following list contains affiliate links. Should you choose to click and purchase items via these links, I Sugar Coat It may earn a commission, at no additional cost to you. Thank you for your support!

Grab your craft tape (or acetate), hole punches, cocoa butter, your airbrush and let's do this:

  • Prepare your chocolate and set aside, hold at working temperature.
  • Temper your cocoa butter colours (purchased or homemade) and hold at working temperature.
  • Clean and buff your molds like I showed you here. Be sure to glove up, so you don't leave fingerprints on the molds.
  • Grab your tape or acetate and craft punches and decorate away - for the flowers I used this hydrangea punch and these punches for the large and small circles.
  • Place the shapes in random patterns onto your molds - they will be easier to remove, if you allow an overhang at the edge of the cavity.
unfilled heart-shaped chocolate shells decorated in red and green | is sugar coat it
  • Once the shapes have all been attached, add your first colour (in my case, red), using an airbrush. Allow to set a few minutes and remove the shapes.
  • Apply the second colour (green), with an airbrush and allow to set
  • Cast the molds with the chocolate from above, tap out and scrape excess. Allow to set.
  • Pipe a layer of yuzu caramel and allow to set. Top with the strawberry ganache and allow to crystallize.
  • Seal molds with remaining chocolate, place in the refrigerator for a few minutes, remove and rest at room temperature for a few seconds before unmolding.
close up of cut bonbons showing layers of strawberry ganache and yuzu caramel | i sugar coat it

Not my best cut, and I would switch up the caramel to ganache ratio a touch, but yummy all around! All that's left to do is gift or enjoy, or both! Here's a little video for the visual learners.

heart-shaped bonbon painted in shiny red with green polka dots | i sugar coat it
Print Recipe
4 from 3 votes

Yuzu Berry Chocolate Hearts

Yuzu Berry Chocolate Hearts with layers of silky strawberry ganache and yuzu caramel in a dark chocolate shell.
Prep Time1 hour hr
Cook Time20 minutes mins
Total Time1 hour hr 20 minutes mins
Course: Dessert
Cuisine: Chocolate
Keyword: bonbons, caramel, yuzu
Author: i sugar coat it!

Ingredients

For the shells:

  • coloured cocoa butter
  • dark chocolate

For the fillings:

  • Yuzu Caramel
  • Strawberry Ganache
  • Page 1
  • Page 2
  • Page 3
  • Interim pages omitted …
  • Page 51
  • Go to Next Page »

Primary Sidebar

Never Miss A Happy Ending...

Previous Sweetness...

Search

Filter by Category

Filter by Date

SWEETEN YOUR INBOX!

All Content Including Images Copyright Jacqueline | I Sugar Coat It© 2026